Computer power supply for TT 12 volt
I have received a couple of question on the computer power supply I use for my 12 volt power supply in my TT. First I am a hack and make no claim that this is the correct or even an acceptable way to to this. Of course no one should do this unless you know what you are doing and have all the proper tools and knowledge....So it you burn down your house or TT or worst  Don't say I didn't say not to do this! Ok that was my disclaimer
I have seen on the web that some people have used computer power supplies to convert 120 volt to 12 volt. So I thought I would give it a try. I had some old computer laying around, but a friend of mine had one out of his computer and gave it to me. I found a site on the web that explained how to determine which power supply you had and how to wire it. I did find it was missing a minor but important step, which I will point out in the pics. The power supplies are solid state so the should hold up in the TT with no problems plus they put out a very clean 12 volts.
Mind you I am no computer guru. I just like to make stuff and use what I have on hand.
Here is a link to the website that explains the power supplies.
http://www.marcee.org/Articles/PCPowerSupply.htm
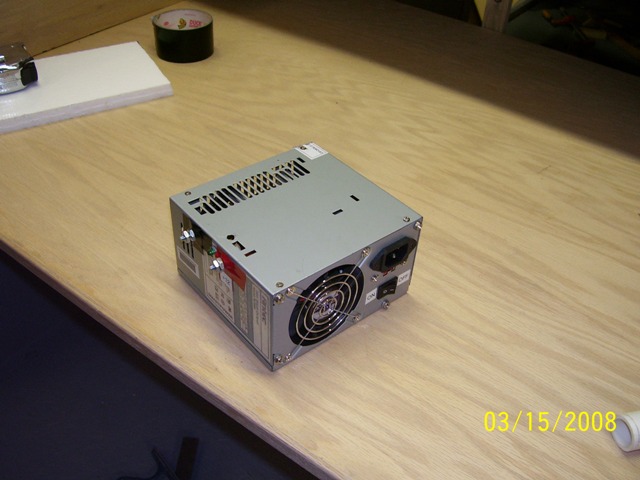
Here is my finished power supply. You can see the positive and negitive posts and a led light I put on it to show when it is on. I got the led light from an old computer. The posts are just 10/32 bolts run thru a grommet with a nut to hold it in place and another nut to use to attach the wires to it.
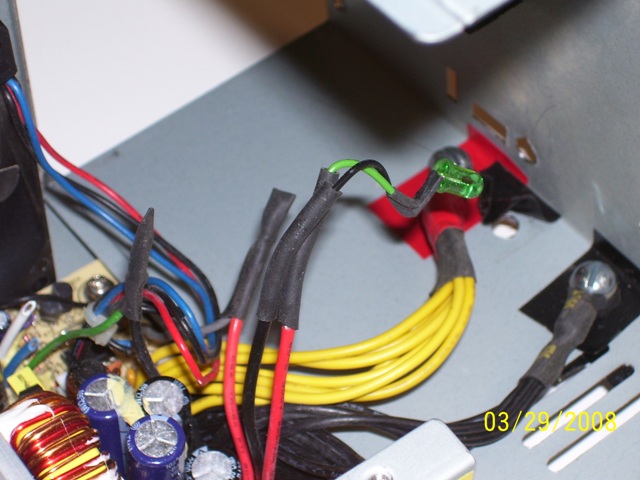
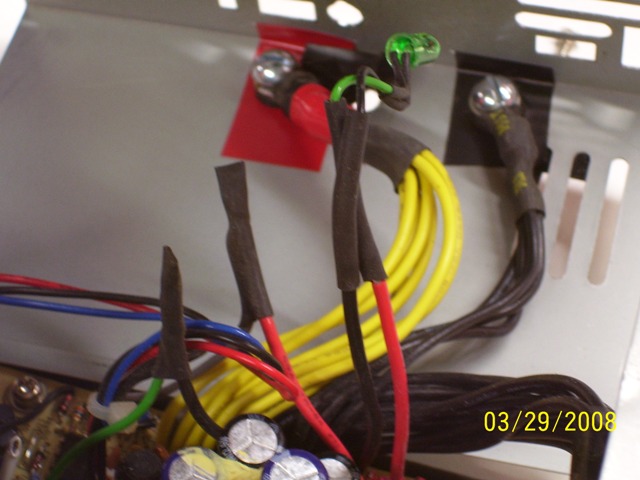
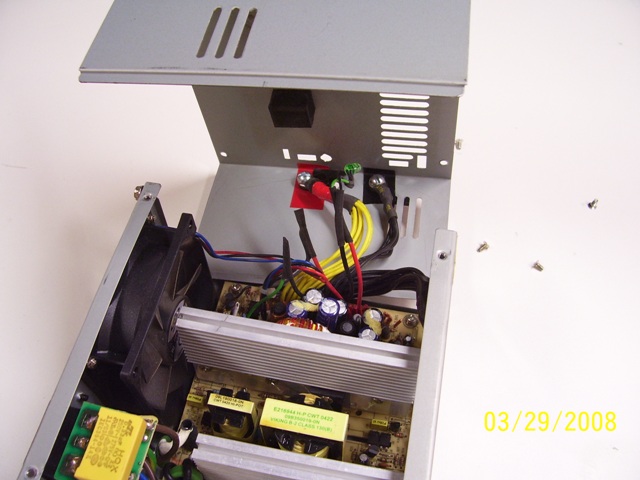
Here are a few inside shots of the power supply. I drilled holes in the case for the bolts and led light. I cut all the wires down close to the board that I would not use and cut the ones I would use a little closer. The article says you can put some hot glue over the cut ends...but I didn't because they are cut so short they can't move and touch anything else..and it is low voltage.
I didn't go back and read the article but I think it left out a couple of wire connections to make the power supply work properly. The power supply has to have some sort of signal that says to turn on and another called "power good". (Don't ask cause I don't know...like I said I am a hack ) (Oh yea I have a volt meter so I could confirm the voltage of the wires.)
I soldered the green wire (power on) to a red wire (+5 volts). I then soldered the gray wire to another +5 volt wire. I think this is the power good wire. I then took four common wires (black) and soldered then to a ring terminal. I took all the yellow wires (+12 volts) and soldered them together on another ring terminal. I took the led I had and soldered one lead to a common(black wire) and another to a red wire(+5 volts). Then I installed them on the bolts I mentioned earlier. Expect the led I just put in in a hole i drilled just large enough for it to stick thru.
Like I said refer to the website I linked to and it can guide you thru...just use good judgement and common since
(edit) I am going to put some rubber feet under the case toa allow air flow and some vibration dampening.
Don't say I didn't say not to do this! Ok that was my disclaimer
I have seen on the web that some people have used computer power supplies to convert 120 volt to 12 volt. So I thought I would give it a try. I had some old computer laying around, but a friend of mine had one out of his computer and gave it to me. I found a site on the web that explained how to determine which power supply you had and how to wire it. I did find it was missing a minor but important step, which I will point out in the pics. The power supplies are solid state so the should hold up in the TT with no problems plus they put out a very clean 12 volts.
Mind you I am no computer guru. I just like to make stuff and use what I have on hand.
Here is a link to the website that explains the power supplies.
http://www.marcee.org/Articles/PCPowerSupply.htm
Here is my finished power supply. You can see the positive and negitive posts and a led light I put on it to show when it is on. I got the led light from an old computer. The posts are just 10/32 bolts run thru a grommet with a nut to hold it in place and another nut to use to attach the wires to it.
Here are a few inside shots of the power supply. I drilled holes in the case for the bolts and led light. I cut all the wires down close to the board that I would not use and cut the ones I would use a little closer. The article says you can put some hot glue over the cut ends...but I didn't because they are cut so short they can't move and touch anything else..and it is low voltage.
I didn't go back and read the article but I think it left out a couple of wire connections to make the power supply work properly. The power supply has to have some sort of signal that says to turn on and another called "power good". (Don't ask cause I don't know...like I said I am a hack
) (Oh yea I have a volt meter so I could confirm the voltage of the wires.)
I soldered the green wire (power on) to a red wire (+5 volts). I then soldered the gray wire to another +5 volt wire. I think this is the power good wire. I then took four common wires (black) and soldered then to a ring terminal. I took all the yellow wires (+12 volts) and soldered them together on another ring terminal. I took the led I had and soldered one lead to a common(black wire) and another to a red wire(+5 volts). Then I installed them on the bolts I mentioned earlier. Expect the led I just put in in a hole i drilled just large enough for it to stick thru.
Like I said refer to the website I linked to and it can guide you thru...just use good judgement and common since
(edit) I am going to put some rubber feet under the case toa allow air flow and some vibration dampening.
 Here's to hoping it will provide enough amperage to operate everything I need it to.
 oh good catch! I'll put one in. Thanks!