PetCool... How I did it....
I know there are a flood of PetCools out there now, as I received mine this past week. I sat and looked at it and the DragonFly for a long time trying to figure a way to install it efficiently, yet not to the point that if I sell the trailer that it has to go with it.
The only thing I don't like about this installation is it limits you to one door, but the good thing is that door can be kept closed.
I have seen several others done similar to this but here's what I came up with. It is still in the rough, but might give some of you some possibilities. This took a total of about 30 minutes.
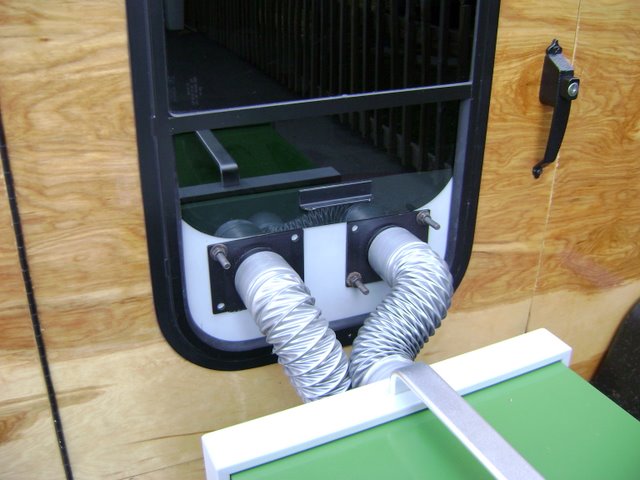
Having windows that slide up and down, I cut a piece of thin aluminum that would flex enough to fit into the same channel track as the window, and just tall enough to fit in when the window was all the way open. Then marked the highest place on the panel to mount the inlet and outlet couplers, as you can see by the pencil marks.
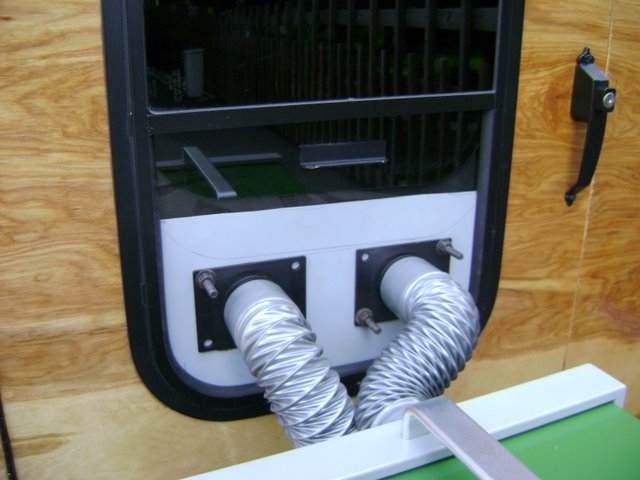
That left room so that when the window was pushed closed, it covers the aluminum to keep the rain out, and further secures the panel in place.
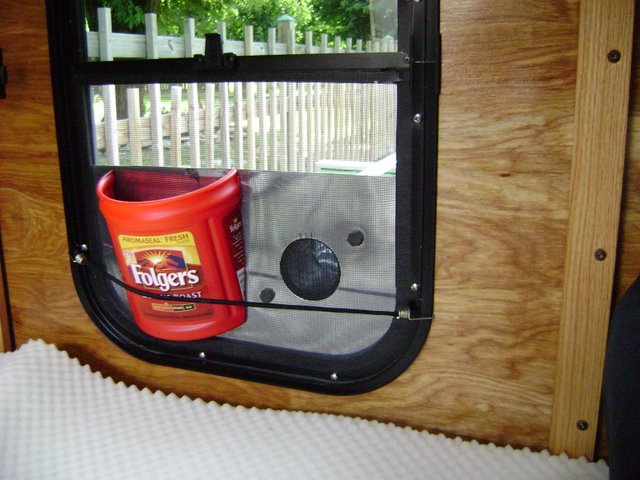
I wanted separation for my cold air and return air, and didn't want to freeze Side's tail off, so I redirected the cold air with a plastic coffee can cut in half at an angle to direct the cold air flow up. A small bungee cord seemed to do the trick temporarily.
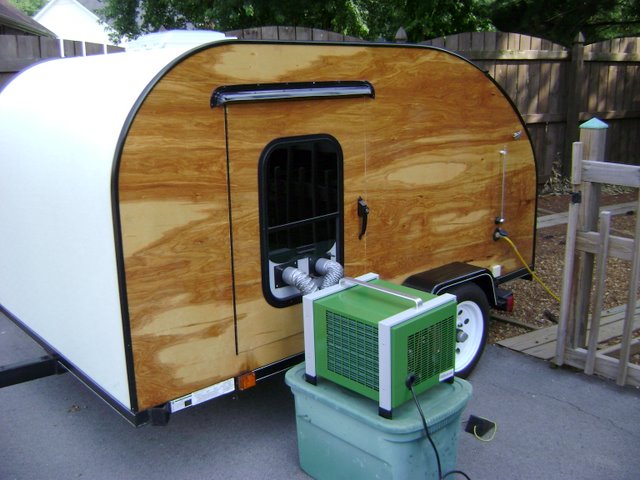
It was all quick and easy, cooled the tear down to 78 on this 92 degree day, and it's not permanent. Our favorite time to camp is spring and fall, but after hearing of the heat at the South/North Gathering that will be in August, I think we'll bring it along.
We still need a stand, and the PVC one that was shown on another thread was nice. Our storage boxes are about the right height though, and don't we always seem to carry too much stuff?
Hope this was helpful.....
Mark
The only thing I don't like about this installation is it limits you to one door, but the good thing is that door can be kept closed.
I have seen several others done similar to this but here's what I came up with. It is still in the rough, but might give some of you some possibilities. This took a total of about 30 minutes.
Having windows that slide up and down, I cut a piece of thin aluminum that would flex enough to fit into the same channel track as the window, and just tall enough to fit in when the window was all the way open. Then marked the highest place on the panel to mount the inlet and outlet couplers, as you can see by the pencil marks.
That left room so that when the window was pushed closed, it covers the aluminum to keep the rain out, and further secures the panel in place.
I wanted separation for my cold air and return air, and didn't want to freeze Side's tail off, so I redirected the cold air with a plastic coffee can cut in half at an angle to direct the cold air flow up. A small bungee cord seemed to do the trick temporarily.
It was all quick and easy, cooled the tear down to 78 on this 92 degree day, and it's not permanent. Our favorite time to camp is spring and fall, but after hearing of the heat at the South/North Gathering that will be in August, I think we'll bring it along.
We still need a stand, and the PVC one that was shown on another thread was nice. Our storage boxes are about the right height though, and don't we always seem to carry too much stuff?
Hope this was helpful.....
Mark


