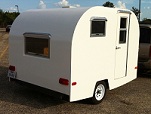
I am building a version of the Pufffin. I have almost finished my seats. I will have a table that lowers between the seats to make a bed. The distance between the seats is 30". I originally planned to use 1/2 " plywood reinforced with some 1x2 underneath, but am wondering if that will be strong enough? Should I use 3/4" plywood? MDF? Other?
I plan to cover the table in the Formica Boomerang pattern.
Wood to use for table / gaucho?
10 posts
• Page 1 of 1
Wood to use for table / gaucho?
![]() by Donutboy » Thu Aug 21, 2008 11:58 pm
by Donutboy » Thu Aug 21, 2008 11:58 pm
Jerry
Retro-Kamper
(Puffin for Four)
Retro-Kamper
(Puffin for Four)
-
Donutboy - Teardrop Master
- Posts: 163
- Images: 126
- Joined: Thu May 31, 2007 10:11 pm
- Location: Volente, Texas
Re: Wood to use for table / gaucho?
![]() by halfdome, Danny » Fri Aug 22, 2008 7:33 am
by halfdome, Danny » Fri Aug 22, 2008 7:33 am
Donutboy wrote:I am building a version of the Pufffin. I have almost finished my seats. I will have a table that lowers between the seats to make a bed. The distance between the seats is 30". I originally planned to use 1/2 " plywood reinforced with some 1x2 underneath, but am wondering if that will be strong enough? Should I use 3/4" plywood? MDF? Other?
I plan to cover the table in the Formica Boomerang pattern.
The most common way (Cabinetmakers) is to put a plam backer on the underside followed with 3/4" x 3" plywood build up all around the outside edges and some in the center. On my top I used 1/2" Baltic Birch plywood, backer and the 3/4" x3" build up followed with the finish plam on top. The backer can be scrap plam or brown or white backer. It helps balance the sheet to avoid moisture problems. If you plam the build up too it will be a cleaner looking table.
 Danny
Danny"Conditions are never just right. People who delay action until all factors are favorable do nothing". William Feather
Don't accept "It's Good Enough" build to the best of your abilities.
Teardroppers Of Oregon & Washington
-

halfdome, Danny - *Happy Camper
- Posts: 5894
- Images: 252
- Joined: Sun Aug 14, 2005 11:02 pm
- Location: Washington , Pew-al-up