Door latch question

Anything to do with mechanical, construction etc

Door latch question

Postby planovet » Mon Nov 24, 2008 4:21 pm

I got my door latches in today. I'm using the "trimark" type latch.
Image

It did not come with a template for cutting the holes and I can't seem to find one online.
It's going to take a rather large hole and I don't want to screw it up.
Anyone that has installed such a latch is welcome to give me any pointers if they can.
Thanks!
ImageMark (& Cindi)
Visit our website: Little Swiss Teardrop

I was wondering why the water balloon was getting bigger... and then it hit me.

ImageImageImageImage
User avatar
planovet
The Cat Man
 
Posts: 5583
Images: 3
Joined: Tue Nov 27, 2007 4:48 pm
Location: Plano, Texas

Postby Joe G » Mon Nov 24, 2008 5:56 pm

I found this PDF for Trimark P/N: 060-0250 and 060-0200. Looks like the right one to me, but you'd better double check.

(Click Here)

There is a template layout at the end of the last page.
User avatar
Joe G
500 Club
 
Posts: 517
Images: 25
Joined: Mon Apr 07, 2008 2:26 am
Location: Minneapolis

Postby planovet » Mon Nov 24, 2008 6:07 pm

Perfect! Just what I was looking for. I found the pdf with the dimentions but not that one. Thanks!
ImageMark (& Cindi)
Visit our website: Little Swiss Teardrop

I was wondering why the water balloon was getting bigger... and then it hit me.

ImageImageImageImage
User avatar
planovet
The Cat Man
 
Posts: 5583
Images: 3
Joined: Tue Nov 27, 2007 4:48 pm
Location: Plano, Texas
Top

Postby Miriam C. » Mon Nov 24, 2008 11:22 pm

planovet wrote:Perfect! Just what I was looking for. I found the pdf with the dimentions but not that one. Thanks!


:thumbsup: Glad you found it, and can you please share so I can book mark it. 8) :D
“Forgiveness means giving up all hope for a better past.â€
User avatar
Miriam C.
our Aunti M
 
Posts: 19675
Images: 148
Joined: Wed Feb 15, 2006 3:14 pm
Location: Southwest MO
Top

Postby planovet » Tue Nov 25, 2008 10:07 am

Aunti M,

The pdf I was talking about had the same picture that was on page 2 of the pdf that Joe referenced to.

I cut the holes last night. I used the dimentions in the pdf to make the template for the large hole but I ended up making my own template for the door edge cut-out. It was difficult and took some time but I finally got it in. I think I measured 20 times and cut 10 times. Of course, the second one didn't take so long. I put CPES on the cut edges last night and now its time to finish painting the doors!

Image
Image
Image
Image
ImageMark (& Cindi)
Visit our website: Little Swiss Teardrop

I was wondering why the water balloon was getting bigger... and then it hit me.

ImageImageImageImage
User avatar
planovet
The Cat Man
 
Posts: 5583
Images: 3
Joined: Tue Nov 27, 2007 4:48 pm
Location: Plano, Texas
Top

Postby Loader » Tue Nov 25, 2008 10:41 am

Hey Mark, What's the thickness of your door?
Earl & Kerry

"Loader"

Blue Yonder Build Thread - viewtopic.php?f=50&t=42611

ImageImage
User avatar
Loader
Platinum Donating Member
 
Posts: 1584
Images: 245
Joined: Tue Apr 26, 2005 2:33 pm
Location: Fort Worth, Texas
Top

Postby aggie79 » Tue Nov 25, 2008 11:00 am

:thumbsup: Gig'em and nice job, Mark.

The locksets I'll be using will have to be mortised in the end of the door, too. That is not something I'm looking forward to, but at my slow pace I won't have to worry about it for another six months.
Tom (& Linda)
For build info on our former Silver Beatle teardrop:
Build Thread

93503
User avatar
aggie79
Super Duper Lifetime Member
 
Posts: 5405
Images: 686
Joined: Tue Aug 07, 2007 5:42 pm
Location: Watauga, Texas
Top

Postby Miriam C. » Tue Nov 25, 2008 11:08 am

:thumbsup: Looks great Mark. Thanks for the pictures. :applause:
“Forgiveness means giving up all hope for a better past.â€
User avatar
Miriam C.
our Aunti M
 
Posts: 19675
Images: 148
Joined: Wed Feb 15, 2006 3:14 pm
Location: Southwest MO
Top

Postby planovet » Tue Nov 25, 2008 11:18 am

Loader wrote:Hey Mark, What's the thickness of your door?


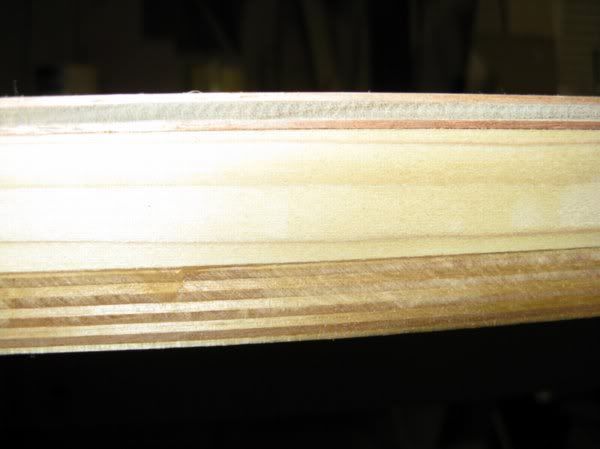
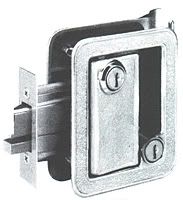
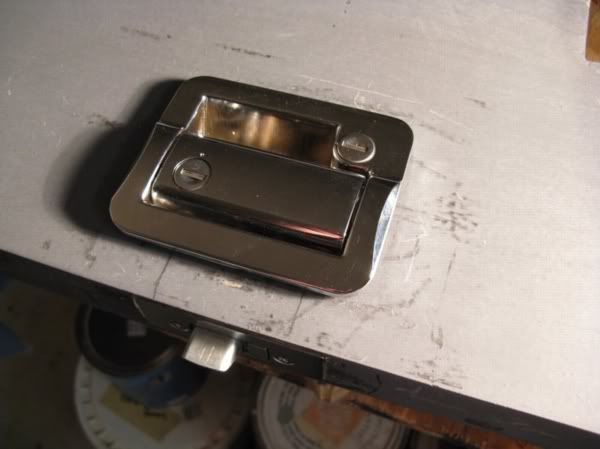
1 1/2" The locks are made to fit doors 1 1/4" to 1 1/2" wide. My doors are made the same as my walls. 1/2" baltic birch ply on the outside, 1by framing and 1/4" interior walls (red oak on door and baltic birch on rest).

Image

aggie79 wrote:The locksets I'll be using will have to be mortised in the end of the door, too. That is not something I'm looking forward to, but at my slow pace I won't have to worry about it for another six months.


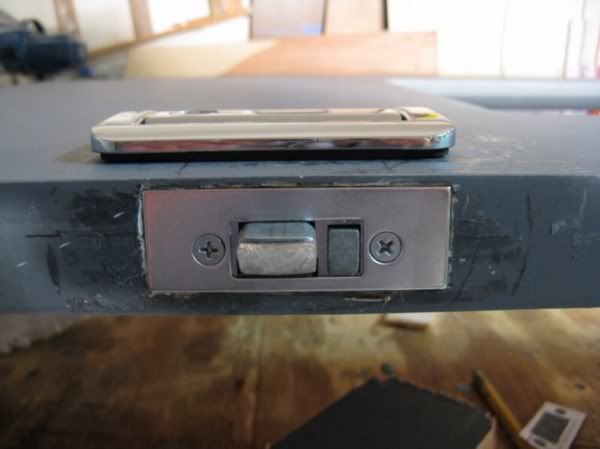
Well, I have put in a lot of door knobs in my day but the doors have always been mortised already. This was the first time I have had to mortise it myself. Also, the latch is attached to the handle assembly and not separate so it made getting the whole thing in that much harder. I had to angle the hole on the top inside to get it to fit. I'm not Norm but I got 'er done!
ImageMark (& Cindi)
Visit our website: Little Swiss Teardrop

I was wondering why the water balloon was getting bigger... and then it hit me.

ImageImageImageImage
User avatar
planovet
The Cat Man
 
Posts: 5583
Images: 3
Joined: Tue Nov 27, 2007 4:48 pm
Location: Plano, Texas
Top

Postby Loader » Tue Nov 25, 2008 1:37 pm

Thanks Mark. Sure, it took you some time, but it looks good! Nice job.
Earl & Kerry

"Loader"

Blue Yonder Build Thread - viewtopic.php?f=50&t=42611

ImageImage
User avatar
Loader
Platinum Donating Member
 
Posts: 1584
Images: 245
Joined: Tue Apr 26, 2005 2:33 pm
Location: Fort Worth, Texas
Top

Postby Mary K » Tue Nov 25, 2008 5:01 pm

:thumbsup: Nice! There is just something about using a hammer and I chisel that makes you feel like you are doing REAL woodwork. :D
Mary K

I don't know half of you half as well as I should like; and I like less than half of you half as well as you deserve. Bilbo Baggins
User avatar
Mary K
6000 Club
6000 Club
 
Posts: 6425
Images: 44
Joined: Wed Aug 02, 2006 3:07 pm
Location: Florida, Pensacola
Top

Postby planovet » Tue Nov 25, 2008 5:57 pm

Mary K wrote::thumbsup: Nice! There is just something about using a hammer and I chisel that makes you feel like you are doing REAL woodwork. :D


Ain't that the truth. :lol: 
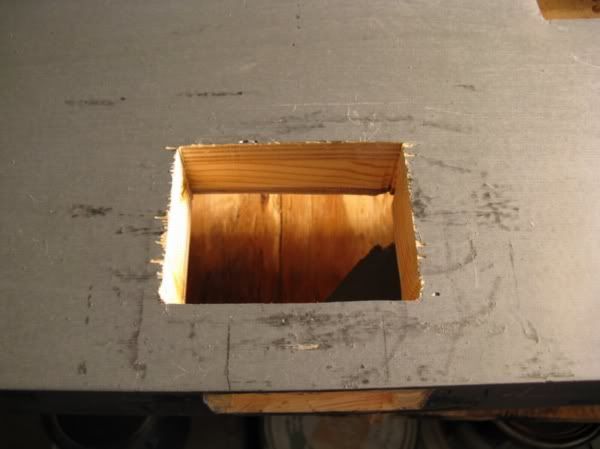
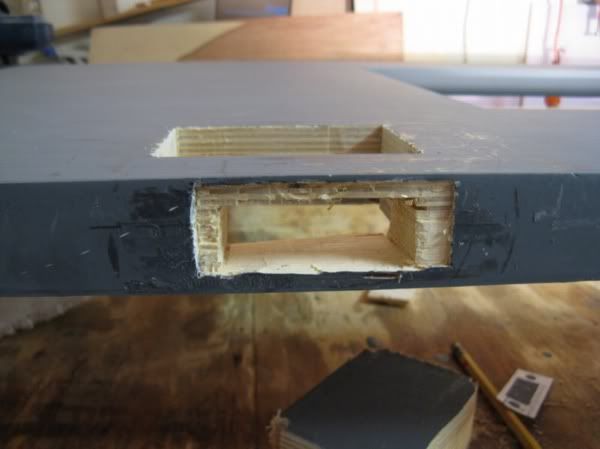
I'm not that great with a chisel so I had to take my time (it didn't help that my chisels are a bit dull!). The pine wasn't bad but the baltic birch soaked in CPES was tough!
ImageMark (& Cindi)
Visit our website: Little Swiss Teardrop

I was wondering why the water balloon was getting bigger... and then it hit me.

ImageImageImageImage
User avatar
planovet
The Cat Man
 
Posts: 5583
Images: 3
Joined: Tue Nov 27, 2007 4:48 pm
Location: Plano, Texas
Top

Postby Aaron Coffee » Tue Nov 25, 2008 7:31 pm

Call me stupid, but what are the 2 locks for?
Thanks
If I could shut my brain off, I could save myself alot of time, money and effort.
User avatar
Aaron Coffee
1000 Club
1000 Club
 
Posts: 1003
Images: 26
Joined: Thu Jun 30, 2005 4:40 pm
Location: Elk Point, SD
Top

Postby madjack » Tue Nov 25, 2008 7:58 pm

Aaron Coffee wrote:Call me stupid, but what are the 2 locks for?
Thanks


...one is for the slam latch and the other is for the deadbolt......................... 8)
...I have come to believe that, conflict resolution, through violence, is never acceptable.....................mj
User avatar
madjack
Site Admin
 
Posts: 15128
Images: 177
Joined: Thu Dec 02, 2004 5:27 pm
Location: Central Louisiana
Top

Postby planovet » Tue Nov 25, 2008 9:03 pm

madjack wrote:
Aaron Coffee wrote:Call me stupid, but what are the 2 locks for?
Thanks


...one is for the slam latch and the other is for the deadbolt......................... 8)


Bingo! Madjack beat me to it. You can see the deadbolt on the bottom picture. It's retracted, just to the right of the latch.
ImageMark (& Cindi)
Visit our website: Little Swiss Teardrop

I was wondering why the water balloon was getting bigger... and then it hit me.

ImageImageImageImage
User avatar
planovet
The Cat Man
 
Posts: 5583
Images: 3
Joined: Tue Nov 27, 2007 4:48 pm
Location: Plano, Texas
Top

Next

Return to Teardrop Construction Tips & Techniques

Who is online

Users browsing this forum: No registered users and 6 guests