Molding head on a table saw

Anything to do with mechanical, construction etc

Molding head on a table saw

Postby Frank » Mon Apr 18, 2005 7:46 pm

Tonight was trying to round off the drawers and cabnet doors with a Craftsman 3 blade molding head. When cutting cross the grain had a lot of trouble with it taking chunks out of the oak. Any ideas? This stuff is too expensive to mess up! Have finished the cabin stuff, but still have the galley to go.

Frank :oops:
Let's go camping!
User avatar
Frank
Silver Donating Member
 
Posts: 423
Images: 52
Joined: Wed Apr 14, 2004 9:16 pm
Location: Aiken, S.C.

Postby davel » Mon Apr 18, 2005 7:49 pm

Frank,

Those molding heads have always scared me to death. But I would think you would need to make several passes taking a little more off each time until you get the shape you want.
User avatar
davel
Donating Member
 
Posts: 1369
Images: 32
Joined: Mon Apr 26, 2004 9:42 pm
Location: Ennis, Texas

Postby Frank » Mon Apr 18, 2005 7:59 pm

Dave,

Yes, it sounds like a jet plane! I had 13 pieces to do so tried to cheat and do it in one pass. Think you are right though. Thought of that after I tore up the second one. Hoping wood doe is going to help what I have already done. will take it slower next time. Thanks for the come-back.

Frank :thumbsup:
Let's go camping!
User avatar
Frank
Silver Donating Member
 
Posts: 423
Images: 52
Joined: Wed Apr 14, 2004 9:16 pm
Location: Aiken, S.C.
Top

Postby nickster60 » Mon Apr 18, 2005 9:11 pm

I had one of those things it scared me to death. One of those cutters came out and took a large chunk out of the floor. I have since used a router
nick
nickster60
Teardrop Inspector
 
Posts: 12
Joined: Sat Apr 16, 2005 6:53 am
Top

Postby Guest » Mon Apr 18, 2005 9:24 pm

Yeap,
Those moulding heads don't spin as fast as a router or shaper, take more passes...
I wish I still had my moulding head for the table saw. One of the sets of blades that came with the one that I used to have were nothing more than a triangular shaped chissel tip. I discovered that if I set up a rip fence at an angle to the blade, I could get just about any cove that I wanted. It worked great for jewelry boxes. Depth was achieved by how high the blade was set and the length of the cove was determined by which angle the rip fence was set.
It works with a saw blade too, but not as good as that mouling head did.
Guest
 
Top

Postby ALAN GEDDES » Mon Apr 18, 2005 10:25 pm

Also try having another board at the finish end of your cut if you can and it will help stop it from splintering as it comes off the good board.
Alan
User avatar
ALAN GEDDES
1000 Club
1000 Club
 
Posts: 1637
Images: 34
Joined: Fri Apr 16, 2004 8:48 am
Location: NC, Fayetteville
Top

Postby Frank » Tue Apr 19, 2005 6:00 pm

Dean,
Have that Vee shaped one also, came in the set, did not know what it was for and sorry but not following you on the cove. What is it for?

Alan, will try what you said, sounds kind of tricky though.

Frank
Let's go camping!
User avatar
Frank
Silver Donating Member
 
Posts: 423
Images: 52
Joined: Wed Apr 14, 2004 9:16 pm
Location: Aiken, S.C.
Top

Postby Guest » Tue Apr 19, 2005 7:56 pm

Frank,
OK... The rip fence runs horizontally to the cut of the saw blade, right?
Well... If you remove your rip fence and clamp a substitute fence (Usually just a stout straight piece of wood) to your table saw at a bit of an angle to the line of the blade, you can cut a cove in a piece of wood.
It takes a bit of testing to get the exact cove you want.
I'll draw a top view of the table saw for you.....

Image

I've built several jewlery boxes with that chissel set.
I glue up a blank box; sides are mitered with a spline joint, bottom is rabbeted in and the top is just a butt joint.
Then I set up a fence something like the upper left diagram and cut the cove on the sides of the box.
Then I set up the fence like what's shown in the upper right diagram and make the crown cut on top of the box.
Then I put back my normal rip fence and cut the "V" notches.
Then it's time to sand all the cutter marks out.
When I have the still unopenable box sanded, I use a band saw to cut the lid off right in the crotch of the upper "V" notch.
Once that is done, I chissel out for two simple butt hinges and attach the lid.
Then I remove the lid, apply stain/finish to the exterior surfaces and where the lid butts, but not the inside or the exterior bottom.
When the finish is dry I use a flocking paint and paint the inside of the box and the inside of the lid and the bottom, then flock those areas.
With that simple little chipper setup, you can make some real nice jewlery boxes.
Use special care when making those special cuts on that angled fence.
(I've also used that angled fence on the "uphill" side of the blade also)

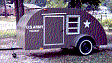
I still have one of those boxes kicking around here somewhere, I've been using it to keep my fly tying stuff in.
I'll take a couple of shots of it fo you...
Image
She's been banged around on plenty of streambeds over the years...

Image
Here's a shot of the inside...

Just use care and common sense and don't try to hog off that cove in one pass... Table saws don't spin near as fast as a shaper. :thumbsup:
Guest
 
Top

Postby Dennis T » Wed Apr 20, 2005 7:39 am

Yes, back the piece with another board and take smaller cuts. 2 or 3 passes to the finish will help with the cip out.

Dennis
Image
User avatar
Dennis T
The 300 Club
 
Posts: 323
Images: 10
Joined: Fri Jun 04, 2004 6:38 am
Location: Bristol, Pa
Top

Postby DestinDave » Wed Apr 20, 2005 9:01 am

I had that set also and used it in my radial saw quite a bit. Only problem I had was cutting some oak and using the 3-bead cutters I hit a knot in the wood and the whole piece exploded and a sharp section gave me a pretty nasty cut on the hand. Just take it slow and shallow cuts and you will do alright. I would suggest also using feather boards, or hold-downs and push sticks.
Reality? What a concept!
Building "The Salty Tear" - a photo log of the project.
http://www.bluezenphoto.com/p979644357
User avatar
DestinDave
500 Club
 
Posts: 687
Images: 4
Joined: Sat Jan 29, 2005 10:03 am
Location: Hendersonville, NC
Top

Postby Guest » Wed Apr 20, 2005 9:24 am

Forgot to mention that earlier...
I like using a push board more suited for a joiner. It has a wooden hand saw handle on top of a 1 x 6 board and it a little strip of wood across the back edge that hooks the stock being pushed.
Guest
 
Top

Postby Denny Unfried » Wed Apr 20, 2005 4:03 pm

Is this the cutting head that the topic is about? Bought this one about 1980 and seldom use it but sure handy when I need it. Tried it on a direct drive saw once and scared the "$%*&" out of me. Maybe it was because the saw was so light with the aluminum table and vibration set in. Anyway, works fine with the heavy belt drive.

Denny

Image
aka - "Uncle Denny"
<img src="http://www.uncledennyscorner.com/teardrop/photos/Linux.gif">
User avatar
Denny Unfried
sprint car builder/racer & all that jazz
 
Posts: 411
Joined: Mon Jun 21, 2004 8:54 am
Location: So Bay, CA
Top

Postby Guest » Wed Apr 20, 2005 4:20 pm

That's different than the one I used to have , but same prinicple.
Mine was a thicker round disk and I think it was old when I got it back in the 70's.
Guest
 
Top

Postby DestinDave » Wed Apr 20, 2005 5:44 pm

That's the same set I have and the 3-bead culprit is the on on the top right.
Reality? What a concept!
Building "The Salty Tear" - a photo log of the project.
http://www.bluezenphoto.com/p979644357
User avatar
DestinDave
500 Club
 
Posts: 687
Images: 4
Joined: Sat Jan 29, 2005 10:03 am
Location: Hendersonville, NC
Top

Postby Frank » Wed Apr 20, 2005 7:04 pm

Yes, that is the same set I have, well did what everyone suggested and managed to save the pieces by making the cuts a little deeper and a small amount of wood doe. Have always used the push board, just a little 1X2X12, but I like the sounds of that shaper pusher, sounds like more control and less likely to slip into the blade.

Thanks Frank
Let's go camping!
User avatar
Frank
Silver Donating Member
 
Posts: 423
Images: 52
Joined: Wed Apr 14, 2004 9:16 pm
Location: Aiken, S.C.
Top

Next

Return to Teardrop Construction Tips & Techniques

Who is online

Users browsing this forum: No registered users and 16 guests