Page 1 of 2

What can I do about this

PostPosted: Fri May 06, 2005 6:47 pm
by TomS
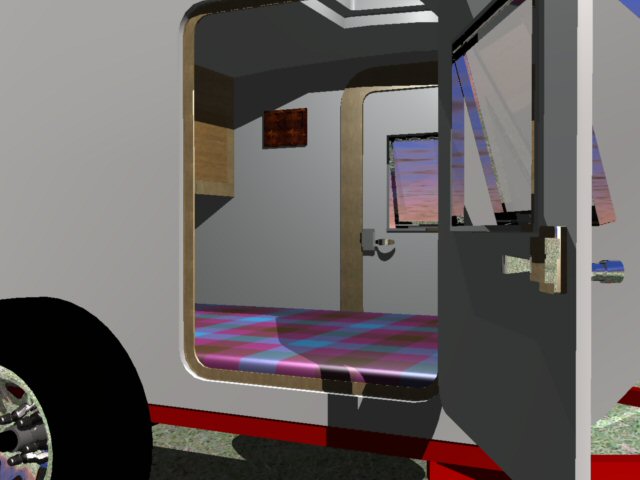
I cut and fitted my inside wall skins today. Unfortunatly, the veneer on that 1/8" birch play is very, very thin. It tore out on me in in two places.

Image

One of these in way back near against the bulkhead wall. But, the one pictured above is right next to the door opening. That damn plywood cost me $32/sheet plus a drive into Boston. I really don't want to throw it this piece out if I can avoid it.

Does any one have any ideas for repairing it. Or at the very least, covering it up so doesn't look so bad.

Thanks.

PostPosted: Fri May 06, 2005 6:54 pm
by ceebe
I'd make a nice contrasting wood trim piece to cover it up. Make a matching one for the other side. next thing you know, TD'ers from all over the world will look at your inside door treatment and say COOL!!

PostPosted: Fri May 06, 2005 7:44 pm
by mikeschn
How wide, or rather, how long is that tearout? Ceebe is right, you could cover it with a door trim, like the one in this photo...

Image

Mike...

PostPosted: Fri May 06, 2005 7:45 pm
by doug hodder
I agree, if you can't fit in the piece that blew out and glue it in, you are going to have to do something to hide it. When drilling a hole in thin material like that I always work from the good side, or the side I want to show. You can also lay a patch of masking tape down and that will help to minimize tear out, on the face when drilling. back up with a piece of scrap to stop it on the back. I sort of wobble a forstner bit as it cuts so that the outer edge cuts the material before the chipper removes the inside, a cleaner edge. Hope this helps in the future. Doug Hodder

PostPosted: Fri May 06, 2005 8:36 pm
by TomS
doug hodder wrote:I agree, if you can't fit in the piece that blew out and glue it in, you are going to have to do something to hide it. When drilling a hole in thin material like that I always work from the good side, or the side I want to show. You can also lay a patch of masking tape down and that will help to minimize tear out, on the face when drilling. back up with a piece of scrap to stop it on the back. I sort of wobble a forstner bit as it cuts so that the outer edge cuts the material before the chipper removes the inside, a cleaner edge. Hope this helps in the future. Doug Hodder


When I drilled the starter hole for the other side, I put a piece of scrap under it and it was fine. Oh, well, some lessons we learn the hard way. :cry:

The tearout is 1 1/2 inches long. Looks like I'll be installing some wide door trim.

Thanks for the advice!

PostPosted: Fri May 06, 2005 9:25 pm
by madjack
...do you still have the tear out? is it usable? If so butter it and wall up with wood glue of choice, put tear out in place, cover with wax paper, put block over it and clamp tightly...have done this several times in similar situations, works well and usually you can't even see damaged area
madjack 8)

PostPosted: Fri May 06, 2005 9:49 pm
by TomS
madjack wrote:...do you still have the tear out? is it usable? If so butter it and wall up with wood glue of choice, put tear out in place, cover with wax paper, put block over it and clamp tightly...have done this several times in similar situations, works well and usually you can't even see damaged area
madjack 8)


No, unfortunatly I don't have it. Dang!

PostPosted: Fri May 06, 2005 10:03 pm
by madjack
...in that case, do you have some matching ply such as the cutoff from the profile? If so VERY carefully cut, chisel, rip, tear, remove an appropriate sized stip from the cut off, clean up the tearout to match the piece you removed from the cutoff and then folow the previous directions I gave and you should be able to patch it up with a minimum of difference in appearance...better than a huge, outta place, piece of trim
madjack 8)

PostPosted: Fri May 06, 2005 10:37 pm
by GeorgeT
Cut yerself another chip as madjack says. Get a piece of scrap of the same plywood. Take a chiesel, puttly knife or whatever and remove the top layer of veneer to match the layer you chipped out that would be big enough to cover and overlap the entire area a bit. Then put a brand new No. 11 exacto blade in your exacto knife (or somthin with a very thin razor sharp blade). Place the veneer you removed from the matching scrap piece over the chipped out space makin sure the grain is runnin the same direction. Take the exacto knife and use a metal straight edge and cut through the top new layer of veneer and through the veneer layer of the plywood underneath cutting a rectangle slightly larger than the damaged chipped out area. Be sure to cut through the veneer piece on top and the veneer of the plywood underneath. Do not let the top veneer piece slip even the sightest. Also do not cut too deep as the thickness of the blace might cause you to not get a good duplicate cut underneath. Then remove the top veneer piece and set aside. This will be your replacement chip. Next take a chisel or whatever and carefully remove the material inside the cut lines of plywood veneer underneath removing only the top layer of the veneer which you will replace with the new piece you just cut from the top veneer piece. The top piece should now fit exactly into the space you cleared out. Glue it down and sand. If you take your time, hold your breath, think good thoughts, don't swear and are careful to cut straight down vertically not slanting the blade you will have a most perfect fit. Go easy when cutting across the grain. Many light cuts until you get the right depth as a single deep cut might tear some grain enough to not give you a very crisp cut line. Try it and if you don't like the results resort to the wide trim to cover it up. I have done this several times on my project and others. Hope these directions are clear enough. :D

PostPosted: Fri May 06, 2005 10:55 pm
by madjack
...hey George...'zactly what i said(only a little better) :o :lol: ;)
madjack 8)

PostPosted: Fri May 06, 2005 11:20 pm
by GeorgeT
madjack wrote:...hey George...'zactly what i said(only a little better) :o :lol: ;)
madjack 8)


Shoot, I'd try it, wooden yew? Better'n 32 bucks and cussin' all the way to Boston an' back. B'sides it'd give it some character and sumpin to talk about later 'round the campfire wuddenit? :R

PostPosted: Fri May 06, 2005 11:47 pm
by madjack
...ya know I had a wooden yew oncet and never could figger it out, but I would definetly give it try afore I tried anthin else, afterall nobody wants to cuss all the way to Beantown and back(might make the beans all soggy) :lol: :lol: :lol:
madjack 8)

p.s. if it doesn't work out Tom, check out the second line of my sig and give that a thought

PostPosted: Sat May 07, 2005 6:34 am
by toypusher
Tom,

If you have a scrape piece that is a little bigger than the tearout spot, just cut it out with a utility knife and glue the patch in.

Actually you would need to split the patch to just the thin layer that is the species for the finished side. (hope this makes sense to you) Then you put that over the bad area and cut through it and into the sidewall far enought to go throught the laminated surface. This creates a perfect patch. Glue it in and lightly sand it.

I have used this method on many woodworking projects and with a little patience, it will be invisible.

I really just finished reading the rest of this thread and what I am saying is just what GeorgeT allready said. Guess I should read more carefully before jumping in to answer. :oops:

Kerry

PostPosted: Sat May 07, 2005 3:33 pm
by TomS
I took another look under my cutting table and found that chip. I didn't find it the first time because it had broken two narrow peices. I followed Madjack's advice (no not the part about exposives) and glued and clamped it in place.

Here are the results ....


Image

In natural light, the match looks better than this photo shows. Thanks again guys for the excellent advice!

:thumbsup:

Good save tom

PostPosted: Sat May 07, 2005 4:41 pm
by Guy
Good save Tom.