Hatch Problems
Having one heck of a time fitting the hatch . I've adjusted this and adjusted that , beat ,banged ,sanded , screwed ,unscrewed , cussed ,broken stuff , patched , braced .
I built it like instructed and watched others do in here and i guess the mistake i made was in making it to tight of a fit . I had my hatch frame sitting preatty in its home with about 3/16 on each side . looked good so i moved to next step of putting the luan skin on outside of hatch. Here is were i screwed up , having to use straps on it to draw luan in tight to frame i think ( or now no) i pulled the hatch frame to a tighter radius than the tear drop frame radius that once fit like a glove . So i was thinking about it for days and yes i did loose sleep over it i thought and thought how i could fix my mistake . so it came to mind that i havent yet cut the notch in the wall of teardrop frame yet so i was thinking i could use the notching to fix my problem of not fittting exact . i waited to the last minute to cut this notch because it is critical i think (right ) . I have been very cautious not to screw any thing up in the final build of teardrop i have not worked on it in 3 weeks or more because of this problem i have been real bumbed out a bout it . So moving on , I notch the thing and it goes back to being a good fit not a glove like fit but getting better so i put on this edge trim with weather seal buit on it already and when i closed the hatch the first time it ripped and shaved the seal off badly
i notched it good i thought but i guess it wasnt enuff im scared to notch more it seems it only meeds it at the very bottom my hatch resembles a ( J ) shaped hatch so i guess you could say the bottom of (J) is needing more notch cut out on frame wall im just scared as hell of it It is the the outside of my wall that will be exsposed to view and i dont want to big of a gap there and once cut you cant turn back In notching you dont want to much cut out cause i already goy 1/2 inch im just thinking i should scrap this hatch and start over what would be a suggestion from others about the hatch shaving and or scissoring the trim seal when it closes ill post some pics to detail maybe to help describe problem . Maybe i need to take some radius out of frame wall or just notch more just really scared
Norm
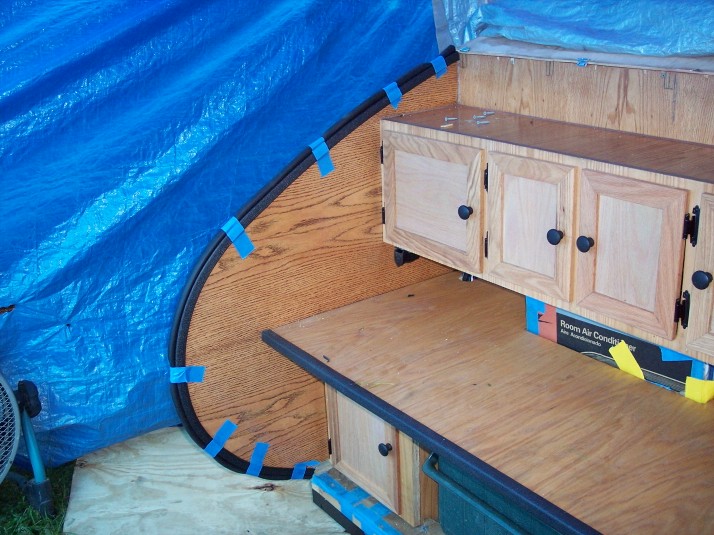 PIC OF FRAME WALL RADIUS WITH TRIM SEAL ON
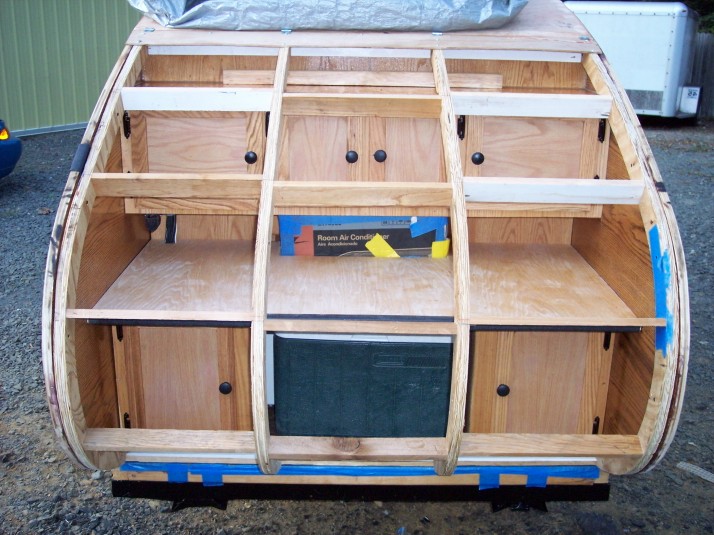 PIC WITH HATCH FITTING LIKE A GLOVE
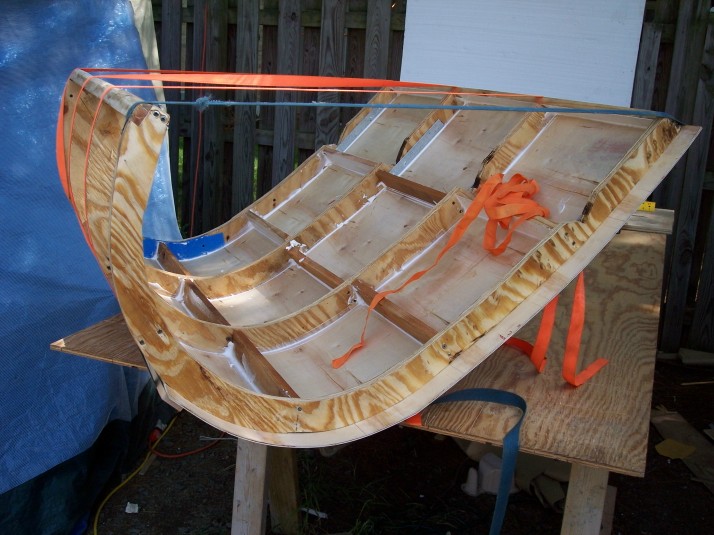 PIC STRAPING THE SKIN ON
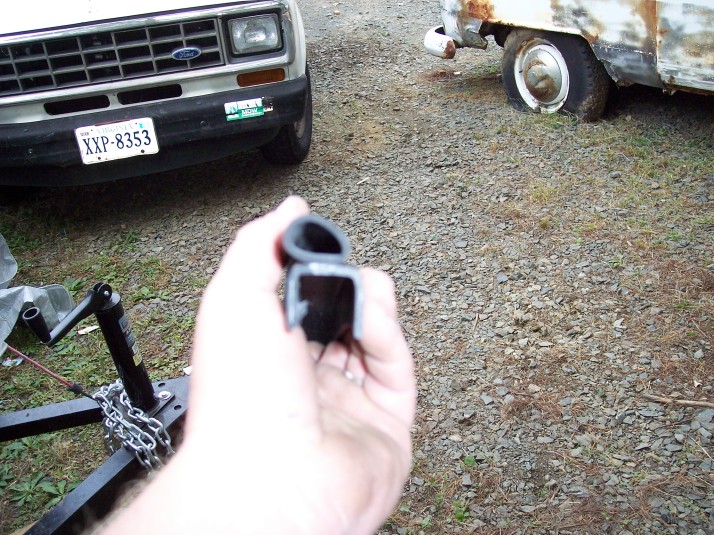 PIC OF EDGE SEAL AND TRIM SEAL I USED
I built it like instructed and watched others do in here and i guess the mistake i made was in making it to tight of a fit . I had my hatch frame sitting preatty in its home with about 3/16 on each side . looked good so i moved to next step of putting the luan skin on outside of hatch. Here is were i screwed up , having to use straps on it to draw luan in tight to frame i think ( or now no) i pulled the hatch frame to a tighter radius than the tear drop frame radius that once fit like a glove . So i was thinking about it for days and yes i did loose sleep over it i thought and thought how i could fix my mistake . so it came to mind that i havent yet cut the notch in the wall of teardrop frame yet so i was thinking i could use the notching to fix my problem of not fittting exact . i waited to the last minute to cut this notch because it is critical i think (right ) . I have been very cautious not to screw any thing up in the final build of teardrop i have not worked on it in 3 weeks or more because of this problem i have been real bumbed out a bout it . So moving on , I notch the thing and it goes back to being a good fit not a glove like fit but getting better so i put on this edge trim with weather seal buit on it already and when i closed the hatch the first time it ripped and shaved the seal off badly
i notched it good i thought but i guess it wasnt enuff im scared to notch more it seems it only meeds it at the very bottom my hatch resembles a ( J ) shaped hatch so i guess you could say the bottom of (J) is needing more notch cut out on frame wall im just scared as hell of it It is the the outside of my wall that will be exsposed to view and i dont want to big of a gap there and once cut you cant turn back In notching you dont want to much cut out cause i already goy 1/2 inch im just thinking i should scrap this hatch and start over what would be a suggestion from others about the hatch shaving and or scissoring the trim seal when it closes ill post some pics to detail maybe to help describe problem . Maybe i need to take some radius out of frame wall or just notch more just really scared
Norm


 Beautiful tear you have built too. I thought Id chime in and let you know I have no garage at all to build in.


