Page 1 of 1

Sidewall, roof spar, hatch seal and door seal illustrations.

PostPosted: Sun Dec 13, 2009 6:51 pm
by danlott
I really like the illustrations that DougGirling put together for sidewall to floor connections. Does anyone have similar drawings for roof spar connections, hatch seals or door seals. Please add any drawings that you might have come up with that deal will different ways of handling these. It would be great to have a bunch of different ideas all on one thread.

Here is DougGirling's sidewall to floor connections.
Image

PostPosted: Fri Dec 18, 2009 12:49 am
by bfitz
Throwin' a non-reply in the hopes that someone will post some pictures. I'd like to see this too.

Fingers crossed,
Brian

PostPosted: Fri Dec 18, 2009 9:51 am
by aggie79
bfitz wrote:Throwin' a non-reply in the hopes that someone will post some pictures. I'd like to see this too.

Fingers crossed,
Brian


+1

I think it would be great to have this and package these in a "standard details" booklet.

And how do you fasten it?

PostPosted: Sat Dec 19, 2009 1:02 am
by N6NG
I plan to use the simple lap but do you screw it or bolt it?
Thanks

Dennis

PostPosted: Sat Dec 19, 2009 2:05 am
by Muggnz
bfitz wrote:Throwin' a non-reply in the hopes that someone will post some pictures. I'd like to see this too.

Fingers crossed,
Brian


me 2

fingers & etc crossed

david

PostPosted: Sat Dec 19, 2009 5:31 am
by bobhenry
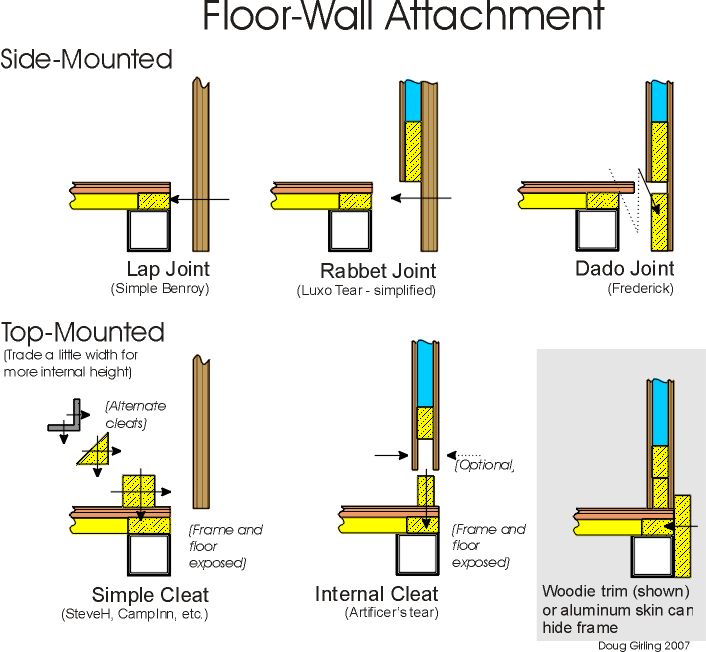
I have built 4 tiny trailers and I have used a half lap rabbett joint and cut a pocket in my wall to recieve it. The 1 1/2 by 1 1/2 spars are always cut from 2x12's which are southern yellow pine rather than spruce pine fir grade stock. The SYP is about 50% stronger than the SPF.

I will dig up a few pictures to help make it clearer how they go together

Image
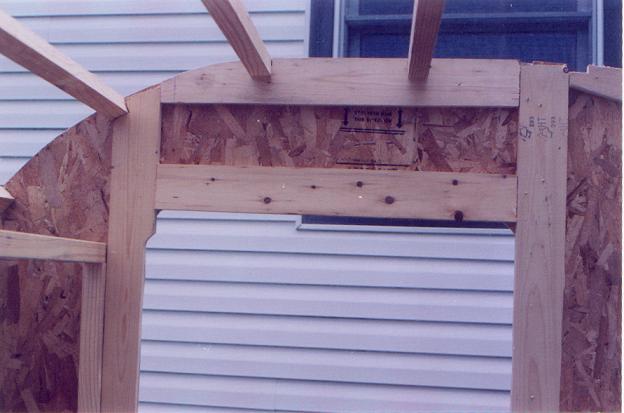
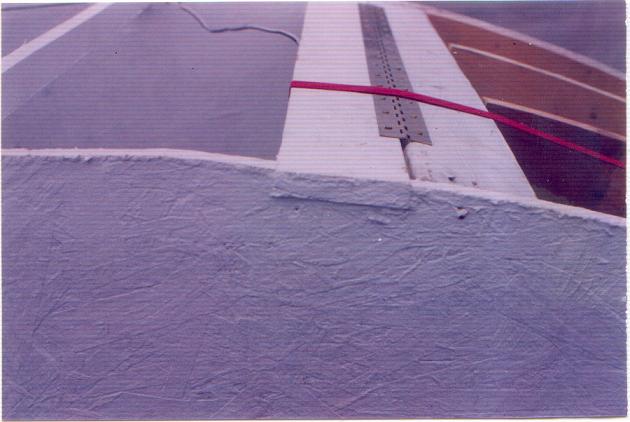
In the picture above you will notice the spar on the far left is rabbetted 3/4" deep and cut back 1/2 " (the thickness of the osb). In the reinforced areas the rabbett is still cut 3/4" deep but the tongue is now 1 1/4" long (the thickness of 1/2 osb plus the 3/4 thick 1x4)
Image
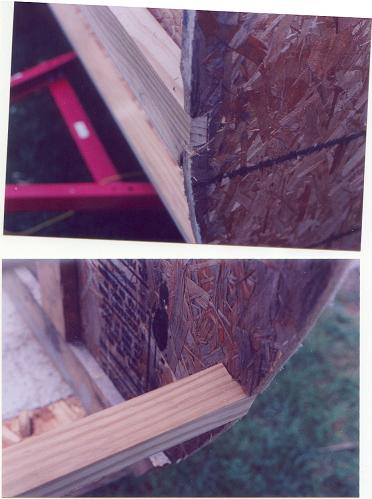
This one shows the spar glued and screwed in place. I used a single 3" construction screw and it is angled in to allow it to cross the grain of the wood for more holding power. DO NOT place it straight in . A screw into end grain of wood has a very limited amount of holding power
Image
The spar before and after installation
Image
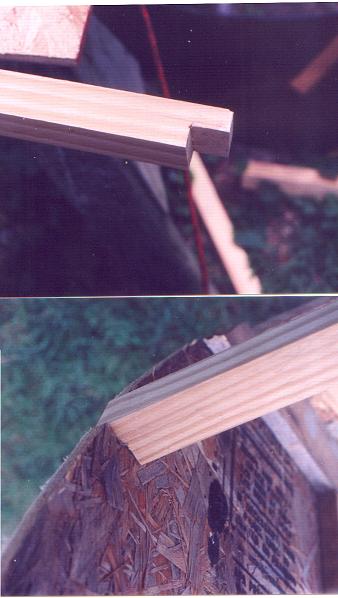
This is my 3x5 motorcyle tear cargo trailer. I install the stationary hatch spar the same way but use a full 2x4 releaved the same way and set in a pocket cut into the wall also. This allows for 2 or 3 screws to be installed to help resist the twisting motion and strengthen this final roof spar
Image
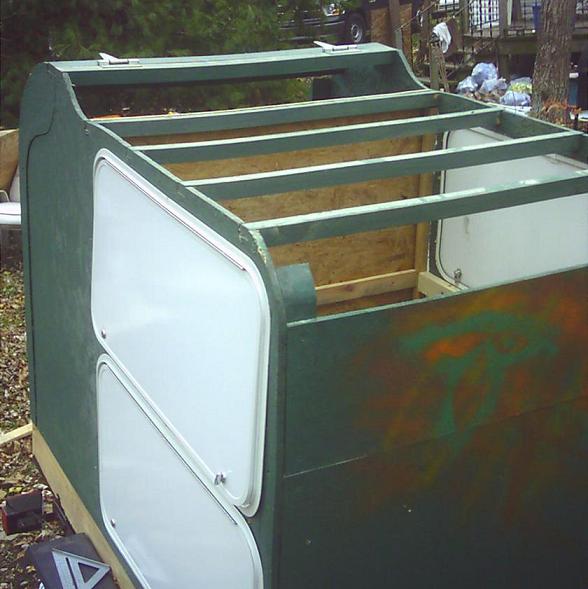
This is the latest project. My dedicated chuck wagon It share the same technique in its roof