Page 1 of 2

Standy sidewalls

PostPosted: Wed Mar 17, 2010 12:43 pm
by StPatron
I'm planning a standy build, lighter the better.

What do you recommend for sidewall material and thickness (non-insulated) for:
1. Aluminum or Filon clad
2. Painted

PostPosted: Wed Mar 17, 2010 12:55 pm
by NightCap
I was planning on using 3/4 inch plywood for mine and cutting out pieces to make a lighter weight frame.

Image

And using the cutouts as shelves etc.

PostPosted: Wed Mar 17, 2010 1:37 pm
by synaps3
Lightest way to do a painted wall: http://tnttt.com/viewto ... c&start=66

^ 1x3's sandwiched between 1/8" luaun, with insulation in the gaps. You can't really build lighter than that on a standie, or the structure will become flimsy. This method is also lighter, more sturdy, and cheaper than using plywood cutouts (even if it takes much longer).

The lightest way to do the same with an aluminum or filon shell is to replace the outer pieces of luaun with the direct filon or aluminum.


:)

PostPosted: Wed Mar 17, 2010 9:20 pm
by StPatron
Thanks guys for your replies, appreciate it.

Dave: I hadn't looked at your build thread lately, you're really moving along! Congrats.

PostPosted: Wed Mar 17, 2010 11:24 pm
by afreegreek
I made a trailer using aluminum T (as studs) let into doubled 3/4" ply frames top and bottom. was fast and easy.. if you'd be interested in doing something like that I will draw you a sketch..

PostPosted: Wed Mar 17, 2010 11:27 pm
by Juneaudave
afreegreek wrote:I made a trailer using aluminum T (as studs) let into doubled 3/4" ply frames top and bottom. was fast and easy.. if you'd be interested in doing something like that I will draw you a sketch..


I'd like to see a sketch if you have time... :thinking:

PostPosted: Thu Mar 18, 2010 10:47 am
by john
I have built the side-walls both ways.

One with 3/4" ply with holes cut out and filled with insulation. This turned out being much stronger than I needed. Unnecessarily so. It was also more expensive and heavier than I expected.

Image
Image


On my second build, I choose a different method. I prefer it.
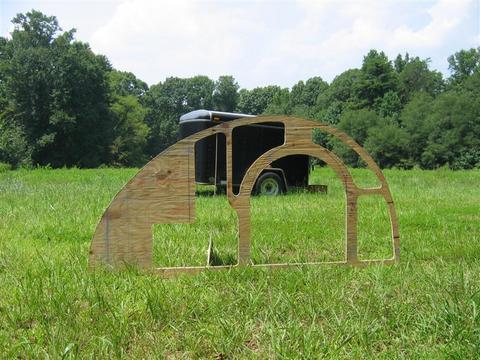
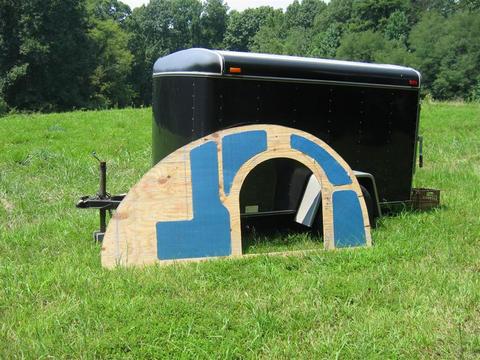
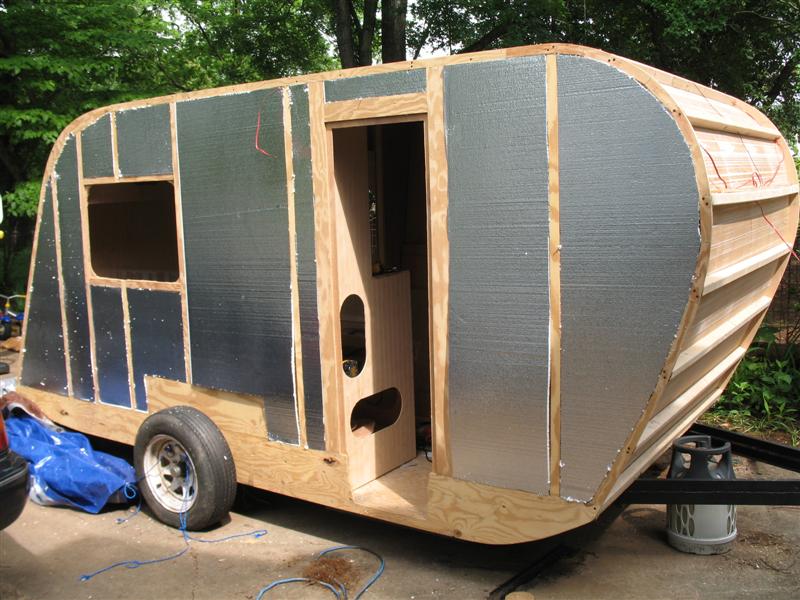
I used 1/2" ply that I ripped to make 1/2"x (whatever width I needed) strips to create a void between the interior and exterior skins. A single sheet of ply will make a lot of these strips at 1 1/2" wide which is what I used mostly. I found thicker ones worked better as I rounded curves and places where I wasn't sure where screws would be needed (behind the fenders). This method was lighter, cheaper (than solid wood strips), still used plywood for strength where needed, and finally, gave me the exact 1/2" void for the 1/2" insulation I planned to use.

Image
Image
Image


Just my experience...

Edit: I was just reminded of the OP's no insulation qualification when my post comment popped up after submitting. I got side tracked by the other comments.

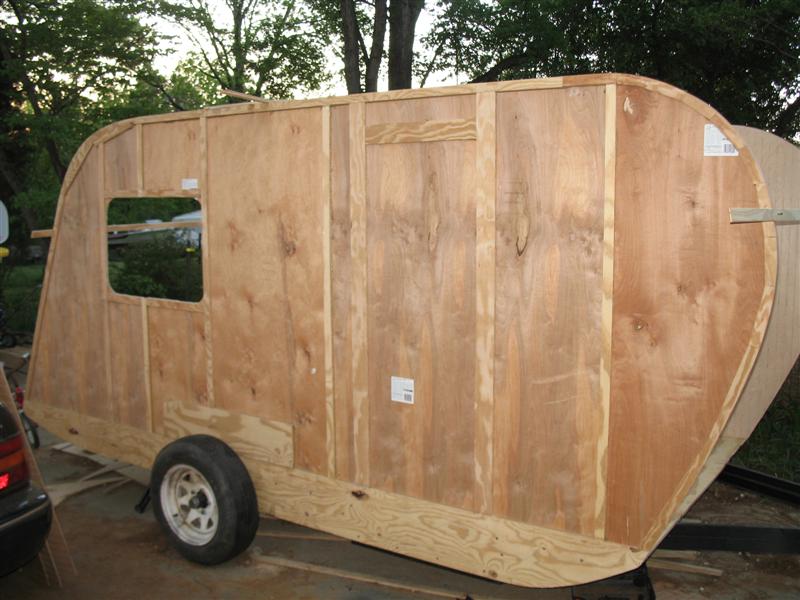
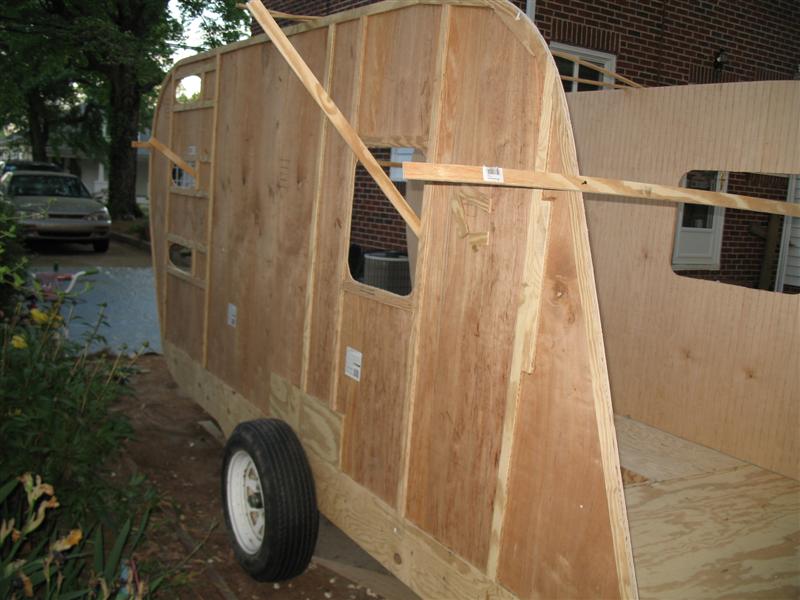
Without insulation I would go with a quality 1/2" ply. It may seem floppy at first, but once the rigid box is complete and internal closets and shelving are mounted inside the floppyness disappears.

PostPosted: Thu Mar 18, 2010 12:18 pm
by StPatron
greek: I'd like to see the plans. The amt. of aluminum material needed for my plan would probably be prohibitively expensive but I'm always interested in learning.

John: I really like that idea! I'm glad you missed the no-insulation caveat at first read. :)

Seems I read a build thread of yours long ago, but didn't recall your technique. Gone to read again. Thanks so much.

PostPosted: Fri Mar 19, 2010 11:21 pm
by afreegreek
ok, here's the best I could draw it.. basically I pre assembled the floor (3/4" ply with 3-1/2" wide buildup) and the top plate (2 pieces of 3/4" ply 3-1/2" wide) with brads, clamped the whole thing together and routed out the faces with a jig to let the 'T' in, then pulled it apart and used the 'let in' as a guide to position another jig to cut the slot in the floor and the lower piece of the top plate, then glued everything up.

I used a jig to cut the section out of the aluminum with a 1/2" flush trim bit in the router. this was basically a block of wood with a kerf in it for the shank of the 'T' to fit in clamped 3/4" inch from the end of the 'T'.

for assembly I bedded the aluminum in PL Premium and angle drilled the ply for 1-1/2" #10's in through the pre countersunk holes and set them. once I had everything together and plumb/square, I used a pocket guide to drill pocket holes in to the floor and through the 'T's. for these I used 2" #10's.

** right!.. just to be clear, I did not predrill the the aluminum for the pocket screw. the drill for the pocket hole guide did that once everything was set plumb and locked into place..
Image

PostPosted: Sat Mar 20, 2010 6:49 pm
by bdosborn
Here'show I built the walls to our standy. They came out pretty light and very strong.

First I built a frame out of 1x2's on the floor so I knew it would fit to the trailer frame:

Image

Then I glued and stapled 1/4" plywood to the outside. I traced the frame onto the plywood from the underside so I knew where to staple:

Image

Then I insulated it and glued on the 1/8" interior skin. I used a vacuum bag to make sure it the skin went on flat and made good contact with the frame.

Image

Cut out the openings with a laminate trimmer/router and apply finish to the inside:

Image

Vacuum bagged it again to apply the filon exterior skin and you're done.

Image

There are a lot of options for the exterior. Filon has gotten *very* expensive, I doubt I would use it now.

Bruce

PostPosted: Sat Mar 20, 2010 11:03 pm
by StPatron
Thanks for the tips, Bruce. I just finished studying your "Boxcar" build thread again, very impressive! Your cabinetry work is outstanding, nicer than anything in my house. Based on your recommendation I'm scratching the Filon idea.

PostPosted: Sun Mar 21, 2010 12:05 am
by bdosborn
Thanks for the compliment! Don't get me wrong,I love Filon. It doesn't get hot in the sun like aluminum and its easy to clean. Its just that it went from $1.25/SF when I built the Teardrop to $4.50/SF by the time I bought the Filon for the roof of the Boxcar. :o

Bruce

PostPosted: Sun Mar 21, 2010 12:33 am
by afreegreek
just look at the price at the time you're ready to go. building materials are a commodity and the price rises and falls due to demand. the "building boom" is bust so lots of stuff is going to be cheaper than it was a few years ago.

PostPosted: Sun Mar 21, 2010 2:04 pm
by RAYVILLIAN
Gary
The lightest standy build I've seen was Steve Wolverton's Puffin. He used 1/4" plywood in both the walls and roof with very little to no framing. Just the door frame and shelves and a center rib on the roof for about 3 to 4 foot between the front and back shelf. He did fiberglass the outside which added strength though. If I remember right Puffin weighed between 700 and 800 lbs and I know that Steve pulled it with a Subaru outback with no problem.

Unfortunately the pics from the build thread are lost which is a shame. there are a few left in his gallery though.

http://tnttt.com/album_ ... ser_id=404

One of them plainly shows the lack of framing in the wall over the bed.

Image

Gary

Ps here is the link to the build thread. It's interesting reading but without the pics you have to use your imagination.

http://tnttt.com/viewto ... ght=puffin

PostPosted: Sun Mar 21, 2010 10:30 pm
by StPatron
Many thanks for the info. and links, Gary. I remember following the Puffin build back in my lurker days, sure wish I'd saved the photos, the one you posted really helps. The plan now is to construct some small mock-ups before making my final decision. I've already made one using John's recommendation and was impressed with the strength and ease of assembly. Plus, it provides the option of a nice interior paneling.

From what I'm understanding, wall construction methods/materials are the same whether one is building a standard teardrop or a standy. Previously, I assumed I'd need to beef it up a bit. A 1/4" wall standy w/fiberglass sure answers that question. :lol: