Page 1 of 1

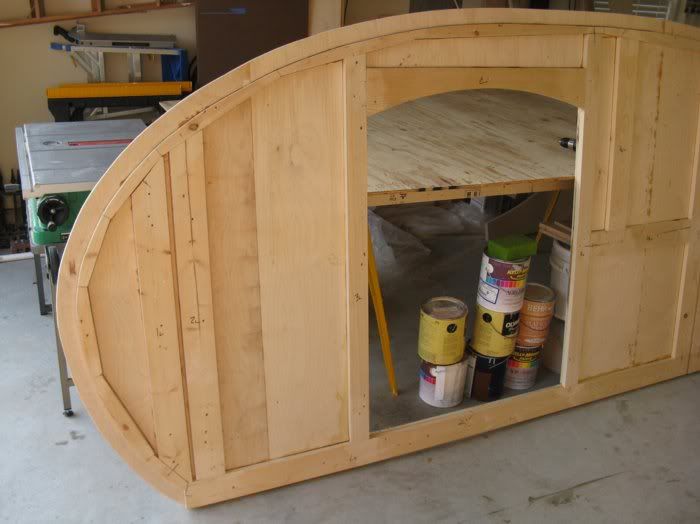
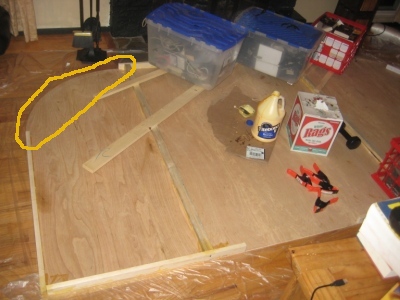
How to frame the wall radius

PostPosted: Thu Aug 12, 2010 12:04 am
by tcolar
How should I frame frame my wall radius (highlighted area):
Image

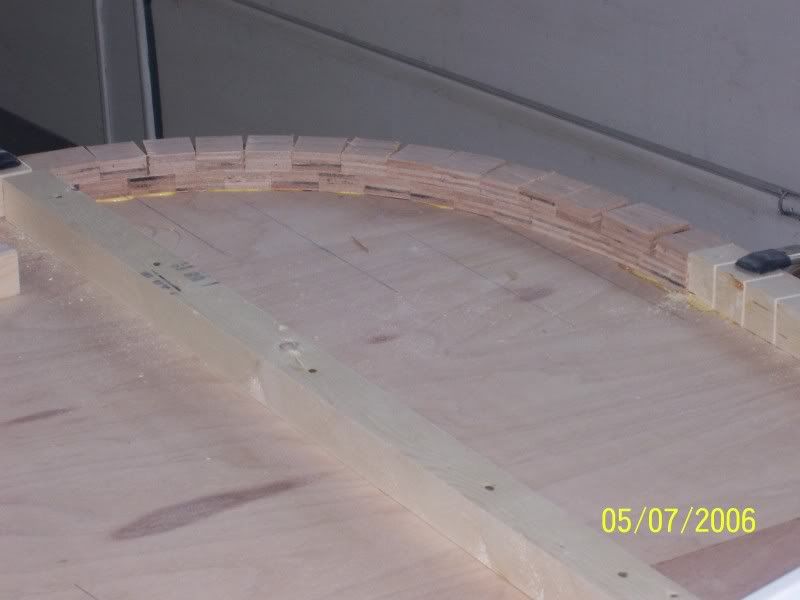
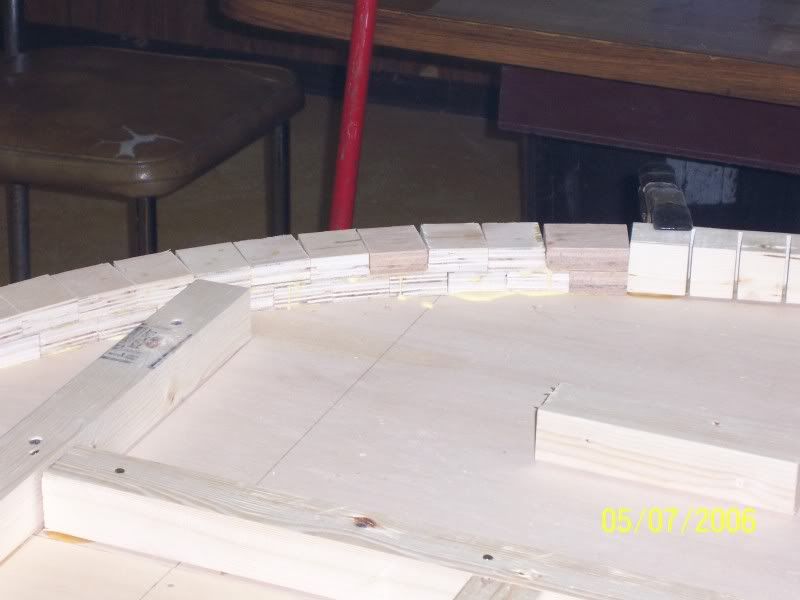
1) Should i cut couple of radius shapes ("arches") out of 3/4 ply and glue them together (to get 1 1/2 '') ... somewhat lots of work.

2)Make a "rough" radius using small pieces of 2x1 .. later fill the gaps with putty or exp foam ...

Other ?

Thanks.

PostPosted: Thu Aug 12, 2010 12:25 am
by afreegreek
rip some 1-1/2" wide plywood strips and cut kerfs every 3/4 of an inch to an inch through 3 of 5, or 5 of 7 plies.. if you don't want the kerfs visible, rip one ply off of a strip and glue it over the kerfs once the piece is glued in place.. it's fast and will make a smooth curve..

if you want to maintain the 3/4" thickness, just rip a ply off before you cut the kerfs and replace it with another one after..

PostPosted: Thu Aug 12, 2010 12:30 am
by tcolar
Bear with me ... not a wood worker :)

I believe what you are saying is cut "notches" at regular intervals so that I can just flex my 2x1 strip, right ?

I don't have a router, although i can probably pull those notches with the jigsaw or plain old miter box and saw.

PostPosted: Thu Aug 12, 2010 12:47 am
by afreegreek
tcolar wrote:Bear with me ... not a wood worker :)

I believe what you are saying is cut "notches" at regular intervals so that I can just flex my 2x1 strip, right ?

I don't have a router, although i can probably pull those notches with the jigsaw or plain old miter box and saw.
you have a skill saw? a router isn't the best choice, neither is a jigsaw. a hand saw would be better but you'll have to make more cuts as the kerf is thin.. you could put the kerfs to the outside of the radius but it's more difficult to bend in a smooth curve like that.. and it's easier to break the piece.. the 1/8" kerf of a skill or table saw is ideal for this..

PostPosted: Thu Aug 12, 2010 1:22 am
by tcolar
Do have a skill saw, that will probably work good, but guessing I will have to be very gentle !

I also have a hand saw with "wide" teeth that would probably work good too.

Either way this sound like a better method :)

Wish i had a table saw, but don't really have the room .... do have a tile saw though ... whish I could just put a wood cutting disc on it :)

PostPosted: Thu Aug 12, 2010 1:58 am
by afreegreek
a skill saw and a speed square (or similar item) used as a saw guide is quick and easy. cut a piece wide enough for all the strips, kerf it and then rip your strips. it's faster and all the pieces will be kerfed equally.

this piece is 3/4" MDF and rosewood veneer.. it has 9/16" kerfs every 1/2". the diameter is 24" (12" radius) and the final finish is semi-gloss.. no kerf is evident, the curve is smooth..

Image

PostPosted: Thu Aug 12, 2010 7:20 am
by GPW
You could laminate thin strips together around a form for the curved bits ... easy , no kerfing ... Strong and light too...

PostPosted: Thu Aug 12, 2010 7:58 am
by len19070
I've used this method a handful of times and it works well for me.

Image

Image

These photos are on a Stick built insulated wall but I have also done it on a solid plywood wall.

It worked out well on the nailers for the ceiling panel.

Happy Trails

Len

PostPosted: Thu Aug 12, 2010 8:37 am
by Juneaudave
I did it two ways...a solid steamed and laminated outside and a kerfed inside. The space between the two was used to slide in the headliner.

Image

PostPosted: Thu Aug 12, 2010 8:51 am
by GPW
JDave , that's pretty slick !!! ...also allows you to add the inner paneling and then just route in the groove for an exact fit .... very COOL !!! 8) 8) 8)

You can easily see where the laminated strip provides more wood for better strength ... the kerfed wood is only thick as the uncut wood , the rest is just dead weight/gluing surface ... I sometimes obsess about getting the maximum strength into a project , the little things being very important in the overall strength of the build ... Laminated is definitely the best way to go .... thin wood bends easily , and when fixed together , retains that shape ... Twice as thick is eight times as strong !!! :thinking:

PostPosted: Thu Aug 12, 2010 9:03 am
by planovet
I took 1x4 pieces and cut them to fit along the curve I wanted. I used biscuits and glue to lock them together and then used my template to cut the curve.

Image

Image

Image

PostPosted: Thu Aug 12, 2010 2:08 pm
by Miriam C.
Might be surprising but Marks way is probably the easiest. I did kerfs and it was fairly easy. Did the sharpest curves with a skill saw........

The biggest issue I had with kerfing is when I had a hairline crack in the wood. It showed in the pictures but couldn't see it by eye.

Image

I also put PL glue between the kerfs so it filled the gap and made it stronger. Just don't put kerfs where you intend a screw....

Image

PostPosted: Thu Aug 12, 2010 7:55 pm
by tcolar
Thanks, that works great.

I did start the cuts with the skill saw, although only half way as it's too "sensitive" and hard to judge how deep it goes.

I then finished the cut to the right depth with a hand saw (one with wide, double edge teeth)

Image