Page 1 of 1

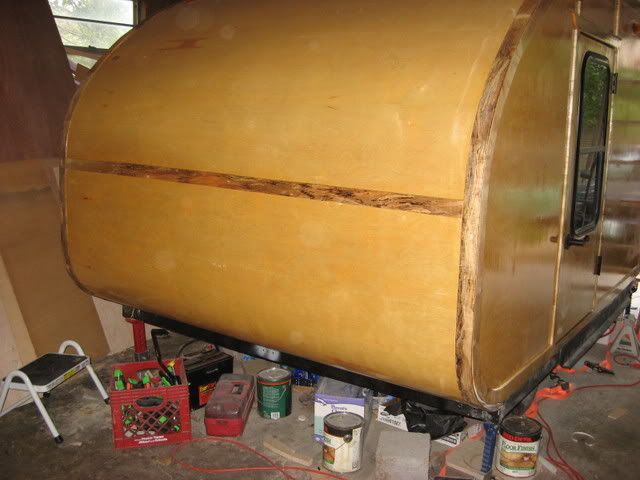
Dealing with seams in plywood

PostPosted: Wed Feb 09, 2011 1:11 pm
by DudKC
Image

I hope the above makes sense as it was crudely drawn, not to scale, and probably labeled poorly, but here goes with the question. That is a side view, as I see it in my head today of the front of the roof.

If I go with plywood, 1/8" thickness, I've read here that you want to double it up. Being from MO, with summer hailstorms a yearly occurence, I assume it is for strength in those situations. My tear will be 6' wide, making seams inevitable. I am thinking of using 4 x 8 ply, flipped longways, and running a spar under each seam, as I've read that is the proper method.

If I double up the ply, I should probably offset the seams a little right? What should I use to fill each seam (inner and outer)? Bondo seams :lol: to be a popular product here. If I sand the bondo that will likely get on the face of the ply, the wood will still take stain, right? Last question, should I mess with treating the inner layer of ply (with stain, varnish, cpes, etc.)?

Thank you for getting through this long post, any replies are greatly appreciated.

PostPosted: Wed Feb 09, 2011 1:39 pm
by DrCrash
Image
I can try to explain what I did on mine.

I cut my first layer of ply one spar short
so they would not overlap on a spar.

The first layer is just stapled and glued.

The second layer I taped fiberglass over the joint.
And smoothed off with bondo.

Hope this helps.

PostPosted: Wed Feb 09, 2011 2:00 pm
by Woodbutcher
I offset my seams on different spars, not the same one. I think your asking for trouble if you only stagger the seam a 1/2" or so. I would glue and staple down layer one. Then since you want to stain the outer layer you will have to glue and strap the second layer to keep it free of seeing fasteners. If you are doing a Woody style then you may consider covering the seam with a trim board allowing you to seal the seam real well under it. Bondo or wood filler is not going to stain, try to not use it where it will show.

PostPosted: Wed Feb 09, 2011 2:17 pm
by DudKC
Thanks for the replies guys. So I should alternate the spars that the seams are tied to, and by making say a 3" strap of 1/8" ply, and gluing it on the inside of the seam of the 2nd layer, I can avoid using a trim piece? I would think there would still be a need to fill the seam with some kind of filler...am I wrong about that? Would a dark enough stain hide a small line of wood filler?

PostPosted: Wed Feb 09, 2011 2:56 pm
by rbeemer
I think you are trying have the seams match up between the layers and that is not what you want.

If you put on the first layer from front to back you should put the second layer on from back to front this way your seams on the previous layer are fully covered by the top layer. It is the same principle for putting on roofing shingles on your house(you do not line up the edges of your shingle from one row to the next they are staggered)

Hope this makes sense

PostPosted: Wed Feb 09, 2011 3:02 pm
by Miriam C.
I treated every piece of wood I could get to! You do want to stagger your seams. If you want to stain you will want to use trim over the seam or get them really close and fiberglass. I did 1/8" for MO storms. If it gets a hole I will put on another layer and fiberglass over it! 8)

PostPosted: Wed Feb 09, 2011 3:11 pm
by DudKC
So for treating the wood, does everyone like CPES or is there a thriftier alternative that works well? I want the outside to be HARD, what would work best to achieve that?

PostPosted: Wed Feb 09, 2011 4:01 pm
by aggie79
Welcome DudKC,

If you insulate your roof and have your spars at around 12 inches on center, 1/8" plywood is really all you need, particularly if you epoxy the plywood and/or cover it with aluminum or other roof material.

I used a single layer only of 1/8" plywood, and it has supported my 200 pounds several time during construction (prior to the installation of the aluminum.) If you do go with a double layer, and your spars are 12" on center, rip the first sheet of the first layer down to 2 feet in width and then apply the other sheets the full 4 foot width. For the second layer, start with a full 4 foot width. This way your seams, other than your start and ending points, are staggered apart 2 feet.

Be sure to post pictures. What's your first name, by the way?

Take care, Tom

PostPosted: Wed Feb 09, 2011 4:06 pm
by DudKC
Tom,

The name is Dustin, I've enjoyed following your progress on the silver beatle, looks awesome. I have a build thread here http://mikenchell.com/forums/viewtopic.php?t=42426 where I have and will continue to post pictures. Sorry to hear about your accident a while back. Hope everyone is feeling fine and all the insurance companies are being cooperative. I've had to deal with that issue a few times so I know what you're going through. I have a few more pics in my album too. Thanks for the help!

PostPosted: Wed Feb 09, 2011 4:45 pm
by DudKC
If builders the quality of Miriam and Tom say 1 layer of 1/8" is good enough (w/ insulation) I will definitely consider it. How does the fiberglass in the seams work? I've never worked with it before, would I still strap the backside and do the fiberglass over the strap?

PostPosted: Wed Feb 09, 2011 8:13 pm
by Miriam C.
This is the best picture I have seen of fiberglass seams for a long time. I don't do fiberglass but if you are not wanting to use a trim over then this is what I would do.
http://tnttt.com/viewto ... 112#794112

Image

This is mine and I did not use fiberglass but did use marine epoxy and filled the edges good. You can use fiberglass over the trim too.

Image

PostPosted: Thu Feb 10, 2011 9:00 pm
by Miriam C.
If you would like more detailed information on some of the tips and tricks to building a td you can see if Steve F. is still selling his CD...
http://tnttt.com/viewtopic.php?t=26550