Side table edge trim?

Anything to do with mechanical, construction etc

Side table edge trim?

Postby BillZ » Sun Apr 24, 2011 9:17 pm

I am in the process of planning a side table for my tear.

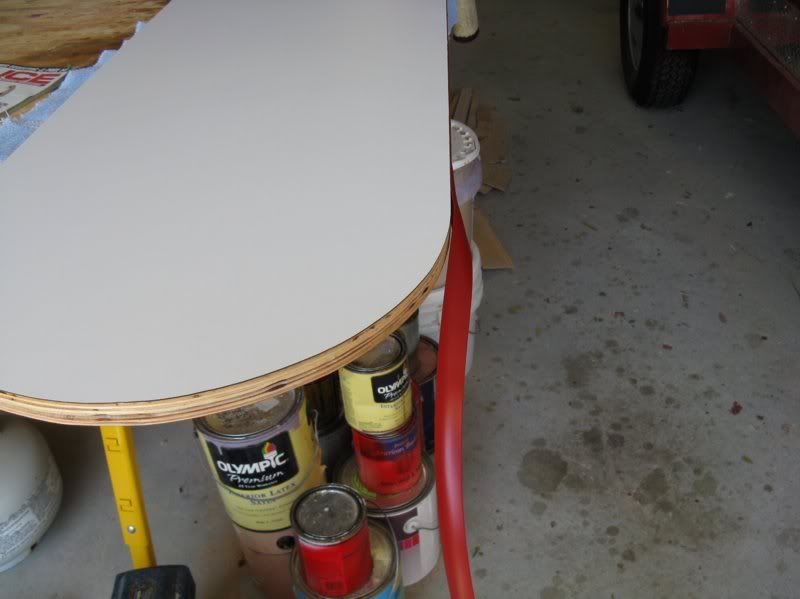
I want to use some left over 1/2" Baltic Birch for the table portion and need a trim to cover up the plys on the edge. The table will be curved at the end, not square, so it should be something that is flexible or can be formed.

The table will be wood finish to match the tear so painting is not an option... although I suppose I could paint just the edge. :thinking:

What have you guys done?
User avatar
BillZ
The 300 Club
 
Posts: 308
Images: 0
Joined: Tue Feb 16, 2010 7:39 pm
Location: College Park, Maryland

Postby GuitarPhotog » Sun Apr 24, 2011 9:52 pm

I used iron-on veneer strip when I built my printer table last year. Seems to be pretty durable, but my application is pretty light duty.

<Chas>
GuitarPhotog
Silver Donating Member
 
Posts: 1779
Images: 55
Joined: Tue Feb 08, 2011 12:52 pm
Location: Grants Pass Oregon

Postby halfdome, Danny » Sun Apr 24, 2011 10:06 pm

Build up the 1/2" with a 1/2" x 1" piece of Baltic Birch on all sides , sand smooth and finish it like the top. It will look just fine and hold up to camping. :D Danny
ImageImage
"Conditions are never just right. People who delay action until all factors are favorable do nothing". William Feather
Don't accept "It's Good Enough" build to the best of your abilities.
Image
Teardroppers Of Oregon & WashingtonImage
User avatar
halfdome, Danny
*Happy Camper
 
Posts: 5894
Images: 252
Joined: Sun Aug 14, 2005 11:02 pm
Location: Washington , Pew-al-up
Top

Postby GPW » Mon Apr 25, 2011 6:31 am

What about a nice Aluminum edge trim ... Kind of like Grandma's kitchen table ... old school ... but very durable ...
There’s no place like Foam !
User avatar
GPW
Gold Donating Member
 
Posts: 14920
Images: 546
Joined: Thu Feb 09, 2006 7:58 pm
Location: New Orleans
Top

Postby Nobody » Mon Apr 25, 2011 8:15 am

Everyone has different tastes/likes but, I don't find the exposed 'plies' to look all that bad when finished with a nice clear satin poly. I used scrap 3/4" birch ply for both my side table & the swing/fold away in my galley -

Image
Image
Image
Harvey -

- - - - - - - - - - - - - - - -

Doing the right thing ain't always easy but, . . . it's always right!
User avatar
Nobody
1000 Club
1000 Club
 
Posts: 1196
Images: 342
Joined: Wed Jan 25, 2006 1:09 pm
Location: Benton, Arkansas
Top

Postby schaney » Mon Apr 25, 2011 9:05 am

I go for the natural look, just sand smooth and seal. I like to use 3/8" Baltic Birch with a 1x1 edge support.

Image
Scott
Camping the "Compact Way"
Image
User avatar
schaney
500 Club
 
Posts: 804
Images: 262
Joined: Tue May 02, 2006 9:27 pm
Location: Salem, OR
Top

Postby planovet » Mon Apr 25, 2011 2:26 pm

ImageMark (& Cindi)
Visit our website: Little Swiss Teardrop

I was wondering why the water balloon was getting bigger... and then it hit me.

ImageImageImageImage
User avatar
planovet
The Cat Man
 
Posts: 5583
Images: 3
Joined: Tue Nov 27, 2007 4:48 pm
Location: Plano, Texas
Top

Postby BillZ » Mon Apr 25, 2011 11:33 pm

Thanks for the ideas, guys.

I am thinking I may just paint the edge to match the green trim on the Tear. Either that or go with a square table instead of a rounded one and trim with 1X1 around the edge, like Schaneys.

Nobody, I like how your table is supported to the camper. You don't have to adjust for uneven ground.

Schaney, where did you get your telescoping leg?


I think we need a sticky thread with all the side table designs in it. :thinking:
User avatar
BillZ
The 300 Club
 
Posts: 308
Images: 0
Joined: Tue Feb 16, 2010 7:39 pm
Location: College Park, Maryland
Top

trim

Postby 3822sean » Mon Apr 25, 2011 11:38 pm

depending on your radius you can rip wood down to 1/8 for tight radius and bend it,, 1/4 if you steam it,do some tests, rip down different thickness's and find out what size you need to use,ash is the best for bending you can get a 1/8 thickness to bend 3" radius
User avatar
3822sean
Teardrop Master
 
Posts: 183
Images: 37
Joined: Wed Dec 22, 2010 1:44 pm
Location: SO CAL,BELLFLOWER
Top

Postby gregp136 » Tue Apr 26, 2011 9:51 am

We used Aluminum trim around ours.
Image

Greg (and Laurie)
Image
User avatar
gregp136
The 300 Club
 
Posts: 329
Images: 100
Joined: Sun Jan 03, 2010 8:11 am
Location: West Allis, Wisconsin
Top

Postby bobhenry » Tue Apr 26, 2011 9:56 am

BillZ wrote:Thanks for the ideas, guys.

I am thinking I may just paint the edge to match the green trim on the Tear. Either that or go with a square table instead of a rounded one and trim with 1X1 around the edge, like Schaneys.

Nobody, I like how your table is supported to the camper. You don't have to adjust for uneven ground.

Schaney, where did you get your telescoping leg?


I think we need a sticky thread with all the side table designs in it. :thinking:


One used aluminum crutch

Image

Image

Image
Growing older but not up !
User avatar
bobhenry
Ten Grand Club
Ten Grand Club
 
Posts: 10368
Images: 2623
Joined: Fri Feb 09, 2007 7:49 am
Location: INDIANA, LINDEN
Top

Postby bobhenry » Tue Apr 26, 2011 11:00 am

Growing older but not up !
User avatar
bobhenry
Ten Grand Club
Ten Grand Club
 
Posts: 10368
Images: 2623
Joined: Fri Feb 09, 2007 7:49 am
Location: INDIANA, LINDEN
Top

Postby planovet » Tue Apr 26, 2011 4:36 pm

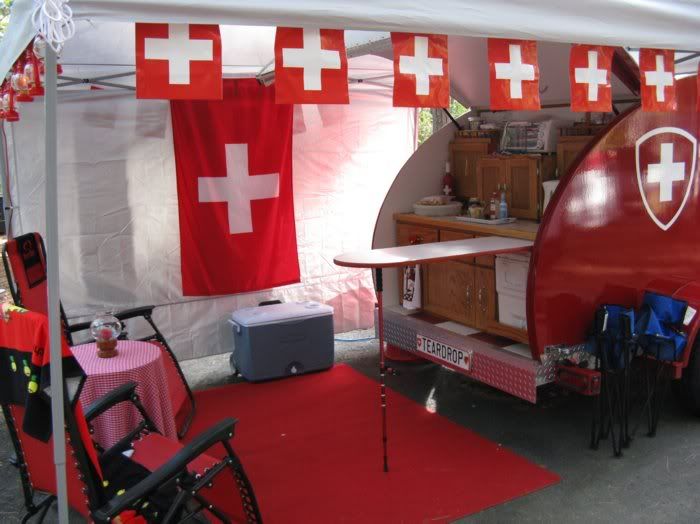
I used an adjustable aluminum walking stick for my table leg. Easily adjustable. :thumbsup:

Image
ImageMark (& Cindi)
Visit our website: Little Swiss Teardrop

I was wondering why the water balloon was getting bigger... and then it hit me.

ImageImageImageImage
User avatar
planovet
The Cat Man
 
Posts: 5583
Images: 3
Joined: Tue Nov 27, 2007 4:48 pm
Location: Plano, Texas
Top

Postby schaney » Tue Apr 26, 2011 6:33 pm

Bill, I make my own and offer a kit, they are made with marine aluminum tubing and HW. Check them out at Side Table Supplies

Image
Scott
Camping the "Compact Way"
Image
User avatar
schaney
500 Club
 
Posts: 804
Images: 262
Joined: Tue May 02, 2006 9:27 pm
Location: Salem, OR
Top


Return to Teardrop Construction Tips & Techniques

Who is online

Users browsing this forum: No registered users and 9 guests