How I made Curved Framing
I got a PM asking how I made the curves I used for the front framing on the Boxcar. I thought I'd post as I hadn't seen a thread on curved framing when I made mine.
I started with a template of the front curve and 1"x4"s, my goal was for a curved 1"x2". I scribed a line about 1/2" from the edge of the board as a reference. First I aligned the edge of the board with the template so that the edge was close to the scribe line along the length of the board. The start of the curve is fairly straight so it was easy to move the board around and get the best fit. I have the board turned upside down in the picture so you can see the line.
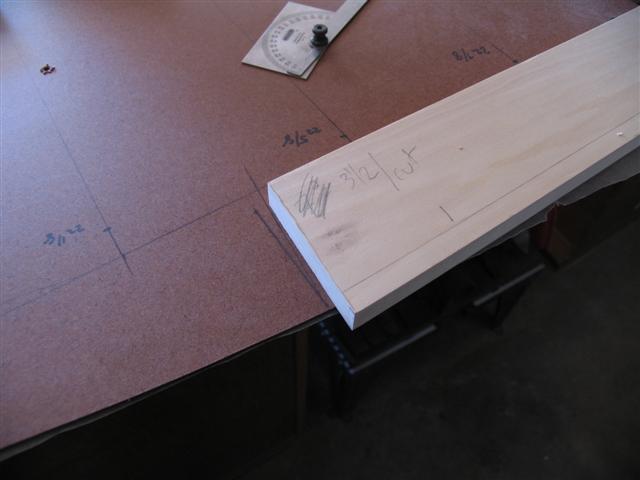
Once I was happy with how the board was lined up I cut the board perpendicular to the edge. The idea is to cover as much of the template with board as you can, then cut it to length.
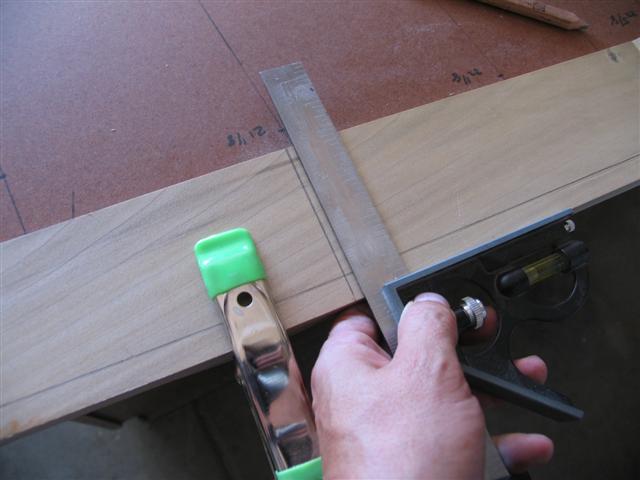
Then I took the next board, lined the scribe line up with the template and angled it so it would follow the curve. I measured the angle between the boards with a protractor. Divide the angle by two and cut both boards at that angle.
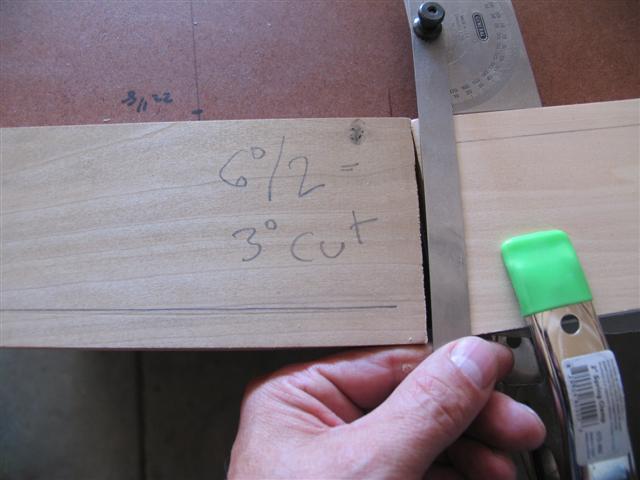
Keep cutting boards and follow the template around till you've got your curved board. I marked each piece so I knew how it would go together when I took it apart. The sharper the curve, the shorter the board needs to be cut.
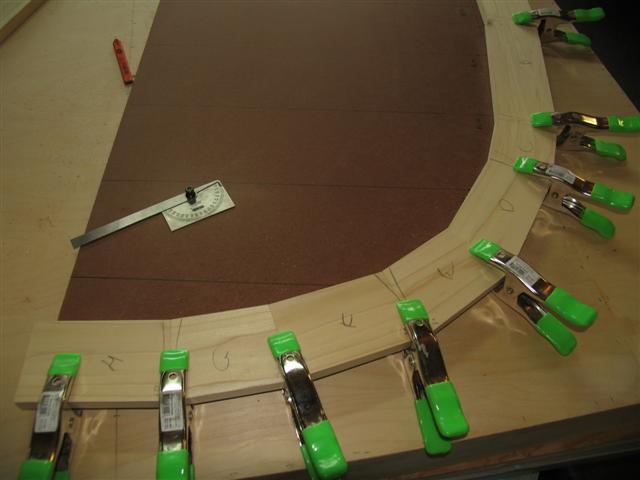
My template was too floppy to hold the pieces while gluing so I transferred the pattern to some scrap plywood and used it to keep the boards straight while the glue dried. I put wax paper under the curve so it wouldn't stick to the plywood. I used biskets on the joints for strength after I dropped one that was only glued and it feel apart.
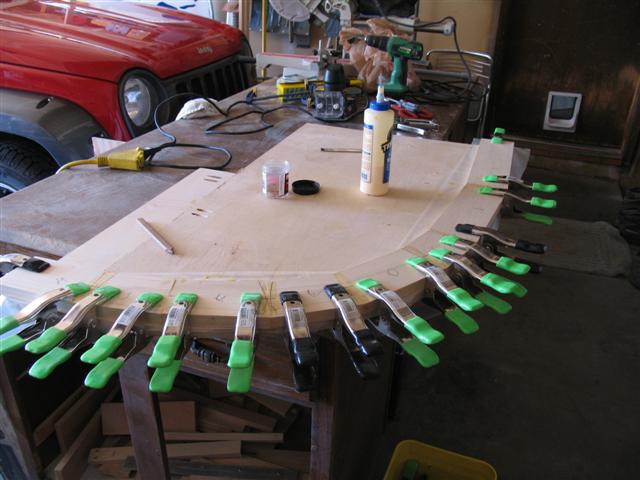
I used a router with a flush trimming bit to cut the outside curve. Then I used the template to trace the curve on the boards and a sabre saw to make the inside cut.
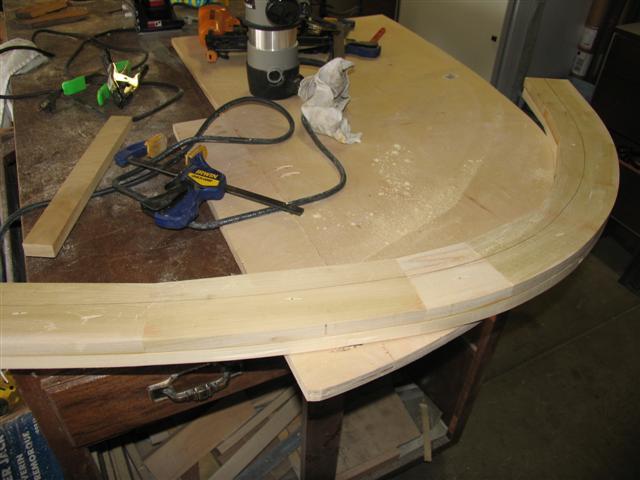
I made 4 of these as I stacked two together to make it 2"x2". I turned my 1x2" framing on its side for a thicker wall so the curve needed to be thicker.
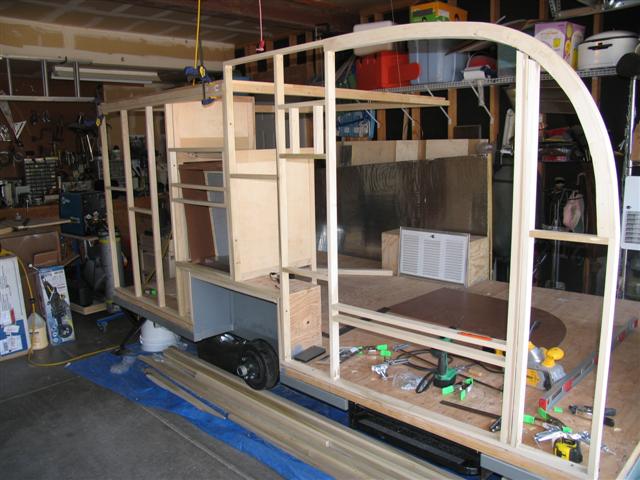
Hope this helps, maybe somebody can post if there's an easier way to do it as I kind of made it up as I went. You might wonder why I didn't use plywood and skip all this work (like I just did after a couple of years has gone by). It was so the board was the same thickness as my insulation. I bet I could have laminated a couple of pieces of 3/4" plywood with an 1/8" to get the right thickness.
Bruce
I started with a template of the front curve and 1"x4"s, my goal was for a curved 1"x2". I scribed a line about 1/2" from the edge of the board as a reference. First I aligned the edge of the board with the template so that the edge was close to the scribe line along the length of the board. The start of the curve is fairly straight so it was easy to move the board around and get the best fit. I have the board turned upside down in the picture so you can see the line.
Once I was happy with how the board was lined up I cut the board perpendicular to the edge. The idea is to cover as much of the template with board as you can, then cut it to length.
Then I took the next board, lined the scribe line up with the template and angled it so it would follow the curve. I measured the angle between the boards with a protractor. Divide the angle by two and cut both boards at that angle.
Keep cutting boards and follow the template around till you've got your curved board. I marked each piece so I knew how it would go together when I took it apart. The sharper the curve, the shorter the board needs to be cut.
My template was too floppy to hold the pieces while gluing so I transferred the pattern to some scrap plywood and used it to keep the boards straight while the glue dried. I put wax paper under the curve so it wouldn't stick to the plywood. I used biskets on the joints for strength after I dropped one that was only glued and it feel apart.
I used a router with a flush trimming bit to cut the outside curve. Then I used the template to trace the curve on the boards and a sabre saw to make the inside cut.
I made 4 of these as I stacked two together to make it 2"x2". I turned my 1x2" framing on its side for a thicker wall so the curve needed to be thicker.
Hope this helps, maybe somebody can post if there's an easier way to do it as I kind of made it up as I went. You might wonder why I didn't use plywood and skip all this work (like I just did after a couple of years has gone by).
 It was so the board was the same thickness as my insulation. I bet I could have laminated a couple of pieces of 3/4" plywood with an 1/8" to get the right thickness.
Bruce


