My version of back hatch supports
For those of you who don't know, I purchased my Tear from forum member B. Bodemer early this spring. My wife and I have thoroughly enjoyed taking it camping.
After spending some time in the tear, we decided on a few changes and additions to this wonderful teardrop to customize it for ourselves.
One thing I want to do is build wooden drawers and bottom cupboards in the galley. But before I did, I needed to change the hatch supports so they wouldn't be in the way. After consulting this forum many times, I came up with a fairly simple design that I think will work for us.
This tear is very well made and designed so I took as much care as my meager talents could muster and tried to make something that followed the look of the tear and also could be removed without too much trouble in case it turned out that we didn't like it.
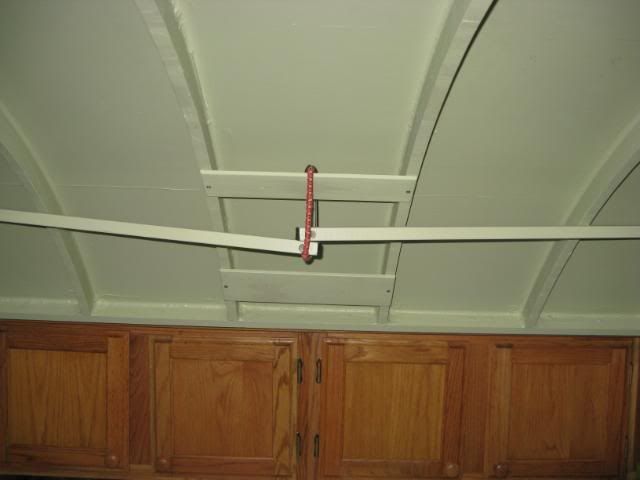
Original broomstick supports:
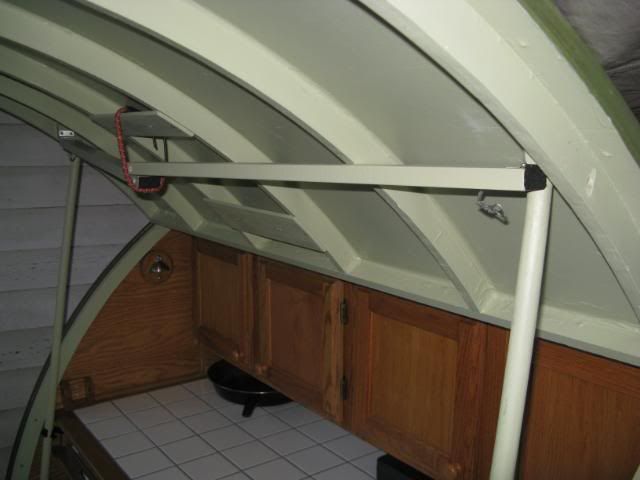
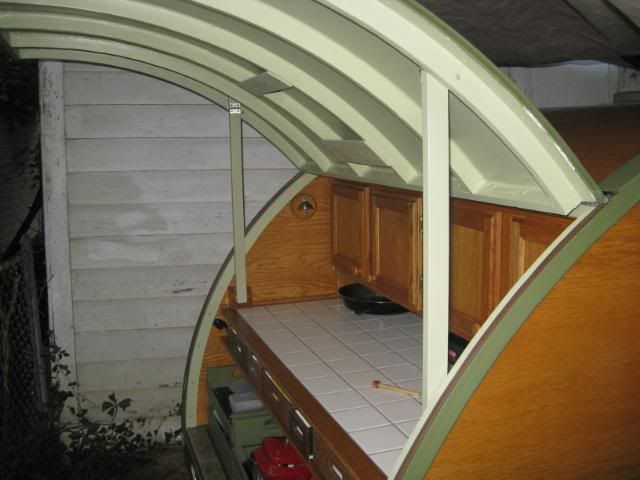
My wife is not blessed with upper body strength and she had some trouble with holding the hatch open and installing the broom handles by herself so I decided to go with a hinged design that hinges at the top. When the hatch is opened, the supports can swing down and fall pretty much in place. Out of a scrap piece of red oak 1X I made "receivers" with a pin to hold the uprights in place.
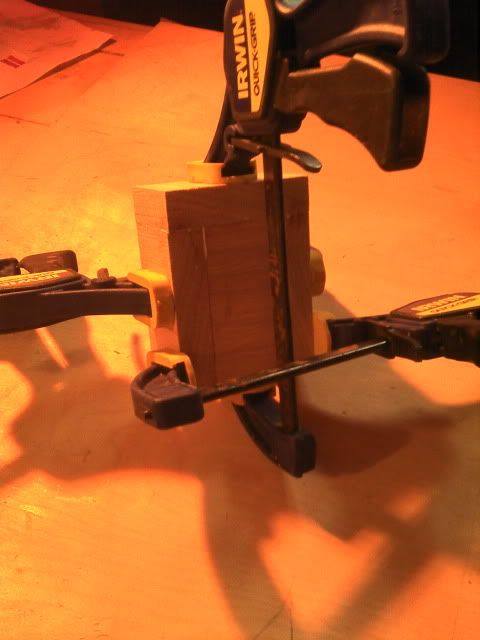
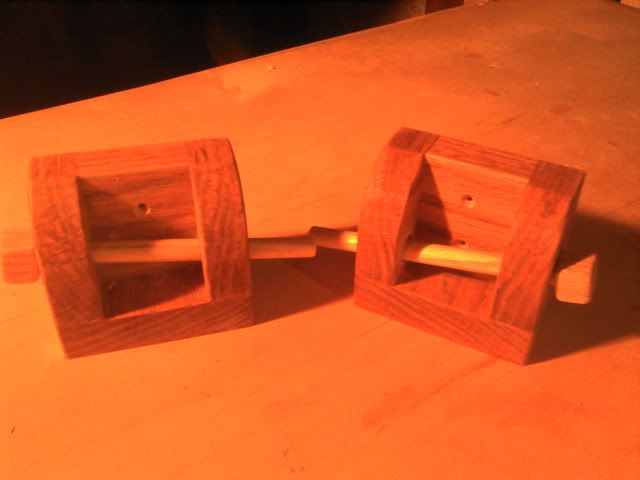
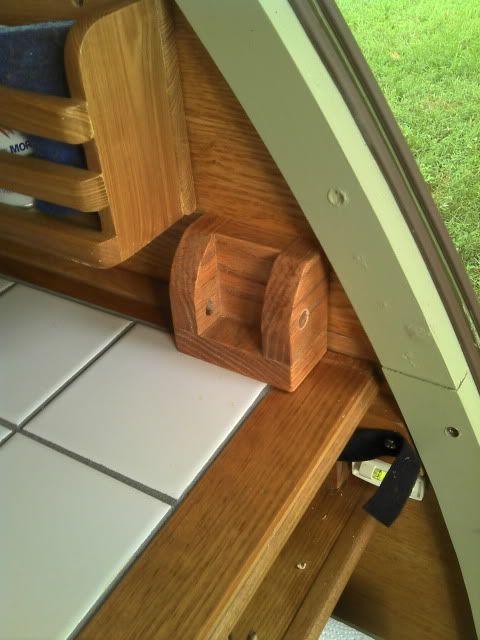
The receivers sit on the counter and 2 #6 screws attach it to the wall. This pic shows the receiver in place before being screwed to the wall.
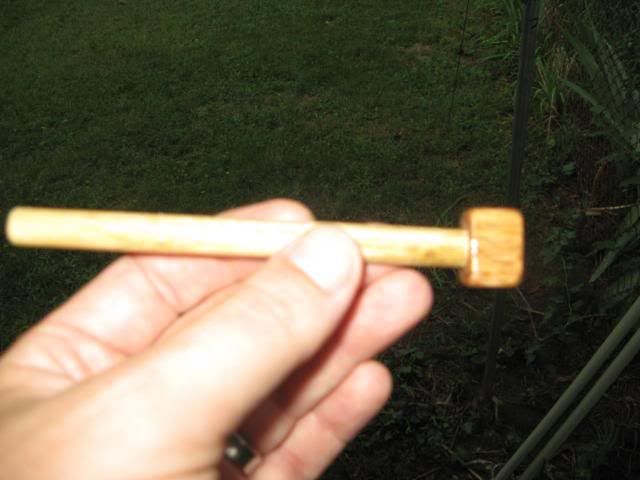
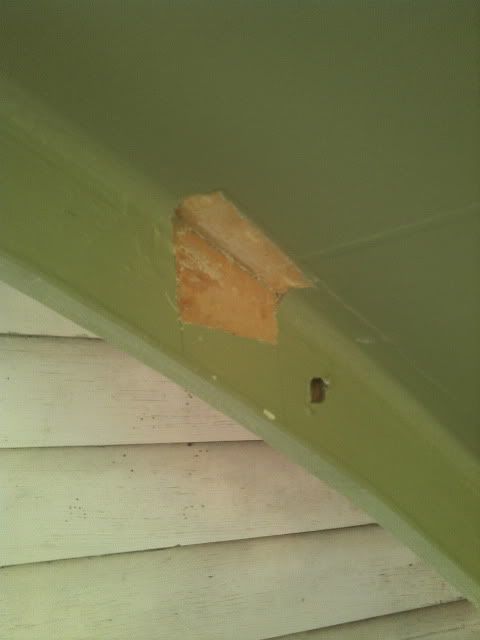
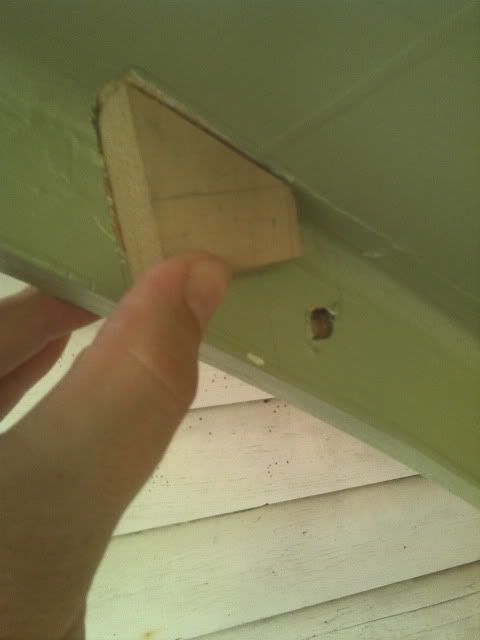
I then used a scrap piece of solid maple 1x2 for the uprights. I cut the angle at the top end to match the curve of the hatch, cut to the length that I wanted, then took a small portion off the top to attach to the hatch. This small piece is the only permanent addition to make this design work and it would be hardly noticeable if we decided to not use it in the future. I removed the paint and primer at the point of contact and glued it to the spar so all the pressure of contact would not be on the 1/4" hatch skin.
Then I painted the uprights and finished the receivers and pins to match the rest of the galley and attached the uprights to the top support with a simple hinge.
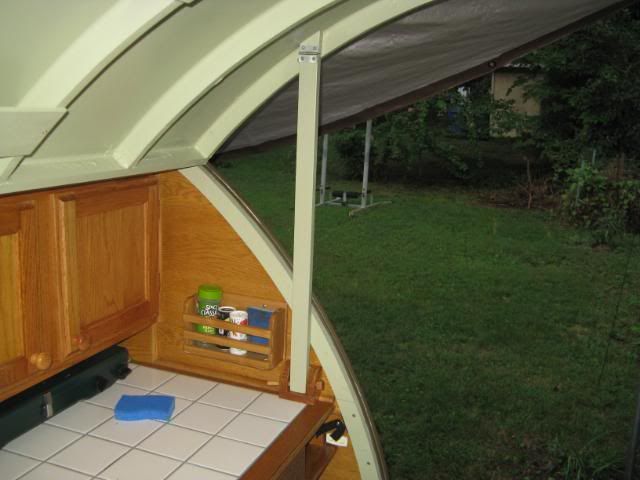
I haven't yet worked out a permanent way to hold the supports when the hatch is down. right now, they are just held up with a bungee on the crosspiece you can see in the center of the hatch. Oh, and I plan to leash the pins with some type of string or wire so they stay near the receivers.
After spending some time in the tear, we decided on a few changes and additions to this wonderful teardrop to customize it for ourselves.
One thing I want to do is build wooden drawers and bottom cupboards in the galley. But before I did, I needed to change the hatch supports so they wouldn't be in the way. After consulting this forum many times, I came up with a fairly simple design that I think will work for us.
This tear is very well made and designed so I took as much care as my meager talents could muster and tried to make something that followed the look of the tear and also could be removed without too much trouble in case it turned out that we didn't like it.
Original broomstick supports:
My wife is not blessed with upper body strength and she had some trouble with holding the hatch open and installing the broom handles by herself so I decided to go with a hinged design that hinges at the top. When the hatch is opened, the supports can swing down and fall pretty much in place. Out of a scrap piece of red oak 1X I made "receivers" with a pin to hold the uprights in place.
The receivers sit on the counter and 2 #6 screws attach it to the wall. This pic shows the receiver in place before being screwed to the wall.
I then used a scrap piece of solid maple 1x2 for the uprights. I cut the angle at the top end to match the curve of the hatch, cut to the length that I wanted, then took a small portion off the top to attach to the hatch. This small piece is the only permanent addition to make this design work and it would be hardly noticeable if we decided to not use it in the future. I removed the paint and primer at the point of contact and glued it to the spar so all the pressure of contact would not be on the 1/4" hatch skin.
Then I painted the uprights and finished the receivers and pins to match the rest of the galley and attached the uprights to the top support with a simple hinge.
I haven't yet worked out a permanent way to hold the supports when the hatch is down. right now, they are just held up with a bungee on the crosspiece you can see in the center of the hatch. Oh, and I plan to leash the pins with some type of string or wire so they stay near the receivers.