Teardrops n Tiny Travel Trailersor t n ttt for short (tnttt.com) |
Securing the roof
10 posts
• Page 1 of 1
Securing the roof
![]() by Forrest747 » Thu Jan 12, 2012 5:10 pm
by Forrest747 » Thu Jan 12, 2012 5:10 pm
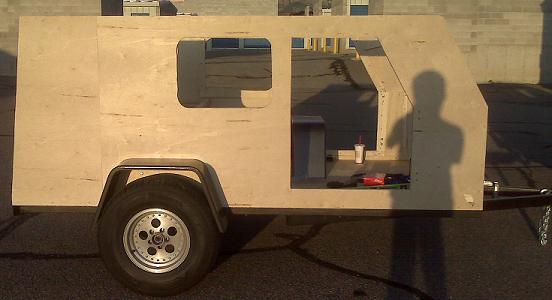
I have question about securing the roof. I plan on putting a bead of PL adhesive along the spars and wall joints. The spars are about every 12 inches or so. The roof is also flat from the front to the back. So i was wondering can I just screw it around the perimeter where the walls meet the roof. the roof will be 3/4 inch
"All the success on the trail can not compensate for having square headlights"
"I've got a fever and the only prescription is more cowbell!"
http://www.tnttt.com/viewtopic.php?f=50&t=37701 Build Journal
"I've got a fever and the only prescription is more cowbell!"
http://www.tnttt.com/viewtopic.php?f=50&t=37701 Build Journal
-

Forrest747 - Cowbell Donating Member
- Posts: 1327
- Images: 447
- Joined: Mon Apr 06, 2009 3:40 am
- Location: West Valley Utah, Utah
Re: Securing the roof
![]() by jonw » Thu Jan 12, 2012 5:37 pm
by jonw » Thu Jan 12, 2012 5:37 pm
Forrest747 wrote:I have question about securing the roof. I plan on putting a bead of PL adhesive along the spars and wall joints. The spars are about every 12 inches or so. The roof is also flat from the front to the back. So i was wondering can I just screw it around the perimeter where the walls meet the roof. the roof will be 3/4 inch
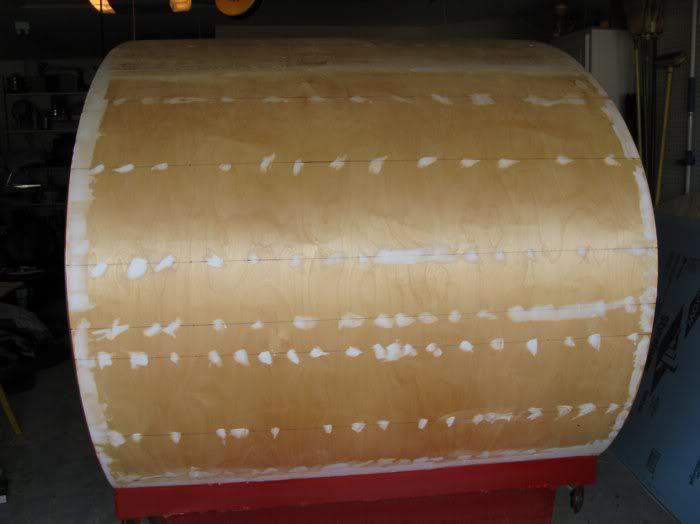
That's basically what I did on mine, although my roof is just a sheet of aluminum. Just figure out a mechanism for clamping/pressing the roof to the spars until the glue dries.
I used wedges underneath bar clamps. Another method is to use a few screws to hold it down and then remove and fill in the screw holes (or just leave them in depending upon what look you are going for). The only issue with this method is the potential for introducing leaks.
Good luck!

-

jonw - Titanium Donating Member
- Posts: 525
- Images: 163
- Joined: Thu Oct 22, 2009 6:22 pm
- Location: Marlboro, Mass.


 Mark (& Cindi)