Page 1 of 2
Pin Holes in my Finish

Posted:
Thu Mar 15, 2012 8:06 pmby PSBreen
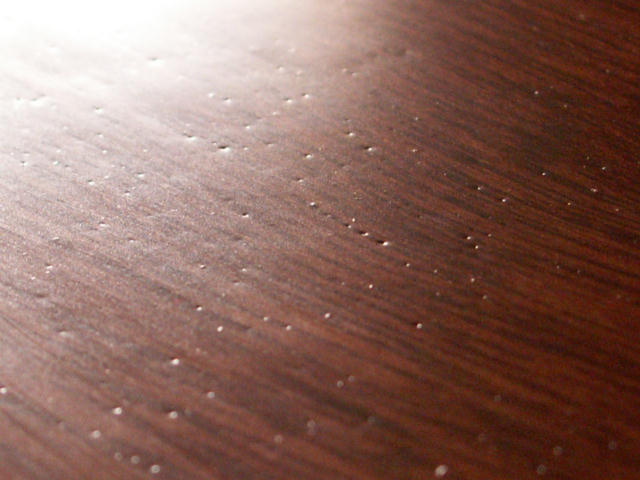
I'm not sure where I went wrong, but I've got pin-holes in my clear finish.
1. Applied the stain and let it dry for 2 days.
2. Applied the 1st coat of Minwax Helsman Semi-Gloss Spar Urethane with a brush and let it dry overnight.
3. Sanded with 220 grit. Wiped with a dry rag. Wiped with a tack cloth. Applied 2nd coat.
4. 3rd coat same as the 2nd.
Anyone have any ideas on what would cause this and if there is a way to fix it short of sanding it all off and starting over? This is driving me crazy.

Thanks.
Re: Pin Holes in my Finish
Posted:
Thu Mar 15, 2012 8:59 pmby Oldragbaggers
Did you shake the can, or stir it too fast? Sometimes air bubbles in the varnish will cause pin holes like that.
Re: Pin Holes in my Finish
Posted:
Thu Mar 15, 2012 10:22 pmby PSBreen
I guess it's possible, but I don't think I did. There pin-holes over every square inch of both sides.
Re: Pin Holes in my Finish
Posted:
Thu Mar 15, 2012 10:27 pmby GuitarPhotog
Did you notice pinholes in the earlier coats? If so, I think it's probably brush bubbles, I had trouble with them when I used a foam brush with some urethane one time.
If it's just in the top coat, can you put on one more thin coat to fill the holes?
<Chas>
Re: Pin Holes in my Finish
Posted:
Thu Mar 15, 2012 10:36 pmby PSBreen
Found this: And on close-grain woods where no filler is used a first coat of varnish which is too thick will cause pin-holes to appear. The thick varnish fails to penetrate into the wood cells. The first coat of varnish should be thinned with about 25% of pure turpentine, for first coat only.
Looks like I should have thinned my spar urethane. Yes the holes are in all coats. Any ideas on how to fix it?
Re: Pin Holes in my Finish
Posted:
Fri Mar 16, 2012 12:35 amby tonyj
You will probably hate to hear this, but 3 or 4 coats may not be enough.
Every time you sand and re-coat, you are adding a very thin film to the surface that follows the surface of the previous coat. If that previous coat has any surface irregularities ( whether caused by dust, sweat, wax, solvent), they will show until they are flattened or filled. It might take six or eight coats, if you are lucky, to fill the deepest of those irregularities.
But take heart: from 6 or 8 feet, no one but you will be able to spot those irregularities unless the lighting conditions are right.. Or else, plan on more scraping, sanding and finishing.
No one, I repeat, no one (except me) will inspect your finish on an inch by square inch basis to look for defects.
The first trip will produce more defects and rock chips than the problems you are seeing. Stand back and inspect your work fom 10 feet with your eyes squinted and decide if you need to do more finish work.
Re: Pin Holes in my Finish
Posted:
Fri Mar 16, 2012 8:32 amby Forrest747
I see every brush stroke and flaw in my cherry. used the same stuff you did. although i used a cheap brush, not the foam kind and did 2 coats. I know if Tony ever sees my trailer he will break out the magnifying glasses and write a lengthy report on all my flaws. then we will tie him up burn the report and not let him have dessert. So just think about it Tony do you want the cobbler? Do ya?
Most people will not notice and you can always say we planned it that way.
Re: Pin Holes in my Finish
Posted:
Fri Mar 16, 2012 8:44 amby absolutsnwbrdr
I got some of the same issue when I applied the spar urethane to my exposed oak roof spars. Even got some bubbles. Sanded them away and kept applying coats. I think I did 4 coats and was satisfied.
Re: Pin Holes in my Finish
Posted:
Fri Mar 16, 2012 8:51 amby Oldragbaggers
You're right about the thinning. I use the Helmsman spar varnish on all my boat work. I usually do the first coat thinned 50/50. The second coat 25% thinner and subsequent coats (usually 2) full strength. I bought a couple empty paint cans at Home Depot and I keep the two thinned mixtures on hand all the time. I always get a beautiful finish with it. It is my preferred wood finish.
Re: Pin Holes in my Finish
Posted:
Fri Mar 16, 2012 9:21 amby tonyj
Forrest747 wrote:I see every brush stroke and flaw in my cherry. used the same stuff you did. although i used a cheap brush, not the foam kind and did 2 coats. I know if Tony ever sees my trailer he will break out the magnifying glasses and write a lengthy report on all my flaws. then we will tie him up burn the report and not let him have dessert. So just think about it Tony do you want the cobbler? Do ya?
Most people will not notice and you can always say we planned it that way.
YES, I WANT THE COBBLER!!!
(And I never write reports--that would just tempt to finish gods to get even with me--I just stand off to the side and quietly snicker.

)
And I will ditto what others have said, thinning helps immensely. Depending on what finish I am trying to achieve, I will thin poly anywhere from 25-50%, and put on numerous thin coats.
Re: Pin Holes in my Finish
Posted:
Fri Mar 16, 2012 9:45 amby Forrest747
Ok you can have cobbler.
Never thought about keeping thinned ureathane in seperate can. Do you have to mix it after it has sat for a while. I have never thinned ureathane so not sure about it.

One thing i did taht was stupid is the back of the shelves i put cherry paneling but i went verticle with the grain unlike the horizontal on teh rest of the interior.
Re: Pin Holes in my Finish
Posted:
Fri Mar 16, 2012 11:13 amby Larry C
PSBreen wrote:I'm not sure where I went wrong, but I've got pin-holes in my clear finish.
1. Applied the stain and let it dry for 2 days.
2. Applied the 1st coat of Minwax Helsman Semi-Gloss Spar Urethane with a brush and let it dry overnight.
3. Sanded with 220 grit. Wiped with a dry rag. Wiped with a tack cloth. Applied 2nd coat.
4. 3rd coat same as the 2nd.
Anyone have any ideas on what would cause this and if there is a way to fix it short of sanding it all off and starting over? This is driving me crazy.
Thanks.
Might want to do a search about what others have to say about Minwax Helmsman....
Re: Pin Holes in my Finish
Posted:
Fri Mar 16, 2012 12:19 pmby StPatron
Oldragbaggers wrote: I use the Helmsman spar varnish on all my boat work.
I always get a beautiful finish with it. It is my preferred wood finish.
Same here, Becky. Have used it for as long as I can remember on multiple boats and stripper kayaks, never had any problems with it. I recently used it to protect the exterior epoxy finish on DD, wouldn't have done that if I didn't have full faith in it based on years of experience. I'm still getting a kick out of that article claiming failure of the evil Minwax in a matter of weeks!
PSBreen: I had some "disappointments" during my build. Finishes that weren't perfect, etc. When I weighed the options, I opted for being campable rather than a blue-ribbon winning museum showpiece. No one can make that call but you. It all depends on your priorities and whether it's something you can do or re-do at a later time.
Re: Pin Holes in my Finish
Posted:
Fri Mar 16, 2012 12:35 pmby absolutsnwbrdr
StPatron wrote:I had some "disappointments" during my build. Finishes that weren't perfect, etc. When I weighed the options, I opted for being campable rather than a blue-ribbon winning museum showpiece. No one can make that call but you. It all depends on your priorities and whether it's something you can do or re-do at a later time.
Same here. My paint is not perfect. In fact its far from it. When rolling on the silver hammered textured paint, the roller decided to shed like none other. Looks nice from about 15 feet away though. To each his own, but remember: its a camper and it will get dirty. Unless you are restoring a museum time piece, the imperfections will be overlooked by everyone but yourself. Don't sweat the small things or you'll go crazy. Just learn from the "mistakes".
There is a reason that there aren't too many close-up pictures of my build.


Re: Pin Holes in my Finish
Posted:
Fri Mar 16, 2012 3:04 pmby parnold
If that was a paint job on an automobile, I would say solvent pop. Not enough time allowed for the previous coat to dry.
If you can still smell the varnish, it is not dry. Sanding it down, to give a surface for the next coat to "grip" actually will expose the inner surface that is not dry. It dries from the outside in, so you should allow time after your sanding before applying more varnish. Of course my thoughts, and others are easily tested on some scraps of wood, so that you know the correct way to get the end result you are looking for. If I were you, I would be experimenting and testing so you don't have more time spent, and more disappointment.