Attaching aluminum skin
Hi everyone, I have an old pop-up camper that I'm rebuilding. I have a question: what is the best way to attach aluminum to the sides?
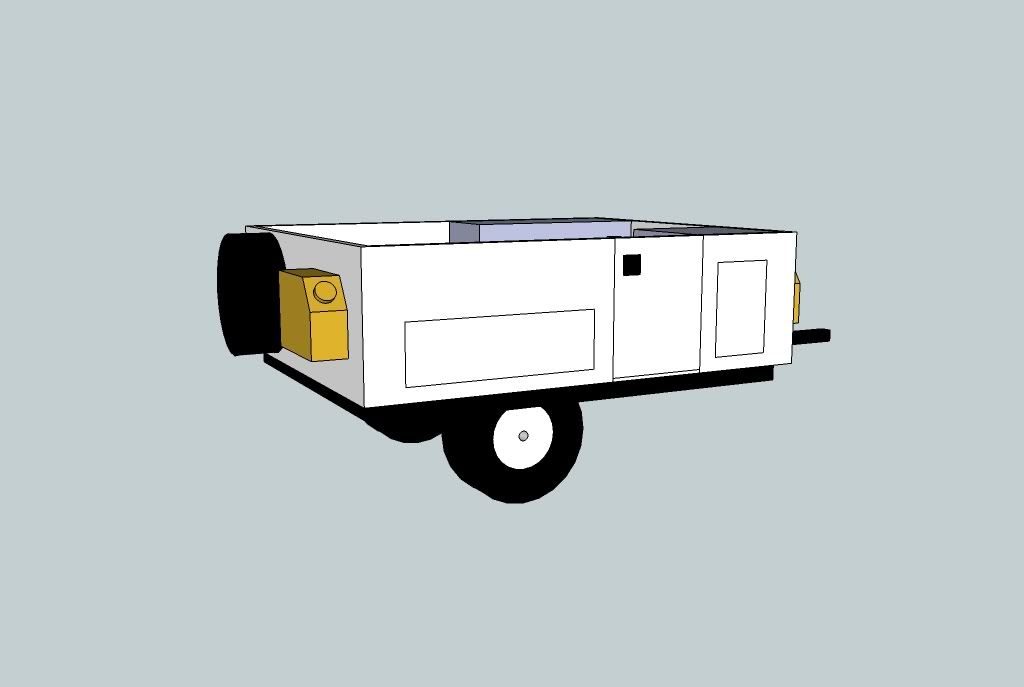
The sides are 1/2" CDX ply with 1/2 studs inside for support. I am planning on using aluminum angle at the edges and along hatch openings.
Here's a pic of the general structure
Do I only need to attache at the edges and at doors? Should I use an adhesive as well? What about 3M 5200 since it provides some flex?
Appreciate the info. I've worked really hard and would hate for the aluminum to buckle or bow with expansion.
Just so you know, I'm planning to prime and paint the sides w/ roll on bed-liner so I have some forgiveness there.
Thanks!
