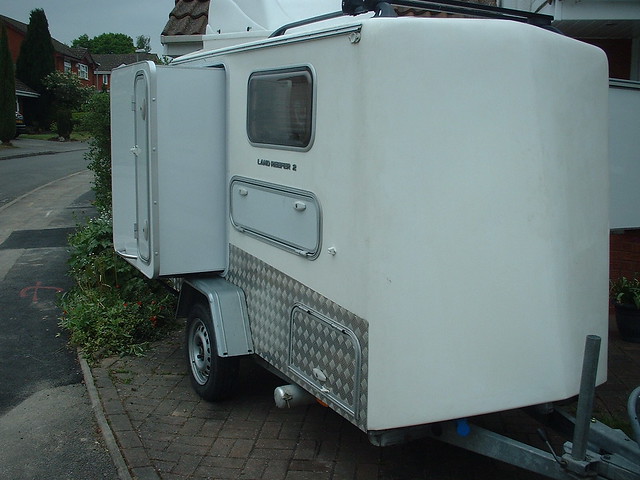
While it is fresh in my mind, I thought I would pass on my experiences with fiberglassing tape on my weekender. I used CPES to seal all the skins so I only used fiberglass tape on all my edges and joints. My skins are 1/4" plywood on the top and ends and 3/4" plywood on the sides. I used 4" tape with 6 oz weight and an Aeromarine 300/21 epoxy system. I'm not saying that this is the textbook method, but it worked for me.
Preparation:
1. Sand all areas to be glassed and radius all sharp (90 degree) corners. I used a belt sander to knock down the corners to about a 1/2" radius and a vibrator sander to make them smooth. Fill and sand smooth any larger holes like screw head holes or major flaws in the wood that will fall under the tape. Make sure your filler is compatible with your epoxy system.
2. Lay out the tape lines by drawing with a straight edge where both edges of the tape will run. I simply measured over 2" from the centerline of each joint and used a long straightedge to draw the lines. These lines will help immensely when you are lining up your tape with the very short set time on your epoxy.
3. Cut your tape to length and pre-position each piece near where it will be laid. Decide ahead of time how the tape will intersect at joints. Don't try to make the lengths too long since your working time with the epoxy will be very limited. Do not overlap the tape. All joints should be butted as close as possible without overlapping.
4. Gather up all your materials (note that most of these should be disposable since they will be ruined by the epoxy):
Clear 12 oz plastic cups - you can get these cheap at most dollar stores
Wood stir sticks - you can find these in the hobby departments of places like Walmart or Hobby Lobby
Rubber gloves - I use nitrile gloves from Harbor Freight. These hold up better to the epoxy but they will still melt after extended use.
Chip brushes - don't waste your good brushes since they will be ruined by the epoxy.
4" high density foam rollers - I found the ones made by Whizz and sold at Lowes to hold up well to the epoxy.
Plastic containers for holding the mixed epoxy while applying. I used the larger square Ziploc containers big enough to dip the 4" foam roller.
Measuring cup graduated in ounces.
Drop cloth
Mixing the epoxy:
Read the instructions well before starting. They all vary a little. Note that the working time with the epoxy shortens drastically as the temperature goes up. I did all my work early in the mornings when the ambient temp was about 75 degrees. That still only gave me about 20 minutes to work. Most epoxies use a 2:1 ratio of resin to hardener. I started out with small batches of 6 oz. Use the measuring cup to measure 4 oz and 2 oz of water into separate plastic cups. Use a Sharpy to mark the level of the water making sure it is on a level surface. Empty the water and dry the cups. Aeromarine recommends the two cup method for mixing and I used this method. Pour the resin and hardener in their respective cups to the line you have previously drawn and then pour into a single mixing cup. Use two clean sticks to scrape all the thick liquid from the cups and keep those sticks separate for the next batch (it helps to mark them to distinguish resin from hardener). Use a third clean stick for stirring the mix. My instructions called for 2 minutes of stirring and then pouring that mixture into a clean cup and two more minutes of stirring. I cheated a little and only stirred each cup more briskly for about 1 1/2 minutes. Then pour the final mix into the Ziploc work container. Dispose of the final mixing cup, but keep the first mixing cup and stir stick for the next batch.
Laying the glass tape:
This is the part that frustrates most builders. I started with my longest piece of about 56" and used the chip brush to liberally wet down the entire area between the previously drawn lines. I then laid the tape alongside the area and placed it in the wetted area working from one end to the other and keeping the edge on the line that I had drawn. This is the nasty part because you have to use your gloved hand to press the tape into the wet area and get it as wet as you can as you go. After getting the entire length pretty well bedded, I changed to clean gloves to keep from getting the epoxy on all my other tools. I then used a 2" chip brush to apply a liberal coat onto the tape with an up and down blotting type action (not side to side like you would to paint). Keep applying and blotting the epoxy until the tape "disappears" and appears to become the same color as the wood beneath it. If you see the white of the tape, it is not wetted enough. After the tape is thoroughly wetted, use the roller to smooth out the epoxy and "feather" it out beyond the edges of the tape. I rolled out about four inches beyond the edge of the tape, first with a light perpendicular motion to spread the epoxy and more firm parallel motion to feather the outer edges. Don't apply a lot of pressure directly on top of the tape as this may tend to pull it up. This is a little more difficult on a vertical surface, but the same technique applies. One thing to note when working vertically is to keep the handle of the brush higher than the bristles as the epoxy will run down the handle very quickly. After rolling out the edges you will note little air bubbles throughout the rolled area. The final step will be to "tip" that area by dragging the chip brush very lightly in a parallel (to the tape) motion from one end to the other and throughout the wetted area. Two things to note here: the rolled edge of the tape will remain proud and will sand easily later. Also, on the vertical surfaces, regardless of how much you roll out the edges, there will be a small sag line as gravity pulls the wet epoxy down before it fully sets up. Don't worry about these as they will sand down easily on your next pass. Overall, I found that 6 oz was about all I could work before it started setting up and that covered about 100 inches of tape. If you feel the mix getting hot in the container it is time to discard and start a new batch.
Sanding:
(Caution - use a good, tight dust mask for this operation; not one of the loose cheapo paper types) After the epoxy has fully hardened(see instructions), you can start sanding. I used a 1/4 sheet vibrator sander and lots of sandpaper. I found the 3M sheets with 100 (medium) grit to give the best performance in both knocking down the high spots and leaving a fairly smooth surface. I started by running the sander over a section of tape with the pad flat and level. This will knock down the high spots and define the edges that need to be feathered. Be very careful to keep the sander away from the sharp corner at the centerline of the tape. Do not apply the sander directly to the sharp corner. Your primary focus will be to feather the outer edge of the tape and any epoxy that stands proud beyond the edges. After the first flat pass, you will see sharp lines in the epoxy. These may be continuous along the outer edges or they may look like little circles within the epoxy. There will be a distinct line along the edge of the tape. These are the edges that must be sanded down (feathered) to blend into the wood. These lines will show through your paint if they are not feathered smooth. I knocked these down by tipping the sander up on any one of the four edges to apply more pressure to the sanded area. Be careful with this technique as you can actually gouge out the wood if you linger too long in one place. You can also use this technique to knock down the raised edge of the tape. After knocking down the visible lines and the tape edges, go back over the entire area with the sanding pad flat, being careful to stay away from the sharp edges of the tape over the joint. When you get through, you should not be able to see the outer edge of the tape or any lines in the epoxy. Change sandpaper sheets often as they will gum up after about 10 to 15 minutes of sanding. Also, it helps to have a brush to brush away the dust so you can see your progress and where you may have to go back and sand some more. It helps to do this outdoors as it puts out a lot of dust.
Building the epoxy:
I needed two more applications of epoxy to completely cover the weave in the tape. On the first of these, I applied the epoxy liberally with the chip brush directly over the tape area and then rolled it with the foam roller in a diagonal pattern and feathering it out away from the tape edge by about 4". After getting it pretty well feathered, I then ran the roller lightly and parallel with the tape to smooth out the epoxy. Again, after rolling, I used the brush to "tip" out the air bubbles with long light strokes parallel with the tape and over the entire wetted area. On the final coat of epoxy, I applied everything with the chip brush only and no roller. I applied the epoxy liberally directly over the tape and then feathered it out using only the brush. This gave a maximum thickness and fully covered the weave in the tape. Again, on the vertical surfaces, there will be some sagging, but it will sand out easily.
Lessons learned:
1. Read instructions. Plan everything out ahead of time and have all your materials ready.
2. Use disposable materials as much as possible as the epoxy will not clean up after it hardens.
3. Use drop cloths, but don't worry if you get some on the floor. The epoxy will scrape up easily from smooth surfaces after it dries.
4. If the epoxy starts hardening before you get a full strip wetted in, don't keep trying. It is usually too late when you can feel the heat of the mix in your container. Pull and dispose of the partially wetted tape and start all over with a new piece of tape. I did this twice and wetted the new tape in while the old coating was still tacky. Some people say not to do this, but it appears to have worked for me. The alternative is to wait until the epoxy hardens and then sand it down and start over.
5. Wipe down your two ingredient containers after each session as the contents will run down the sides and stain your shelf or storage area.
6. The two epoxy components will clean up easily with acetone, but don't try to save any of your mixing cups or sticks. Just dispose of them after each use.
7. When working indoors, use a portable light to shine a reflection on your work so you can see any places you may have missed or any areas that may need to be feathered or rolled out to eliminate lumps and sags. Move it around to suit each location that you are working.
Hope this helps.
Teardrops n Tiny Travel Trailersor t n ttt for short (tnttt.com) |
My experience with fiberglass tape.
7 posts
• Page 1 of 1
My experience with fiberglass tape.
![]() by les45 » Sun Jun 10, 2012 8:32 am
by les45 » Sun Jun 10, 2012 8:32 am
Last edited by les45 on Sun Jun 10, 2012 12:48 pm, edited 2 times in total.
-

les45 - 500 Club
- Posts: 974
- Images: 605
- Joined: Sat Feb 25, 2012 8:57 am
- Location: Aiken, South Carolina
Re: My experience with fiberglass tape.
![]() by Forrest747 » Sun Jun 10, 2012 10:01 am
by Forrest747 » Sun Jun 10, 2012 10:01 am
I did the ziplock bag as well and worked like a charm. I ended up putting the tape in the bag and kneaded till wetted. I had a few white spots when it came out I ended up just squishing it into a ball to force more epoxy in. I then put it on the seam and using my gloved hand spread it out working the center out. What I didn't do well was sand the edges flush. Tou can see them through the paint oh well
"All the success on the trail can not compensate for having square headlights"
"I've got a fever and the only prescription is more cowbell!"
http://www.tnttt.com/viewtopic.php?f=50&t=37701 Build Journal
"I've got a fever and the only prescription is more cowbell!"
http://www.tnttt.com/viewtopic.php?f=50&t=37701 Build Journal
-

Forrest747 - Cowbell Donating Member
- Posts: 1327
- Images: 447
- Joined: Mon Apr 06, 2009 3:40 am
- Location: West Valley Utah, Utah