Page 1 of 1

Aluminium with lines in

PostPosted: Mon Jun 18, 2012 7:54 am
by webbaldo
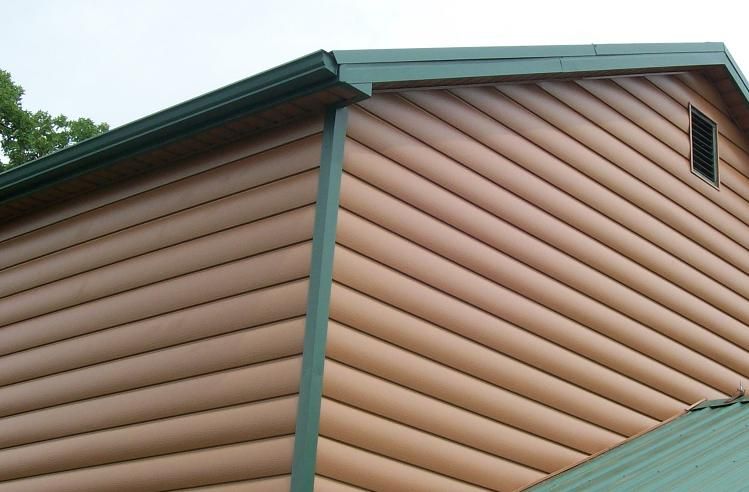
Using the below example, do you buy this alu skin off the shelf or do you somehow hammer in the lines?

Image

Re: Aluminium with lines in

PostPosted: Mon Jun 18, 2012 10:43 am
by Oldragbaggers
I think you can bend it yourself using a sheet metal bending brake but that's not something most of us have laying around in our garage. I know Len Daddona makes his own, wouldn't be surprised if Doug Hodder does too. You can buy it from Frank Bear but you would have to pick it up and he's in Michigan.

Re: Aluminium with lines in

PostPosted: Mon Jun 18, 2012 11:23 am
by len19070
Here's a Tutorial someone made for my way of doing it. (Ignore the part about making your own Brake)

http://serroscottycamperenthusiasts.com ... gfinal.pdf

Happy Trails

Len

Re: Aluminium with lines in

PostPosted: Mon Jun 18, 2012 3:25 pm
by webbaldo
Humm I think Michigan is a little too far to travel hehe.

I think ill leave this one, even with the instructions it seems a bit beond my current skills!

Re: Aluminium with lines in

PostPosted: Mon Jun 18, 2012 3:40 pm
by doug hodder
The material that I got was rolled. They have a roller that they run the material through lengthwise. The dies roll the pattern in the aluminum. I got the 4" roll as that's what die the guy had. If I wanted something else...it meant a long trip to pick it up. Doug

Re: Aluminium with lines in

PostPosted: Mon Jun 18, 2012 8:45 pm
by M C Toyer
webbaldo wrote:.

I think ill leave this one, even with the instructions it seems a bit beond my current skills!


I would think that anytime you find a siding installer on the job you could get a few pieces run off in the rolled embossed pattern shown in the photo for $20-25 or a couple of 6 packs if he was not busy and had the tools with him.

The bubble pattern shown in the tutorial would take longer and cost more, say a couple of bottles of single malt scotch or dinner for two at Outback.

Most siding installers use the 19 gauge aluminum which comes in 24 inch wide rolls 50 foot long. It is also available in steel and in both either painted or vinyl clad. Mill, white and bronze aluminum can be found at many lumberyards but the steel and a full range of colors would come from the siding wholsaler and you might need to have the installer make the purchase for you. Current cost runs $90 - 120 a roll.

The main advantage beyond trying to replicate an existing product is time saving and durability. It is prefinished so once it is installed on your trailer you're done - no further coating or sealing and just an ocasssional wash.

Since I had the tools and material available I used it for the entire exterior and doors on my first build: viewtopic.php?f=50&t=50714

Re: Aluminium with lines in

PostPosted: Mon Jun 18, 2012 10:36 pm
by M C Toyer
Here's another steel siding profile that mimics log siding, both the milled full log with splined flat top and bottom and the 1/4 log wood siding that goes on like shiplap. This product is roll formed on the jobsite from the same 26 gauge vinyl coated steel as the trim coil but an additional wood grain is embossed in the rolling process. It is backed with a matching profile of styrofoam to provide rigidity and maintain the shape.

Image

I will use this on a future build that will be about 12 foot long, 6 foot wide,and 6 - 1/2 foot at the inside peak of the roof. There are some limitaitions - to make it look natural straight vertical walls and a gable roof will be part of the design, It's use will be as a base camp but would not be any more of a problem to tow than a cargo trailer of similar size. I will probably have a v-shaped front wall to cover the a/c and tongue box.

I have seen some other log motif trailers but those were either painted or in one case used the 3-4 inch diameter core posts (super heavy). The steel can be installed directly on studs but sheathing is recommended - the foil faced 1/4 masonite works well or 7/16 OSB. House wrap should be applied over either. The steel weighs .9# per square foot and each individual horizontal panel is 8 inches high and 1 - 1/2 inches thick. Each successive lap hides the fasteners of the one below. The roof will be either a standing seam or metal shake.

M C

Re: Aluminium with lines in

PostPosted: Tue Jun 19, 2012 1:00 am
by Gage
webbaldo wrote:Humm I think Michigan is a little too far to travel hehe.
I think ill leave this one, even with the instructions it seems a bit beond my current skills!

So tell me webbaldo, where is it that you live? That would help. Maybe you have said and I just missed it. :thinking:

Re: Aluminium with lines in

PostPosted: Tue Jun 19, 2012 3:46 am
by M C Toyer
doug hodder wrote:The material that I got was rolled. They have a roller that they run the material through lengthwise. The dies roll the pattern in the aluminum. I got the 4" roll as that's what die the guy had. If I wanted something else...it meant a long trip to pick it up. Doug


This is likely what was used:
http://www.industrialladder.com/productDetails.do?productID=3117&categoryID=55

They're pretty pricey so only a full time installer would have one but I picked up mine used at a pawn shop for $150 - even at that price would take a half dozen trailers just to break even.

You could run an entire 50 foot roll of the coil stock in one piece but you couldn't lift it or roll it back up without kinking. Generally you would cut it to lengths which could be handled by the size of the brake (up to 14 foot) if you need to make additional bends for seams or corners, or whatever length you needed for your trailer. The number of embossed ribs in a single run is limited only by the number of dies availalble but as each rib requires 3 dies spacing could be no less than 3 inches. If only 1 set of 3 dies was availalble you could make multiple passes of short runs.

There is also a hand held embossing roller that is used only with the aluminum coil stock clamped in the brake but it is not as accurate:
http://www.toolsplus1.com/brakebuddy.htm

Re: Aluminium with lines in

PostPosted: Tue Jun 19, 2012 5:39 am
by len19070
len19070 wrote:Here's a Tutorial someone made for my way of doing it. (Ignore the part about making your own Brake)

http://serroscottycamperenthusiasts.com ... gfinal.pdf

Happy Trails

Len


My motivation for making my own was strictly based on price. Yes you can buy this siding, but the shipping will KILL YA!

It takes 2 rolls of coil Stock to do a Teardrop with some leftover. Or, it takes 4 rolls to do a Teardrop and a 10' Scotty.

ImageImage

At $85 a roll I don't think $340 for 2 trailers is to bad.

Happy Trails

Len

Re: Aluminium with lines in

PostPosted: Tue Jun 19, 2012 2:27 pm
by webbaldo
Gage wrote:
webbaldo wrote:Humm I think Michigan is a little too far to travel hehe.
I think ill leave this one, even with the instructions it seems a bit beond my current skills!

So tell me webbaldo, where is it that you live? That would help. Maybe you have said and I just missed it. :thinking:


Sorry I haven't filled my location out yet, I live in europe
So a bit far to come for parts lol! :R

Shame really, it really annoys me how items like your harbour freight trailors and tools in general are so cheap over in the states! Stuff costs a fortune here! :cry:

Re: Aluminium with lines in

PostPosted: Wed Jun 20, 2012 6:51 pm
by NathanL
Any good sheet metal shop should be able to roll it for you assuming you don't use super wide material. You'll likely have to buy the rolls for the pattern you like however unless you get super lucky.

Re: Aluminium with lines in

PostPosted: Thu Jun 21, 2012 1:24 am
by webbaldo
NathanL wrote:Any good sheet metal shop should be able to roll it for you assuming you don't use super wide material. You'll likely have to buy the rolls for the pattern you like however unless you get super lucky.


Thanks for the advice, there are some classic UK caravans about with a criss-cross pattern known as 'quilted'

Like this, really like it!

Image