Belt Sanding technique

Anything to do with mechanical, construction etc

Belt Sanding technique

Postby spbiknut » Tue Apr 30, 2013 10:15 am

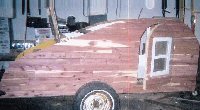
Ok...got myself into a pickle (as expected). I cut out my profiles and it's been a while since I used a jigsaw so to make a long story short the cut edges of my profiles look like something that surfers would enjoy on a larger scale. I have a belt sander (equally long since I've used one of these) and plan to even things out a bit. I cut a little extra, but not enough to cover a couple of spot in particular where the blade of the jigsaw "walked" a little. I've read the Belt Sander 101 thread. Just need some extra pointers and wisdom from you gurus.

Thanks,

-Troy
"Tryin' to reason with hurricane season"

Build Thread
http://www.tnttt.com/viewtopic.php?f=50&t=54668
User avatar
spbiknut
Teardrop Advisor
 
Posts: 75
Images: 140
Joined: Thu Feb 21, 2013 4:13 pm
Location: St. Petersburg, FL.

Re: Belt Sanding technique

Postby danlott » Tue Apr 30, 2013 10:34 am

I would lay your profile flat and turn the belt sander on edge. This way the weight of the sander will not be pushing down on the wall and you will have better control of how much and where to remove material from the profile. Use 80 or 100 grit paper, belt sanders are real aggressive and to low of a grit will be harder to contol. If possible use a pencil to mark areas that you need to remove, this will help to ensure that you do not remove too much material.

Once you get your profile looking good use a router and guide bit to make a copies for your sidewalls.

As a side note for anyone else reading this, I think you should always cut just outside of your profile lines and then use a belt sander to sand up to the lines. You will end up with much better results than just using a jig saw alone.

Dan
Hoplite Traveler Build thread
Image Image
Life is what happens to you while you're busy making other plans.
User avatar
danlott
Donating Member
 
Posts: 874
Images: 264
Joined: Fri Mar 06, 2009 2:18 pm
Location: Winnemucca, Nevada

Re: Belt Sanding technique

Postby halfdome, Danny » Tue Apr 30, 2013 10:56 am

You can repair those low spots so you don't have to alter your profile.
You could take your belt sander to make a flat spot for the patch.
I prefer to use hardwood for Dutchman's if it isn't seen.
Here's a link to explain in more detail.
http://www.oldhouseonline.com/how-to-make-a-dutchman-patch/
:D Danny
ImageImage
"Conditions are never just right. People who delay action until all factors are favorable do nothing". William Feather
Don't accept "It's Good Enough" build to the best of your abilities.
Image
Teardroppers Of Oregon & WashingtonImage
User avatar
halfdome, Danny
*Happy Camper
 
Posts: 5894
Images: 252
Joined: Sun Aug 14, 2005 11:02 pm
Location: Washington , Pew-al-up
Top

Re: Belt Sanding technique

Postby bobhenry » Tue Apr 30, 2013 11:24 am

I think the real factor here is the jig saw "walking".

When I find mine thinking for me it is because the blade is dull.

On something this critical put in a brand new blade before you start the cut and YOU will have control.
Growing older but not up !
User avatar
bobhenry
Ten Grand Club
Ten Grand Club
 
Posts: 10368
Images: 2623
Joined: Fri Feb 09, 2007 7:49 am
Location: INDIANA, LINDEN
Top

Re: Belt Sanding technique

Postby Woodbutcher » Tue Apr 30, 2013 12:04 pm

I also find it easier to just cut outside your line. Then sand to the line with the belt sander. Clamp both sides together before you sand them. This way they match, bo bo's and all.
User avatar
Woodbutcher
Platinum Donating Member
 
Posts: 4191
Images: 45
Joined: Fri Mar 10, 2006 10:01 pm
Location: Chicago Suburbs
Top

Re: Belt Sanding technique

Postby spbiknut » Tue Apr 30, 2013 12:12 pm

Thanks for the input. I really appreciate you guys taking the time to help me with my blunder. I did make sure to use a new blade, but i think my problem was pushing forward a little too hard. I also did cut outside the line by about 1/16 to 1/8 all the way around...its just a couple of spots that I think I'm going to have to use the dutchman's patch to fill in. I'll keep you guys posted.

-Troy
"Tryin' to reason with hurricane season"

Build Thread
http://www.tnttt.com/viewtopic.php?f=50&t=54668
User avatar
spbiknut
Teardrop Advisor
 
Posts: 75
Images: 140
Joined: Thu Feb 21, 2013 4:13 pm
Location: St. Petersburg, FL.
Top

Re: Belt Sanding technique

Postby Fyddler » Tue Apr 30, 2013 12:13 pm

+1 on cut outside the lines, clamp the two sides together and use a belt sander to sand to the line. Sanding lengthwise with the sander and keep it moving gives nice gentle lines. Stop in one place two long and you will get a dip. Also by clamping the two sides together they're not be exact to your design, but they will be exact to each other.
To err is human, to really foul up requires a computer

Build Log: http://www.tnttt.com/viewtopic.php?f=50&t=55017
User avatar
Fyddler
The 300 Club
 
Posts: 349
Joined: Sat Sep 01, 2012 9:52 am
Location: Port Orchard, WA
Top

Re: Belt Sanding technique

Postby aggie79 » Tue Apr 30, 2013 1:59 pm

Fyddler wrote:Also by clamping the two sides together they're not be exact to your design, but they will be exact to each other...
...as long as you keep the belt sander perpendicular to the sidewall.
Tom (& Linda)
For build info on our former Silver Beatle teardrop:
Build Thread

93503
User avatar
aggie79
Super Duper Lifetime Member
 
Posts: 5405
Images: 686
Joined: Tue Aug 07, 2007 5:42 pm
Location: Watauga, Texas
Top

Re: Belt Sanding technique

Postby CarlLaFong » Tue Apr 30, 2013 3:29 pm

I hated jigsaws all my life. What a total crap tool. You're lucky to cut within an inch of the line, on a good day. Then I bought a good one, a Bosch. What a great tool. It cuts straight and fast.It's almost as accurate as my bandsaws.
As far as straightening out a bad edge, I like to use a template and a flush bit in the router. You can make the template from 1/4 inch ply or Masonite
http://jkcallin.blogspot.com/
"As I wandered, alone, through the endless fields of corn, I could hear the crows. They seemed to mock me, calling out my name, over and over", said Cawe
User avatar
CarlLaFong
500 Club
 
Posts: 701
Images: 5
Joined: Wed Jul 06, 2011 9:51 pm
Location: Sunny SoCal
Top

Re: Belt Sanding technique

Postby markhusbands » Sat May 04, 2013 3:49 pm

I had far better luck with a router than a jigsaw. That's one of the reasons I decided to go with simple 3' and 18" radii. I could make a template by putting the router on a swingarm, and each time I wanted to crate a new radius, like the 1/4 hatch notch, I could just knock the 1/4 off the template with the router and then use the template with a trim bit on the finished piece.
133923
User avatar
markhusbands
Teardrop Master
 
Posts: 285
Images: 58
Joined: Tue Jul 03, 2012 3:17 pm
Location: Denver, Colorado, USA
Top

Re: Belt Sanding technique

Postby woodywrkng » Thu May 09, 2013 9:49 am

Maybe it's too late for this, but you would have much better luck creating your profile with one piece of 1/4" hardboard, and using that as a template for both of your sides. You can then cut the sides with a router, using a bit with a bearing which rides against the hardboard.
User avatar
woodywrkng
Silver Donating Member
 
Posts: 104
Images: 35
Joined: Sun Apr 22, 2012 3:54 pm
Location: DeSoto, Wisconsin
Top


Return to Teardrop Construction Tips & Techniques

Who is online

Users browsing this forum: No registered users and 3 guests