Page 1 of 2
Waterproofing the bottom of the walls...

Posted:
Tue Nov 08, 2005 9:39 pmby Micro469
Hi, Everyone.. just joined and am enjoying this forum very much. I told my wife I wanted to build a a teardrop, and, after looking at me as if I was crazy, told me the kitchen floor had to be redone first... and the bathroom.. and the laundry room.. and the........ Maybe I'll be able to sneak a few extra sheets of plywood into some of these reno's... LOL.
I've looked at various builds , looked through the forum, but have not found any info on stopping water from seeping up from the bottom of the walls. Most of you build from raw plywood and place the walls on the edge of the trailer frame to support the weight, then cover the walls with aluminum or whatever, but nobody seems to be concerned with moisture leaching up through the exposed edge of the ply. Am I being picky or what?

Posted:
Tue Nov 08, 2005 9:54 pmby madjack
Welcome aboard Micro...I wouldn't say picky, I would say curious. Upon further investigation, I think you will find that the edges of the ply aren't left exposed...a trim piece is used along the bottom edge to seal off the ply, additionally many folks do a seal job (epoxy, urethane, etc) on any ply that is in a possibly exposed position...you have a good start and are on your way...keep looking at build journals, pics and posts along with your questions, you will come up with the design you want....and have lottsa fun and take lottsa pics along the way and share....cause we luvs da pics

madjack

Posted:
Tue Nov 08, 2005 10:58 pmby Micro469
Thanks Madjack, Maybe its something everyone did, but never mentioned in their builds. It seemed as if they all wanted to get teir Tears built so they could go out and have fun.
Posted:
Tue Nov 08, 2005 11:13 pmby TonyCooper
I seamed the aluminum siding at the point where the wood meets the trailer frame. I then used polyurethane caulk to seal the seam and placed a 1" wide x 1/8" thick aluminum stock the length of the seam. I don't think I'll have water seaping into the plywood edge on my teardrop.
You can see it here
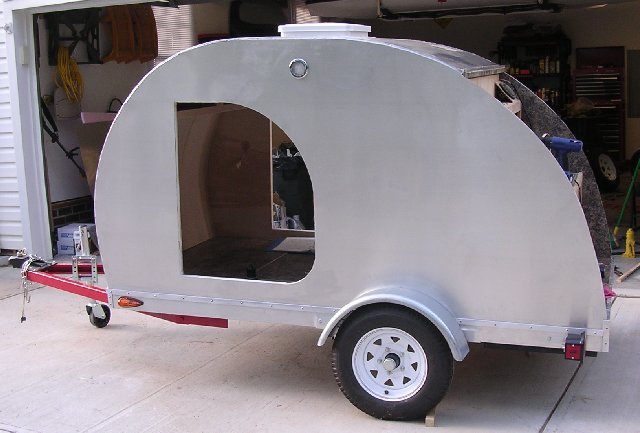
Under the trailer I have insured that moisture will have a tough time getting up past the trailer base. The floor is sealed with asphalt emulsion,
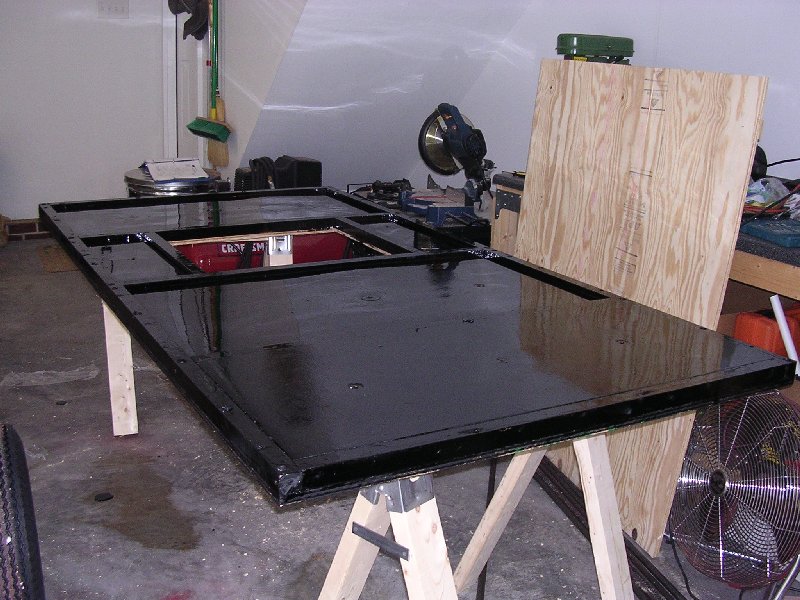
then it was covered with a sheet of .030 aluminum - again with a polyurethane caulk applied to both sides of the aluminum.
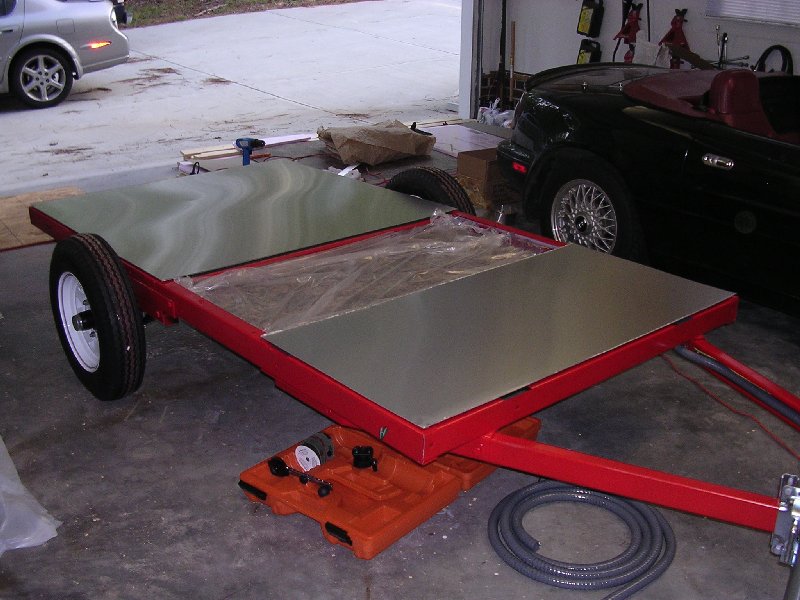
Then the floor subsystem was bolted to the trailer frame.
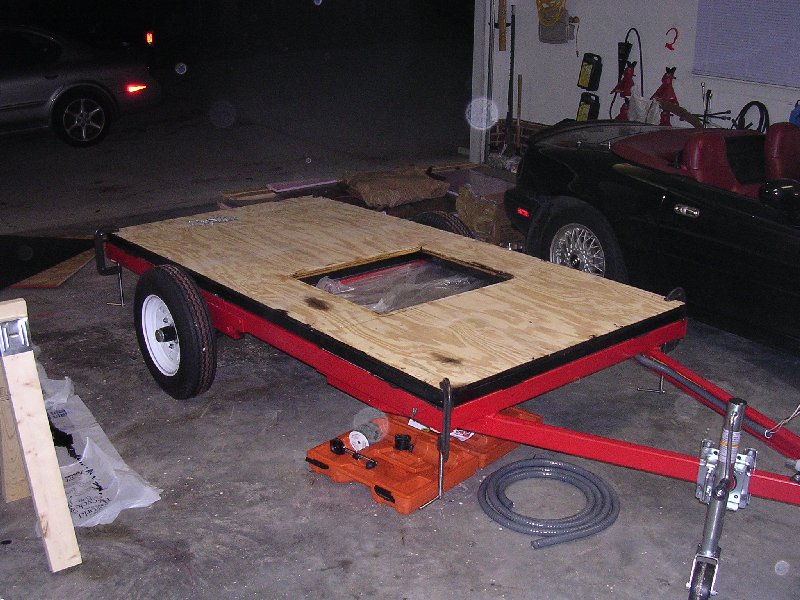
Then the screw and bolt holes were sealed.
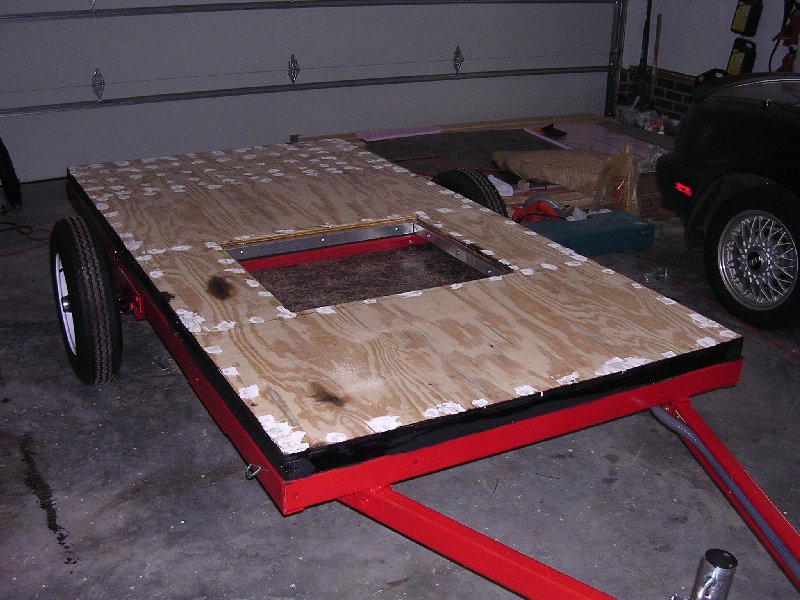
The seam shown in the first picture is directly over where the trailer frame meets the floor .
Re: Waterproofing the bottom of the walls...
Posted:
Tue Nov 08, 2005 11:17 pmby Joanne
Micro469 wrote:Hi, Everyone.. just joined and am enjoying this forum very much. I told my wife I wanted to build a a teardrop, and, after looking at me as if I was crazy, told me the kitchen floor had to be redone first... and the bathroom.. and the laundry room.. and the........ Maybe I'll be able to sneak a few extra sheets of plywood into some of these reno's... LOL.
I've looked at various builds , looked through the forum, but have not found any info on stopping water from seeping up from the bottom of the walls. Most of you build from raw plywood and place the walls on the edge of the trailer frame to support the weight, then cover the walls with aluminum or whatever, but nobody seems to be concerned with moisture leaching up through the exposed edge of the ply. Am I being picky or what?
Hey Micro,
I sealed my edges with epoxy resin before mounting them. I think your concern about water wicking up is valid and should be considered when building. A lot of the old trailers are rotting apart so spending a little effort making sure that the trailer doesn't become water logged seems to make sense.
On the other hand I live in Nevada and am not quite sure what rain is. I've only ever seen it on TV.

Joanne
Posted:
Wed Nov 09, 2005 4:21 amby surveytech
I used epoxy as well. Applied it before the walls got attached to the floor.
Posted:
Wed Nov 09, 2005 8:13 amby Arne
About old trailers rotting.... I think in 60 years I won't care too much<g>.
Since the bottom edge gets so little sun exposure, I expect almost anything will do. Even the water that gets there won't hang on very long. Since I used cpes/uniflex, I went aroung the bottom with both of those.
Posted:
Wed Nov 09, 2005 9:17 amby doug hodder
I'm with Joanne on this....I used any left over epoxy from other jobs to seal up the edges...did the same on the doors and the door jambs also....I'm no expert on this, but I think that if you are in a moist environment that the exposed ply edge would want to wick water up through the edges...and especially on a woody it's important...as any moisture under the epoxy or varnish coating will cause the finish to appear cloudy...not an issue with an aluminum skin....I had a friend do a mohogany boat and did not epoxy coat out the inside....it ended up getting painted the next year....lots of nice cloudy mohogany under the paint......just my thoughts on it...Doug
Posted:
Wed Nov 09, 2005 9:49 amby goldcoop
Hey Micro-
Welcome! Your concern is well founded!
The C'tear I built using 2" x 2" construction for the skeletal frame of the side walls.
Then I used "PickUp Bed Tape" around the perimeter of the floor before I placed the walls to cushion and seal.
The skin ply extends down past this juncture as well as the exterior siding.
I believe how & where you store your Tear will add years of life to it!
Like in a garage or other enclosed structure, covered with a breathable cover and finally with some sort of dehumidification inside the tear (or at least leave windows and roof vent cracked open slightly)!
Just some thoughts!
Cheers,
Coop
Posted:
Wed Nov 09, 2005 12:07 pmby angib
I'll jump in with both feet here and suggest that an alternative to sealing that edge is to not stand it on top of the frame. Bolted or screwed to the side of the frame, there wouldn't be a ledge on which water can sit waiting to be wicked into the side - what gets sprayed up from a wet road is nothing compared to what static water can do.
Andrew
Posted:
Wed Nov 09, 2005 5:13 pmby cracker39
Andrew, I think I've discussed this before. Isn't this what you meant? I plan on sealing the plywood sides with varnish before painting, and double seal the edges with epoxy or fiberglass resin. My sides will extend down to the bottom of the chassis side rails, and I'll put a good application of construction adhesive on the side rail and clamp the sides to it to spread it and make sure it leaves no place for water to enter. The sides will be joined to the floor by the strip of 1" x 3/4" screwed and glued to both (screws or floor bolts are not shown here).

Posted:
Wed Nov 09, 2005 6:04 pmby madjack
Dale, that is how we did the walls of the Alligator Tear except we used 1" Al angle for the cleat and gorilla glue for the adhesive between the cleat and walls/floor. Since it will have an Al skin, there will also be a piece of angle along the bottom with a pl type adhesive to help hold/seal it all up
madjack
Re: Waterproofing the bottom of the walls...
Posted:
Wed Nov 09, 2005 6:13 pmby mikeschn
Hey Micro,
You must not have seen my generic benroy thread yet... I suggest that you seal the underside of the walls with roofing tar....
Here's what I posted in that step...
Step 5: Dryfit the walls.
(Revised 13-Sep-2005 to add notch cutout in walls)
Cut two temporary spars. These are 1x2 pieces of pine, 58 ½” long. Cut this using a miter saw. You want your spars to be as square and perpendicular as possible.
Position the walls so that the bottom of the wall is flush with the bottom edge of the trailer. A partner would be helpful for this step. The back edge of the wall should be flush with the back edge of the trailer. It might helpful to use a piece of scrap wood as a straight edge against the bottom edge of the frame and wall. Once you’ve got the wall positioned, install a 1 5/8” drywall screw in each end. Repeat for the other wall. Then, quickly install your temporary spars putting in a 1 5/8” drywall screw in each end. One spar should be in the middle on the teardrop, near the ceiling vent. The other should be positioned where the hatch starts. Grab a framing square and check to see if your walls are perpendicular to the floor.
The sidewalls now need a notch for the hatch. This is a 3/8” offset cut all the way from the poplar spar to the floor. Use a marking tool or a t-square set at 3/8”. Strike a line offset from the outside profile of the teardrop 3/8”, from the spar to the floor. Also mark the floor and spar locations on the sidewall in the offset area.
Disassemble everything.
With your walls back on the saw horses, cut out the 3/8” notch with a jig saw. Save the cutouts, you will be using it as a template to make your hatch. Sand the notch smooth with a belt sander.
Tip: If you forget to cut the notch at this point, you can cut it after the walls are installed. But it is so much easier while laying on the bench!
Put roofing tar on the bottom edge, and on the inside edge of the wall that will be facing the frame. You’ll only do about the first 2”. Do not coat the part of the wall that will be receiving the glue.
Micro469 wrote:Hi, Everyone.. just joined and am enjoying this forum very much. I told my wife I wanted to build a a teardrop, and, after looking at me as if I was crazy, told me the kitchen floor had to be redone first... and the bathroom.. and the laundry room.. and the........ Maybe I'll be able to sneak a few extra sheets of plywood into some of these reno's... LOL.
I've looked at various builds , looked through the forum, but have not found any info on stopping water from seeping up from the bottom of the walls. Most of you build from raw plywood and place the walls on the edge of the trailer frame to support the weight, then cover the walls with aluminum or whatever, but nobody seems to be concerned with moisture leaching up through the exposed edge of the ply. Am I being picky or what?
Posted:
Wed Nov 09, 2005 7:27 pmby angib
Dale,
Yes, very similar.
A thing I'll add here is that I spent a long time working in shipbuilding and one of the principles was that no welded structure is ever perfectly right. Even if you cut it just right (and steelworkers' tolerances are not the same as engineers' or joiners' tolerances), it will distort when welded. So I would never design the wood to sit tightly on the side of the frame as you've shown - I'd leave a 1/4" gap. Then the floor ply can be cut to the right width and doesn't have to be 'adjusted' to fit the actual width of the frame.
Where the floor sits on the top of the frame is the critical place, since here there is the 'pooling' problem, so a good waterproofing of the floor ply before it is fitted to the frame is required. But as it's side grain, not end grain, that's a lot easier to do successfully.
I'll repeat what I was taught about sealing end grain with epoxy - you should keep feeding the end grain with resin until the resin in your pot starts to gel. Even with fast epoxy, you will get at least two goes at filling the grain, and probably three. The objective is to fully saturate the grain with epoxy and that means you have to keep feeding it - capillary action will draw the first 'fill' away from the end and, if you don't refill, you will get only a partial saturation and that will still be able to soak up water. However this is boatbuilding standard and maybe a bit over the top for a trailer that, hopefully, doesn't sit in water.
Andrew (the pedant)
Posted:
Wed Nov 09, 2005 7:41 pmby madjack
angib wrote:Dale,
Yes, very similar.
A thing I'll add here is that I spent a long time working in shipbuilding and one of the principles was that no welded structure is ever perfectly right. Even if you cut it just right (and steelworkers' tolerances are not the same as engineers' or joiners' tolerances), it will distort when welded. So I would never design the wood to sit tightly on the side of the frame as you've shown - I'd leave a 1/4" gap. Then the floor ply can be cut to the right width and doesn't have to be 'adjusted' to fit the actual width of the frame.
something we learned the hard way on the Alligator Tear, the floor and trailer were built/cut to the same theoretical size and when we put them together it took the BFH approach to get the body of the tear to slide down over the frame...build the frame a 1/4 smaller than the body and use some good pl adhesive to make up any diff...it is what we will do the next time
madjack