Page 1 of 1
1/8 ply Skin on Sides

Posted:
Sat Dec 14, 2013 7:25 amby drgrumpus
I am progressing on my modified Grumman II build. Walls up, cabinets and galley in, headliner in. My 5 X10 3/4 BB sides are full of wood filler due to thru screwing the rear bulkhead and cabinets. Was planning on painting with marine urethane (Interlux), however wifey wants a "woody" look. Thinking of glueing 1/8 BB ply over the 3/4 ply using Liquid Nails construction cement. My problem is how to hold the 1/8 ply in "intimate" contact with the 3/4 until the adhesive sets up-maybe 4-6hrs. I could shoot a bunch of 18 gauge ss brads in, but then I have those holes to fill.
Am asking the TD community for ideas.
Mike

Re: 1/8 ply Skin on Sides
Posted:
Sat Dec 14, 2013 7:51 amby tac422
Are you talking about interior or exterior walls ?
Re: 1/8 ply Skin on Sides
Posted:
Sat Dec 14, 2013 10:27 amby drgrumpus
Exterior. The interior of the 3/4 BB is varnished. Thanks for the clarifying question.
Mike
Re: 1/8 ply Skin on Sides
Posted:
Sat Dec 14, 2013 11:24 amby danlott
You could use a contact cement. Something like DAP Weldwood. You would need a some help to apply it on the vertical sides. Watch some videos on using contact cement on YouTube to get an idea of how to use it.
Dan
Re: 1/8 ply Skin on Sides
Posted:
Sat Dec 14, 2013 12:24 pmby 48Rob
Mike,
You can install a 1 x under the 3/4 wall, so that there is a shelf for the 1/8 ply to rest on.
I've not ever tried liquid nails for such a job, but have used PL premium Polyurethane sealant.
If you use a notched trowel to apply it, and put reasonable pressure on the 1/8 ply with a J roller, or similar, it will "stay stuck" without a need for mechanical fasteners.
If however you want to secure it, some long straps over some 1 x's across the sides with blocking in the center to put even pressure on the sides will work.
Dan's thoughts are good too, contact cement will be instant. Using a ledge will really help, and you still need a roller to apply pressure to be sure the two pieces make good contact.
Rob
Re: 1/8 ply Skin on Sides
Posted:
Sat Dec 14, 2013 1:07 pmby Juneaudave
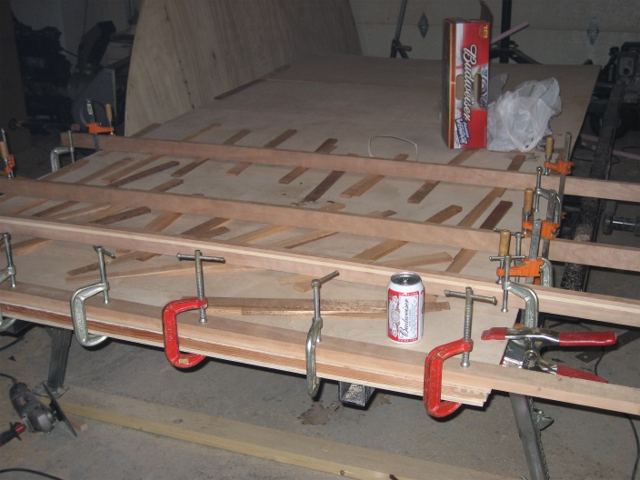
A ledge to hold the ply in place, then something like this, with shims to keep the pressure on the sides? maybe
Re: 1/8 ply Skin on Sides
Posted:
Sun Dec 15, 2013 10:43 amby drgrumpus
Thanks to all for the good advice. The problem solved itself when I convinced my bedmate to go with the painted exterior. This was after ordering a gallon of adhesive. Oh well, I can use that on the two layer top.
Mike
Re: 1/8 ply Skin on Sides
Posted:
Mon Dec 16, 2013 6:48 amby Kody
I held the 1/8 ply skin down on my frame with 1/2" long staples. These were shot in over a short strip (about 1 1/4") of kids wooden sticks. These sticks are exactly the same size as the sticks that the doctor uses to depress your tongue. The sticks are about 5" long, 3/4" wide and about 1/16" thick or a little thinner.They can be bought from any cheap "Knick-nack" shop for peanuts. I took about 10 of them at a time and cut them into 4 pieces. The strip was placed where the staple was to go and the staple (1/2" long) was fired in using a decent powerful hand staple gun. The secret is to fire the staple so the sides of the staple ( the sides are about 1/16" long) are parallel to the grain of the plywood. If the staple doesn't quite go all the way down, a gentle tap with a hammer will seat it. When the glue was dry/cured, I removed the staple very easily without damaging the plywood skin. The two small holes left by the staple were easily fixed by placing a drop of water on the holes. This is now the hard and serious part! Sneak inside and swipe your wife's clothes iron. Do it quick or you may get into big time trouble. With the iron turned up to maximum "High" place it over the dampened staple holes. The heat of the iron instantly turns the water to steam. Water changes to 100 times its volume as steam at atmospheric pressure. This happens instantly. The steam then blows, expands the wood fibers almost back to normal. In many cases it will and the holes will disappear. If the staple is driven in across the grain (90 degrees to the grain) the "legs" of the staple will cut and shear the wood fibers and they won't "blow, expand" back to the original shape. With a gentle sanding, the holes can't be seen. The staples must be fired through the wooden stick. If the stick is not used, you will mess up the surface of the ply as you try to remove them.
Kody

Try and put the iron back without being seen

Re: 1/8 ply Skin on Sides
Posted:
Mon Dec 16, 2013 8:26 amby Tinbasher
By "across the grain" Do you mean the head of the staple is parallel to the edge of the roof assumming the grain running from front to rear?
Re: 1/8 ply Skin on Sides
Posted:
Sat Dec 21, 2013 6:23 amby Kody
Tinbasher wrote:By "across the grain" Do you mean the head of the staple is parallel to the edge of the roof assumming the grain running from front to rear?
No, The side of the staple's leg must be parallel to the grain. If the top of the staple is parallel to the grain, the "legs" cut the grain fibers and the pierced hole wont close fully after the hot iron treatment.
Try this technique out on some scrap timber and plywood.
Kody
Re: 1/8 ply Skin on Sides
Posted:
Sat Dec 21, 2013 10:04 amby Tinbasher
Kody wrote:Tinbasher wrote:By "across the grain" Do you mean the head of the staple is parallel to the edge of the roof assumming the grain running from front to rear?
No, The side of the staple's leg must be parallel to the grain. If the top of the staple is parallel to the grain, the "legs" cut the grain fibers and the pierced hole wont close fully after the hot iron treatment.
Try this technique out on some scrap timber and plywood.
Kody
Got it now

Just couldn't visualise it, makes sense now as it avoids tearing the grain structure.
Re: 1/8 ply Skin on Sides
Posted:
Sat Dec 21, 2013 12:20 pmby bdosborn
I used a vacuum clamp on my 1/8" ply, it worked well.
Vacuum BagBruce