Page 1 of 1
How to proceed... hmm?

Posted:
Tue Jun 30, 2015 10:30 amby TimC
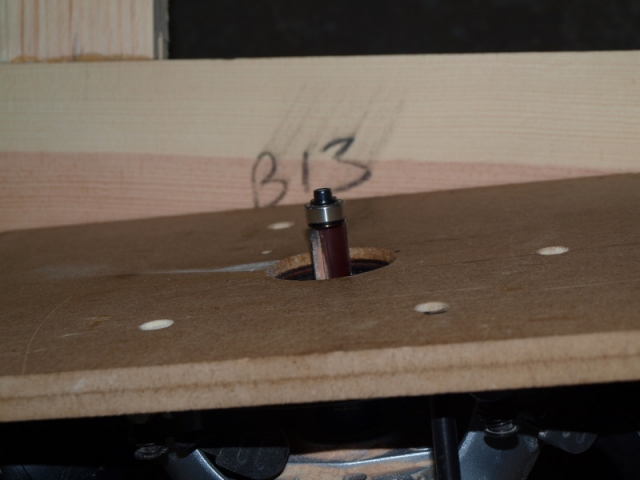
I routed a rabbet on my wall frames and then was going to glue on the interior skin (1/8" Lauan). Problem is, how to trim the skin back to match the rabbet on the walls. My trim bit with bottom bearing will not fit in the 3/8" rabbet with the screw holding the bearing sticking out. I don't have a trim bit that will follow a 3/8" rabbet depth...
Trim bit needs 1/2"+ to follow with bearing...
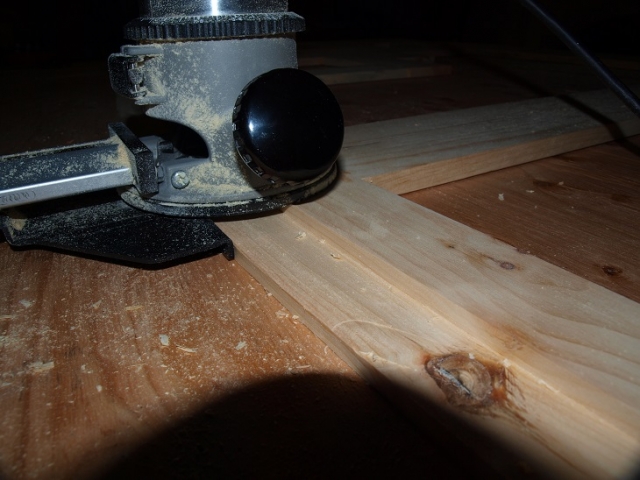
I know I can follow the rabbit the with the router guide fence and straight bit as shown above, but, I don't know if the straight bit I used will cut through the 1/8" without trimming it close first. And how would I do that rough cut.
Help! I'm beginning to experience thoughts I need to rebuild the wall frames...
Re: How to proceed... hmm?
Posted:
Tue Jun 30, 2015 12:42 pmby aggie79
I think you could still use the fence and straight bit.
I'd use the outer edge of your framing as a template to rough cut your inner ply. 1/8" ply cuts easily so you really don't need to get close on your rough cut. Check to see that the extra 1/8" height of the inner ply will still give your fence enough surface of the framing to bear against. I'd also recommend cutting a "path" for the straight bit. Cut it wide enough so when you start your cut the bit doesn't "grab" as you guide the fence toward the bearing surface.
Re: How to proceed... hmm?
Posted:
Tue Jun 30, 2015 1:01 pmby KCStudly
I have only worked with 1/8 inch birch in hobby size pieces (think balsa airplane models), so I'm not sure if that is the same stuff everyone here uses; but if you don't have jigsaw to do the rough cut (and that is not in the budget... it should be even if you have to scour the yard sales) I would think you could almost do it with a utility knife. Okay, maybe doing the whole profile would be a lot of work that way, but I would think you could get thru it pretty quickly using a small hand saw in a pinch. From there, once the rough cut inner panel is glued down (and I mean like not more than 1/8 inch oversize), you could run around the edge with a match box plane or small block plane and shave the thin edge back. You have the perfect guide in that rabbet.
Re: How to proceed... hmm?
Posted:
Wed Jul 01, 2015 1:37 amby wavebreaker
use a straight edge and a pattern template router bit.. like this
http://www.amazon.ca/Magnate-7603D-Patt ... router+bit
Re: How to proceed... hmm?
Posted:
Wed Jul 01, 2015 9:11 amby noseoil
I did mine with the skin in place. Just re-cut the rabbet joint with the same setup you used already. Scroll down to my router picture, same as yours.
viewtopic.php?f=50&t=60248&start=60
Re: How to proceed... hmm?
Posted:
Wed Jul 01, 2015 12:47 pmby TimC
Thanks for all the suggestions. I am officially now out of my funk and being productive. Took advantage of the funk-ness and coated the bottom of the floor. Something easy that took little thought or effort to get me back on track. I'm hoping noseoil's suggestion to use the same method I had used previously works. I will swap out the bit from a 3/4" straight to 1/4" straight bit. Will try that without rough trimming the lauan first. If the scrap causes problems I will regroup and try another way.
Re: How to proceed... hmm?
Posted:
Wed Jul 01, 2015 2:31 pmby KCStudly
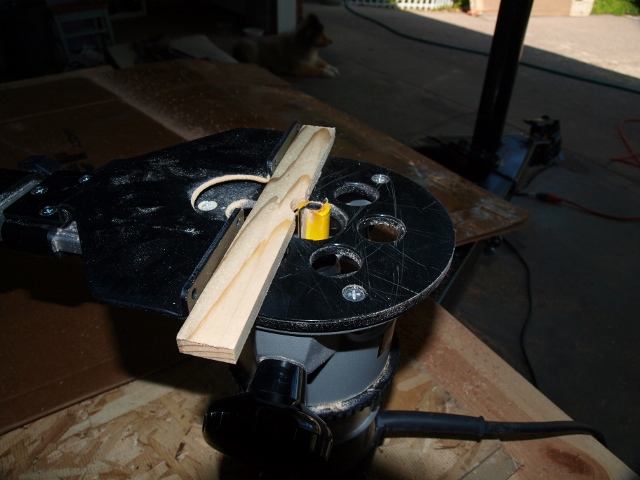
If the weight of the router tends to "fold" the inner skin down, trying to make the cut deeper, you could cut a little shim spacer at the required thickness, slip it between the rabbet and flap and slide that along as you go.
You could also use the smaller diameter bit with the fence set the same to do a test cut and trim of excess. Then either reset the fence or move back to the larger bit to do the final trim. Is that what you meant?
Re: How to proceed... hmm?
Posted:
Wed Jul 01, 2015 4:33 pmby TimC
KC, yeah, I was going to trim off the excess first with a 1/4" spiral bit, then clean it up with the large bit just as you mentioned. Your other suggestion about a spacer is brilliant. On the original cuts the bit did tilt some. I wasn't too worried about it as that will all be covered up later. I was worried towards the end passes that I might slip and cut right through the lip. I'm going to look at the spacer idea and see if I can affix it on the router base temporarily. Thanks for the suggestion. Getting back into the swing of things and seeing some progress. Skinned the inside walls today. Letting them dry overnight, then tomorrow I will be working on the work we have been talking about above. Will post a photo of what I come up with.
Re: How to proceed... hmm?
Posted:
Wed Jul 01, 2015 7:25 pmby noseoil
You can also use some double backed tape to fasten a small block onto the router base. Cut one the right size & just set it in place temporarily to make the cut. It will keep the base from tipping as you make the pass. Clean the base first so it sticks well & use some good tape. I drilled my base plate with two small holes & use small wood screws to hold the block in place for some stuff, if it's going to be a long setup & I don't want things to slip. Doesn't hurt anything. Careful with the spiral bit & free-hand cutting. Work slowly & carefully to maintain control of the pass.
Re: How to proceed... hmm?
Posted:
Wed Jul 01, 2015 9:16 pmby TimC
Another brilliant idea!

I have just the tape to do the job. Thanks.
Re: How to proceed... hmm?
Posted:
Thu Jul 02, 2015 3:51 pmby TimC
The shim spacer technique worked great.
First i used a trim bit with bottom bearing to follow the wall profile. I was surprised that the 1/8" ply did not catch on the bit on the back side. Then I used a 1/4" straight spiral bit to trim off the majority of the rest of the 1/8" using the router guide as pictured above. I finished up with the 1/2" straight bit to trim back to the bottom of the rabbit. Worked like a charm. Thanks for the ideas and encouragement!
Re: How to proceed... hmm?
Posted:
Thu Jul 02, 2015 7:16 pmby KCStudly