Page 1 of 2

Sandwich Wall Construction

PostPosted: Wed Sep 23, 2015 1:01 pm
by ToadSprockett
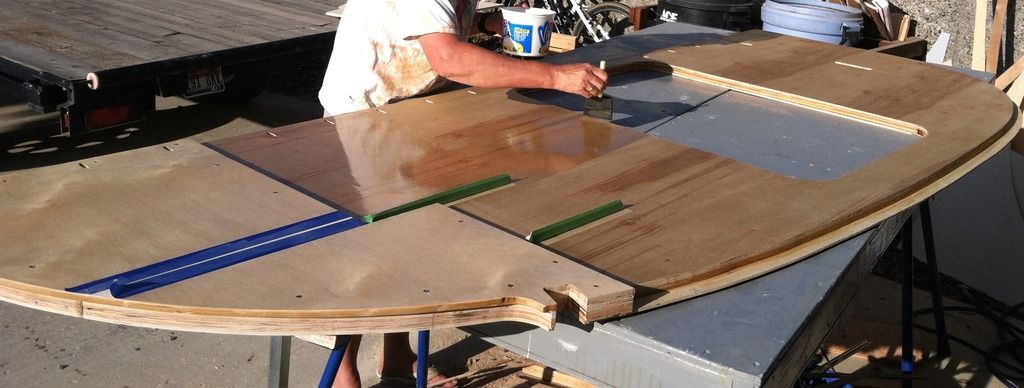
I'm just finishing up my template for the sides, by this weekend I'll have it all done and then I can start on the sides...

I've been reading lots of resources on the sides, I have Steve Frederick's book which has been very helpful in giving me ideas for construction...

On the sides, he does a stick frame of 3/4" wood, some insulation and then 1/4" sheeting on each side. I'm loathe to do stick framing because you lose some structural integrity at the joints, my preference is to do a good birch ply, and cutout for insulation.

The more I look at the design and the more I think about weight, I'm strongly leaning towards the following:

1/4" external sheet, 1/2" Baltic for the internal, and and 1/4" for the external. 3/4" seems like overkill, and if your doing sandwich construction from what I can figure, it should be sturdy enough with bulkheads, and keep the weight down.

Had anyone here done a construction like this?

Thanks
-Paul-

Re: Sandwich Wall Construction

PostPosted: Wed Sep 23, 2015 5:30 pm
by kayakdlk
I used Steve Frederick methods and built mine out of 1x2 and 1x3 frame with 1/8 Baltic Birch plywood inside and out and 3/4 foam insulation to fill the voids. Plenty strong and saved weight. 1/4" is too much in my opinion. It is SIP panel construction and unless all your joint align at the same place you will not loose any strength. I suggest if skeptical build a test panel. I was leaning toward 1/4 on the outside but made my bulkhead first with 1/8" to test how it was solid and light. It was easy after that to change to 1/8" all around. I also only used 1/8" on my floor and I could stand on it.

3/4 of the builds on here are way over built, but you have to decide what you are comfortable with and if you can afford the weight. Ever little bit helps lighten the overall weight and it works the other way to

Good luck with your build
Dan

Re: Sandwich Wall Construction

PostPosted: Wed Sep 23, 2015 6:49 pm
by daveesl77
On mine, I used 3/4" x 3" boards for framing. Then all joints are half-lapped and glued. Half-lap joints become very strong. Every part of the interior of the panels was coated with a 20% dilution of TB2, to act as a waterproofing. All voids were filled with foamboard, glued to 1/4" ply interior and 1/8" ply exterior. Final exterior is 3/16" thick cedar strips I ripped from rough cut western red boards I had and glued to the exterior ply. On areas like where I put my doors, these were solid 3/4", 9 layer ply that had been sitting in my garage for over 8 years, so it had stabilized in regards to heat/humidity. I cut out the doors after finishing both exterior and interior surfaces, so the doors fit great.

dave

Re: Sandwich Wall Construction

PostPosted: Wed Sep 23, 2015 10:32 pm
by noseoil
I would vote for 3/4" sheathing grade plywood (CDX if it's flat) & a skeleton frame, with most of the wood removed. 3/4" insulation foam is good inside the wall & keeps things in place for the skins. I'm also using the 1/8" birch plywood inside & out, with no ill effects. I agree that 1/4" is way too heavy & completely unnecessary for strength.

The job of the inner layer is to keep the skins apart, so the structure is stable. 3/4" is better in this respect than 1/2". A 1" thickness would be even better, but it's just too heavy. If you think the 1/8" skin isn't strong enough, look at the hollow core door blanks at a lumber yard made with 1/8" luan plywood. Try to crush it from the edge & you can't. Yes, you can kick a hole in it, but it's just a skinny frame, 2 layers of door skin & cardboard blocking in the middle. Simple, light, strong.

The skeletonized wall is light, strong, insulated & easy to run wires through. The down-side is labor, it takes more time and can cost a bit more to do, depending on the materials you choose. I used it in my build & I'm happy with the results. It works.

Re: Sandwich Wall Construction

PostPosted: Thu Sep 24, 2015 11:01 am
by ToadSprockett
Ok, CDX it is...

I have a local guy that has a huge stack of maple 1/8" cabinet grade sheeting for pretty cheap, time to go stock up :twisted:

I'm doing a full woody, maple on the outside (with inlay) and mahogany on the inside, this is my weekend therapy build, keeps me sane :D

Thank you...

Re: Sandwich Wall Construction

PostPosted: Thu Sep 24, 2015 3:33 pm
by angib
"I'm loathe to do stick framing because you lose some structural integrity at the joints"

Well, the joints in the framing of a sandwich are of little importance to its strength. A sandwich wall is NOT a house framework in small scale. The framing is there to space the inner and outer skins apart and to maintain the connection between them. The connection between one bit of framing and another is of no importance, since it is the skins that carry all the loads in that direction.

If the framing can be picked up as a self-supporting unit without the skins on it, then it has been massively overbuilt.

A cookie-cutter ply sandwich core is in no way better - usually it will just be much heavier with no corresponding increase in strength.

Re: Sandwich Wall Construction

PostPosted: Thu Sep 24, 2015 6:09 pm
by Dalorin
I used Fredericks manual but I didn't do stick framing. It would have been extra time and trouble. The cost didn't outweigh the benefit to me. Note, had my camper been larger, like his, it would have shifted the equation.

But my sides fit within a 4 by 8 sheet. So my inner frame was cut from the straightest most expensive piece of 3/4 ply I could find. From an actual lumber yard. American made, not the plywood that crosses the ocean.

Then I used a router to clone it.

It was fast and effective.

Re: Sandwich Wall Construction

PostPosted: Thu Sep 24, 2015 7:31 pm
by tony.latham
1/4" external sheet, 1/2" Baltic for the internal, and and 1/4" for the external. 3/4" seems like overkill, and if your doing sandwich construction from what I can figure, it should be sturdy enough with bulkheads, and keep the weight down.


I've built three 'drops using Steve's methods. The first was a 5x 10' using 3/4" stick walls sheathed in 1/4" plywood. The second a 4 x 8' using 1/2" plywood for the bones, 1/4" ply external, 1/8" BB for the interior. The last one was another 5 x 10' using 3/4" ply and 1/4" for the wall's internal/external sheathing.

Image

Image

Image

Here's a few thoughts on sandwiched wall construction:

- sticks take more labor, save a little money, but not enough to justify the labor
- 1/2" AC ply makes for a narrow shelf that I think is too thin to attach the ceiling with screws. I used tacks and glue and think it was fine. (But I was concerned when I was drilling into it and setting spar screws.) But it worked.
- Using 1/2" or 3/4" plywood makes little or no difference in weight savings since it depends on how much material you hog out. Take a look at NoiseOil's build. I think he's done a great job of removing the extra weight: viewtopic.php?f=50&t=60248
- The 5 x 5' sheets of BB plywood that I get are excellent. Doesn't matter if it's 1/8", 1/2" or 3/4". I once bought a 1/2" piece of 4 x 8' BB that wasn't near the quality. It didn't have the number of laminations and the inside and outside veneers were microscopically thin. I'll pass on that stuff but perhaps your's is the same quality as the 5 x 5' sheets I get.
- I use AC plywood for "the bones" because CDX is junk. Lots of voids and less layers.

If Noah commanded me to build another teardrop, 'cause the flood was coming, I'd build out of 3/4" AC and thin the "bones" down like Noiseoil did. (Perhaps I've got Noah, teardrops, and floods confused. Maybe I'm weak on this biblical stuff and should choose a different hypothetical.)

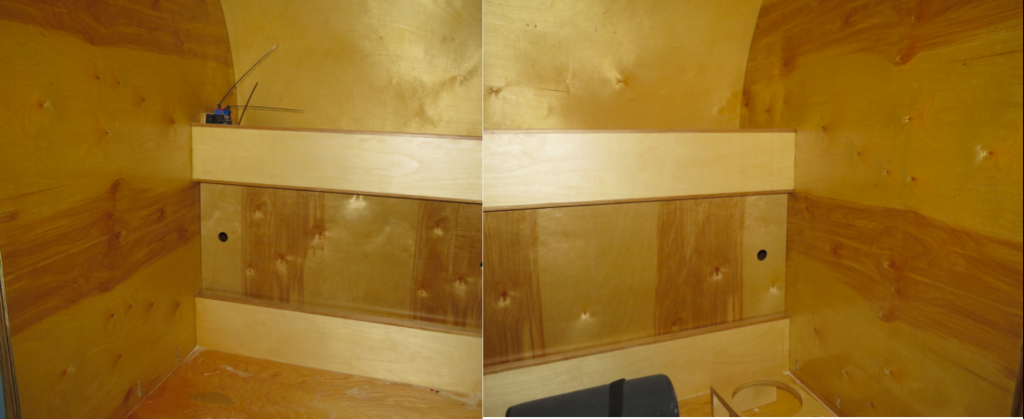
I really like the 1/4" plywood underlayment I get here. I think it's Russian birch. No voids or footballs and it's a bit cheaper than AC. Much better! Throw a piece of it in a bucket of water and it doesn't come apart. They're stamped "for moist environments." Great looking grain. Here's two pieces that are book-matched:

Image

Try to find some!

And have a great build. The flood's coming and it'll be too wet to camp on the ground. :frightened:

Tony :beer:

Re: Sandwich Wall Construction

PostPosted: Fri Sep 25, 2015 1:55 pm
by ToadSprockett
Pretty Funny Tony...

I refuse to glass the outside, it's just too much work and I'm not going to float the damn thing :D

I can get the 5x5 Birch sheets in 3/4", I'll have to price them out. For the floor I used 15/32 ply and spaced my stringers out pretty far, seems to be nice and solid. But as we have gone along I've learned things I will redo on the next one.

If I do AC, I'll need three joints and 5 sheets of ply (with careful cutting, I'm going to spline them), with the BB I can use 4, we are on a tight budget so I'll lay the numbers out. I'm just about finished with the template for the sides, I'm putting it up tonight and then we need to layout where everything is going to go so I know where to make cutouts for the foam. Around the door, how much wood did you leave? I was going to make sure I had a solid ring around it, but I'm unsure how wide that should be.

Thanks
-Paul-

Re: Sandwich Wall Construction

PostPosted: Fri Sep 25, 2015 4:22 pm
by tony.latham
Around the door, how much wood did you leave? I was going to make sure I had a solid ring around it, but I'm unsure how wide that should be.


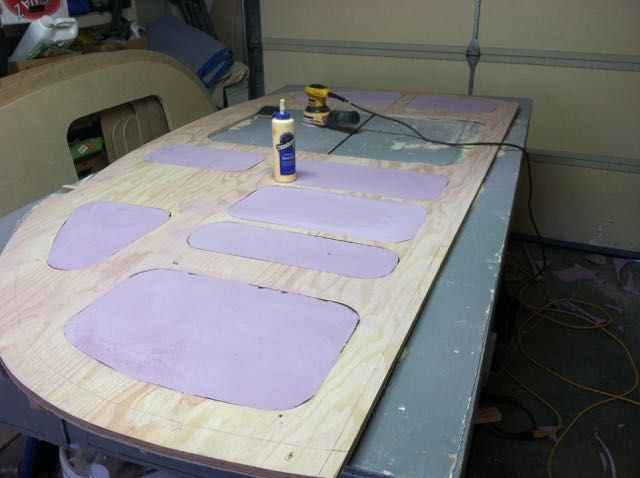
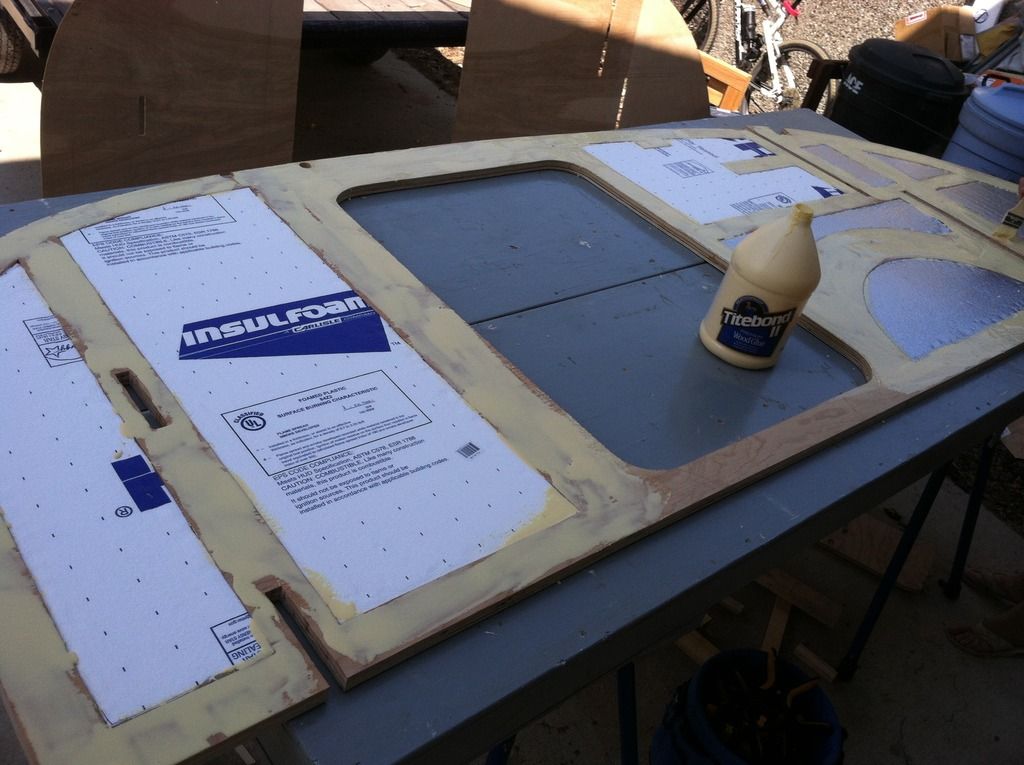
I think I went 2.5" but here's the last skeleton I did (and it's a 4 x10' wall):

Image

You can see where I splined the 3/4" 4 x 8' plywood just forward of the door. That makes for a no-joint interior. And you can see where I butted the external/internal sheathing on the rear of the skeleton. And as you know, there's a piece of 1/8" spacer that goes inside of this along with a 1/2" BB to form the galley lip so the galley area will be more than strong enough.

Image

Remember that you want the bottom of your door to be about halfway down into the mattress so it's comfortable to sit in the door. :frightened: (That skeleton sits on it's floor, thus it's taller than it looks in the pic.)

Tony

Re: Sandwich Wall Construction

PostPosted: Fri Sep 25, 2015 6:09 pm
by tnmedic2010
So my plan of using 2x3 and 2x4 sandwiched between 1/4 ply on the interior and exterior is just over kill and too much weight? What about using 1x instead? Sorry if the question is redundant I just want the tear I build to be around for a while and be safe for my wife and daughters.

Re: Sandwich Wall Construction

PostPosted: Fri Sep 25, 2015 6:29 pm
by tony.latham
tnmedic2010 wrote:So my plan of using 2x3 and 2x4 sandwiched between 1/4 ply on the interior and exterior is just over kill and too much weight? What about using 1x instead? Sorry if the question is redundant I just want the tear I build to be around for a while and be safe for my wife and daughters.


Yep, overkill.

T

Re: Sandwich Wall Construction

PostPosted: Fri Sep 25, 2015 10:05 pm
by dales133
I'm still not convinced stick framing is that much more labor intensive, it definatly is but not a massive undertaking if you go about it the right way.
I cut my inner sidewalls first the glued my stick frame directly to that.
Where my curved sections were I just over hung my stick frame and flush trimmed it of later...easy peasy .
As for the joints not being strong have you seen how they just staple the frames together in comercial rvs and vans?
All my joints were glued with either tb3 or polyurathane adhesive and screwed with a kregg jig and youll break the wood fibers before you break the join.
And im not sure where you are but eucalyptus hardwood here is rot resistant and far cheaper than 18 or 19mm ply for the quantity needed if you rip it up yourself.
There are advantages and disadvantages in both methods but unless your trying to break records in build times don't rule out stick frame.
My frame should far outlive me

Re: Sandwich Wall Construction

PostPosted: Fri Sep 25, 2015 11:24 pm
by KCStudly
That's kind of what I am thinking, too. Making a bunch of cross cuts to length on the power miter saw just has to be quicker than chasing a jig saw around all of those cutouts. Even if you plunge cut the straights with a skil saw (something that always makes me a little bit nervous about kick back), it just doesn't seem easier.

Re: Sandwich Wall Construction

PostPosted: Sat Sep 26, 2015 12:06 am
by tony.latham
There's no question that both "sticks" and plywood work to build the "bones" of sandwiched walls. Having done it both ways. I'd much rather do it with plywood. For me -probably not everyone– it's quicker.

Here's two sheets of 3/4" AC getting cut at the same time. They were joined using a router and an 1/8" plywood spline. It's quick.

Image

Once spliced I can cut those in under an hour.

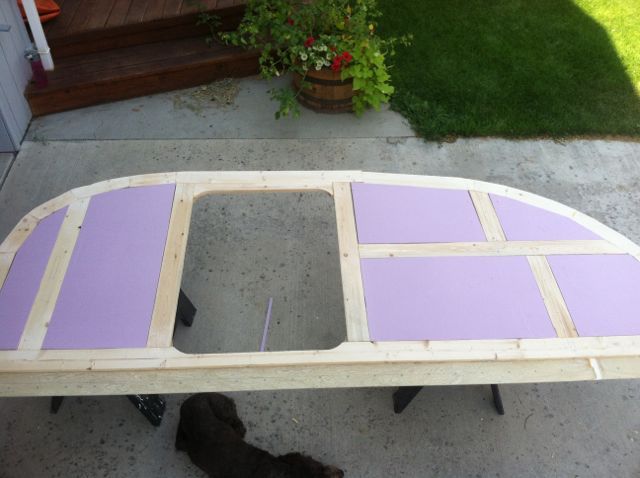
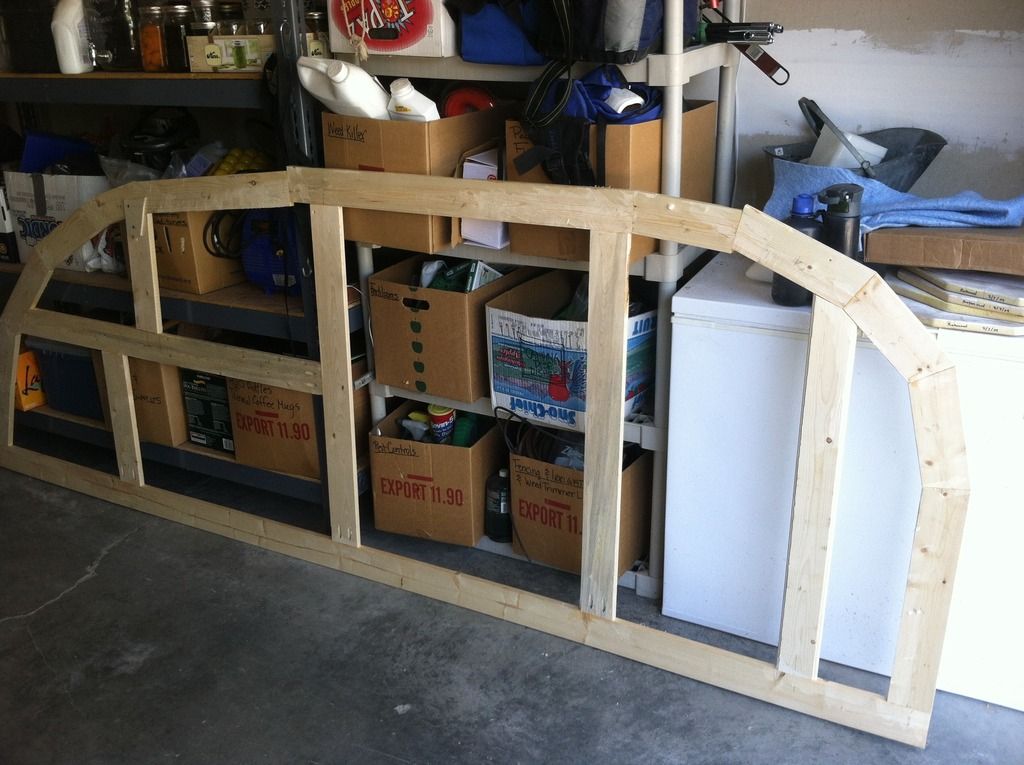
Building two stick-frames like the one I built below takes me much longer. It's joined using biscuits and a few temporary Kreg screws.

Image

The other advantage of the plywood is that once you've got the two pieces cut to your pattern, you go back, mark your cutout for the ceiling and cut it out, and set it aside for the spar blocking. You can kind of do that with a stick-built frame but it's not as easy and clean. At least that's my experience.

The downside of using plywood for the bones? There's a tremendous amount of waste and three sheets of 3/4" AC plywood isn't cheap.

Cheers,

Tony