The original Cabin Car design used fixed windows on the sides.
By fixed, I mean they did not open.
After failed attempts to use wood frames (leaks) they switched to rubber glass channel.
This material is still commonly used for fixed automotive type applications, such as the rear door windows on a service truck body.
Generally, those applications are on 1/8" to 1/4" thick material.
On Rob's version of the Cabin Car, we went with 3/4" sidewalls for extreme strength.
Because of the thickness, I had to use a channel that has a locking strip to hold the glass and squeeze the rubber against the glass to prevent leaks.
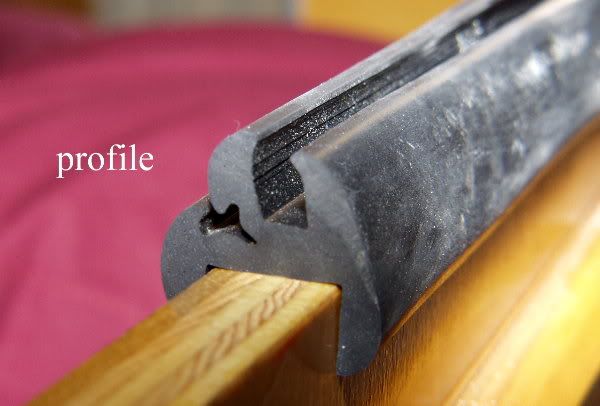
It goes together well, but takes a bit of skill to do quickly...I took a little longer...
Once that locking strip is installed, the glass isn't going anywhere!
Same goes for leaks, no water is getting in!
Here are the steps.
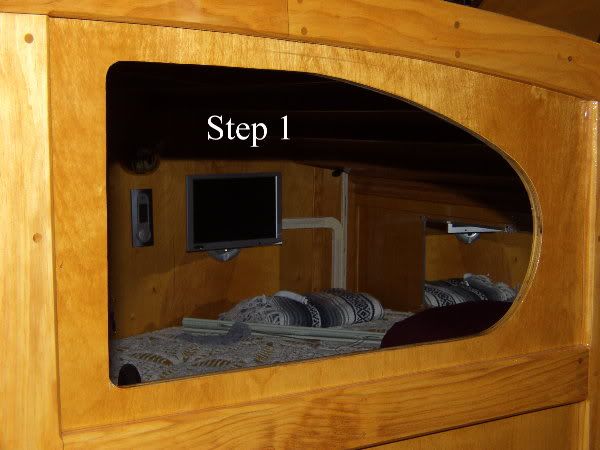
Step 1; cut the hole, seal the raw edge, and make template for glass.
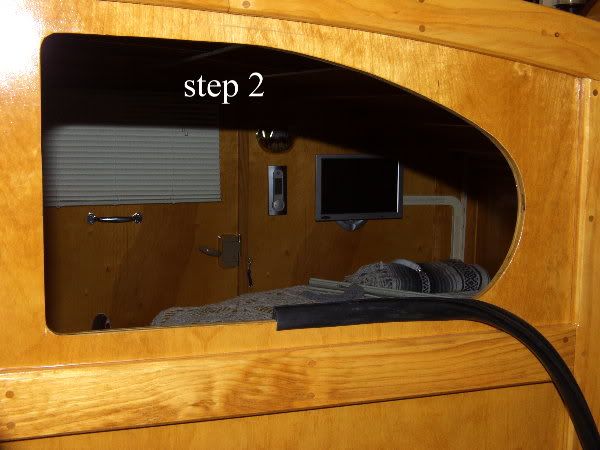
Step 2; install locking rubber glass channel.
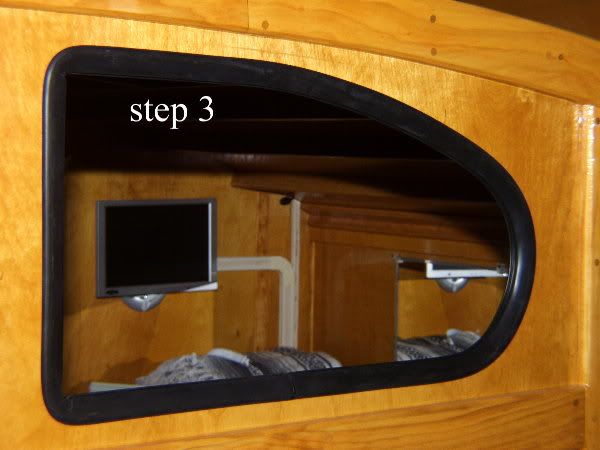
Step 3; Use a small brush to get plenty of thick soap and water mix in the channels and on the face of the rubber so the glass will go in.
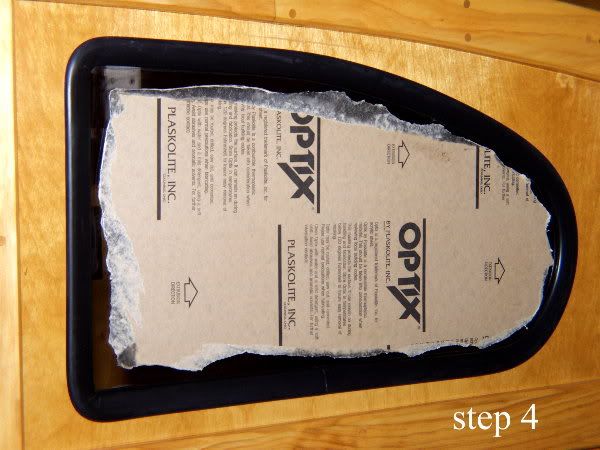
Step 4; Carefully
 work the glass into the channel, then find a helper to hold the glass from the inside while you push the rubber lip over the glass...without breaking it.
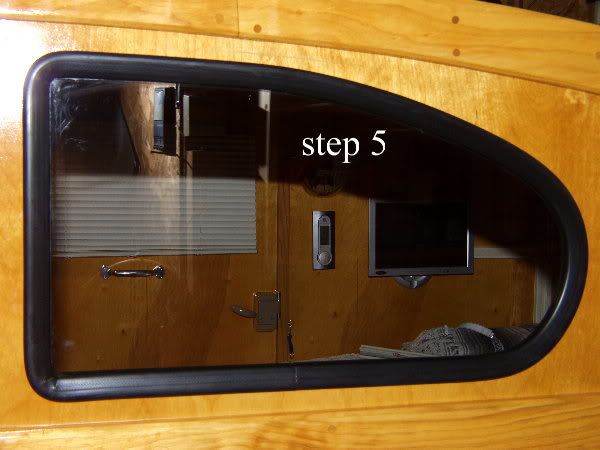
Step 5; Then install the lock strip, remove the protective paper, and wash ofv all the soap and finger prints.
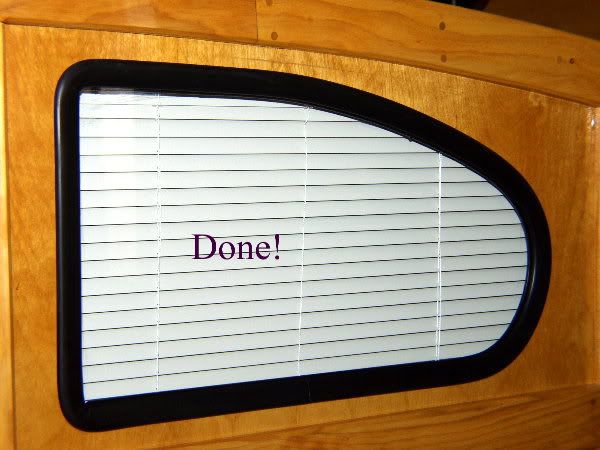
Step 6; Now you can hang your curtains and admire the finished window
As some of you no doubt noticed, the "glass" is actually plexiglass, but "real" glass is installed the same way.
The rubber channel is a good way to "create" a custom shaped window without having one custom made.
The disadvantage is of course that the window doesn't open.
The cost is not slight either...
Per window;
Glass; $25.00
Labor to install; $25.00 (do it yourself and save)
Rubber channel; $25.00 (with shipping and installation tool)
Total, $75.00 per window.
Not cheap, but a custom made to order window in an odd shape like these would easily be in the hundreds, per window.
Rob


 the cutouts were too big to fit the VW glass