Sheathing the Hatch Question

Anything to do with mechanical, construction etc

Sheathing the Hatch Question

Postby Capebuild » Sun Dec 12, 2021 12:30 pm

After you've got the skeleton frame built does it matter if you sheath the exterior or the interior first? I'd rather do the exterior first as then (with the back exposed) I can install the lights, hatch lock and all that. It would be easier to access all the connections without the interior sheathing on. However I'm concerned about the hatch torquing out of shape as I think it would hold it's shape better with both interior and exterior ply panels installed. I was going to use a couple of strap tie downs to help keep the shape until the glue dried.......

any thoughts would be appreciated.

Thanks

John
"Success can be defined as moving from failure to failure without loss of enthusiasm".... Churchill

Visit my Teardrop build here: viewtopic.php?f=50&t=73779
User avatar
Capebuild
Donating Member
 
Posts: 754
Images: 129
Joined: Sun Jan 31, 2021 6:50 am
Location: Massachusetts

Re: Sheathing the Hatch Question

Postby tony.latham » Sun Dec 12, 2021 1:23 pm

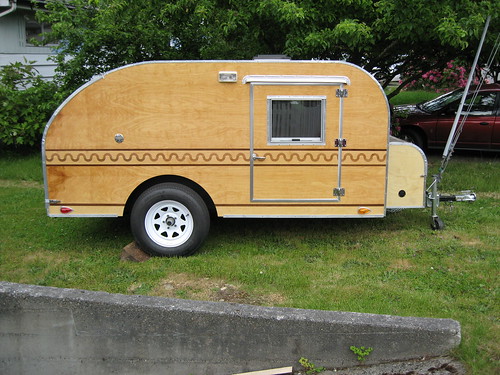
I sheath the interior first. I do it that way because it's easier ––for me-- to add the blocking for the light that way and to add the foam board.

I think it is a good idea to attach a (3-4"?) diagonal piece of 1/8" birch on the outside to make sure things don't twist during this process but I haven't had a problem doing it without one.


Image

I primarily add foam board to support the sheathing. It weighs 3.5 pounds but certainly keeps things cooler in there on hot days.

Tony
User avatar
tony.latham
Gold Donating Member
 
Posts: 6900
Images: 17
Joined: Mon Jul 08, 2013 4:03 pm
Location: Middle of Idaho on the edge of nowhere
Re: Sheathing the Hatch Question

Postby Tom&Shelly » Sun Dec 12, 2021 1:44 pm

We did the inside first, but the bottom of our hatch is flat, so we left that part of the interior off, and added it as a removable panel later to be able to get to the electrical connections, which on ours were fairly complicated. We also used some scrap to keep the frame square until we put the inside sheathing on.

158364 158365

158366 158367 158480

162448 162447 162446

Tom
172912 170466
Tom&Shelly
Palladium Donating Member
 
Posts: 2202
Images: 1946
Joined: Tue Sep 05, 2017 3:27 pm
Location: Upstate New York/New Mexico
Top

Re: Sheathing the Hatch Question

Postby Capebuild » Mon Dec 13, 2021 9:25 am

Thanks Tom and Tony for the help with this. I like the idea of strapping some temporary supports to the frame to keep the torquing to a minimum.
I do think it would be better to sheath the interior side first.... I just have to account for fishing the wiring for the exterior lighting connections.

That's quite the electrical set up in your hatch door, Tom.

Thanks again.

John
"Success can be defined as moving from failure to failure without loss of enthusiasm".... Churchill

Visit my Teardrop build here: viewtopic.php?f=50&t=73779
User avatar
Capebuild
Donating Member
 
Posts: 754
Images: 129
Joined: Sun Jan 31, 2021 6:50 am
Location: Massachusetts
Top

Re: Sheathing the Hatch Question

Postby Tom&Shelly » Mon Dec 13, 2021 12:53 pm

Capebuild wrote:Thanks Tom and Tony for the help with this. I like the idea of strapping some temporary supports to the frame to keep the torquing to a minimum.
I do think it would be better to sheath the interior side first.... I just have to account for fishing the wiring for the exterior lighting connections.

That's quite the electrical set up in your hatch door, Tom.

Thanks again.

John


Thanks John. Having backup lights, turn signal, brake lights etc. on the hatch looks cool, but it's actually an amazing amount of wiring. The terminal strips kept it organized and looks neater than simply soldering (or crimping) wires together. Anyway, so far, no electrical issues! (Knock wood!)

I used rubber hose as sheathing for the wires fished from the top of the hatch to the third brake light and down to the bottom. In theory, we might be able to fish a new cable through the tubing, but I'm hoping we don't have to try.

We did have one issue with putting on the exterior sheath: Make sure your nail gun operator knows to put the nails in pairs at slight opposing angles and knows the keep-out zones to avoid hitting that hidden cable! :?

Tom ;)
172912 170466
Tom&Shelly
Palladium Donating Member
 
Posts: 2202
Images: 1946
Joined: Tue Sep 05, 2017 3:27 pm
Location: Upstate New York/New Mexico
Top

Re: Sheathing the Hatch Question

Postby aggie79 » Wed Dec 15, 2021 12:15 pm

Because I had not installed the sidewall aluminum, I constructed my hatch framing using temporary "through screws" from the sidewall, through 1/4" spacers, and into the outside plywood ribs. I then applied the 1/8" (3mm) skin with the hatch framing "in place". The plywood was run "wild" past the edges and then I used a trim router to later cut it to width. After time for adhesive cure, I removed the temporary clamp screws and filled the screw holes. I then removed the temporary through screws, removed the hatch, applied fiberglass tape along the overhanging plywood edges for reinforcement, and epoxied the entire outer 3mm plywood. (I used two coats of epoxy on all plywood "skins" before adding the aluminum.) Although I didn't have spring-back, even with the tight bottom profile radius and narrow plywood ribs, you may want to install temporary diagonal framing, attached at the bottom and top of the ribs, to "fix" the hatch profile. (The blue screws and straps were applied temporarily to "clamp" the plywood to hatch framing.)

Image

Image
(I'm not sure why this image is rotated or know how to fix it.)

Image

Image

Image

Image

Image

Image

Image

Image

Image
Tom (& Linda)
For build info on our former Silver Beatle teardrop:
Build Thread

93503
User avatar
aggie79
Super Duper Lifetime Member
 
Posts: 5405
Images: 686
Joined: Tue Aug 07, 2007 5:42 pm
Location: Watauga, Texas
Top


Return to Teardrop Construction Tips & Techniques

Who is online

Users browsing this forum: No registered users and 22 guests