Page 1 of 1
Progress Pics

Posted:
Fri May 19, 2006 9:42 amby sunny16
It's been a while since I posted any progress pics. I have been working on the tear slowly the past weks and have gotten the roof insulated, wired and skined. Finished the last section last night. Put the rear hatch on using regular dooe hinges and I will build a seal over the top when the time comes. I also cut out the interior cabinet fronts and attached the doors and set it in place to see what it will look like. I think I will build cabinet fronts our of solid 1 x 2's instead. It just looks better and will work better. Boy this nickle and dime stuff to "get er done" is a killer!
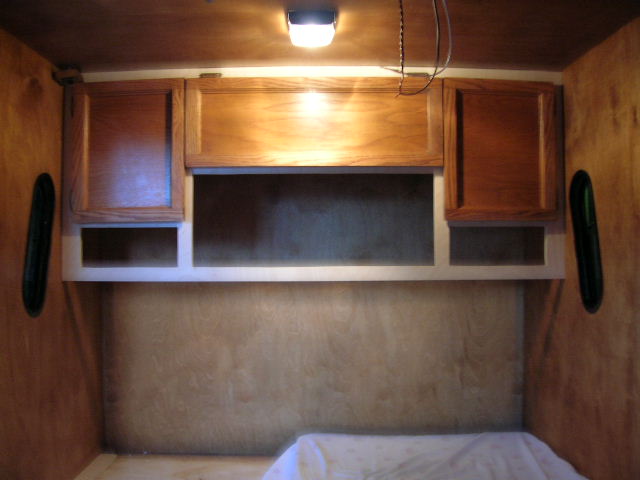
Interior cabinets for now.

Rear hatch closed showing the rear profile.
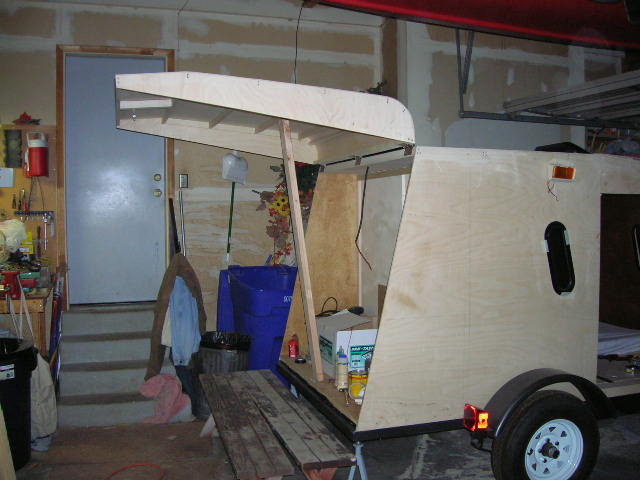
Rear hatch opened. Like my "gas shock"? (Temporary)

Regular door hinges. They work great and I can take the hatch off very quickly by removing the pins.
Posted:
Fri May 19, 2006 10:32 amby rampage
Posted:
Fri May 19, 2006 10:37 amby Darren
I like it. Keep up the good work and thanks for the photos.

Posted:
Fri May 19, 2006 11:04 amby madjack
...looks real good there Sunny....just keep in mind that those easily removable pins will vibrate out as well when travelling and make allowances for that...
madjack

Posted:
Fri May 19, 2006 3:13 pmby Miriam C.
madjack wrote:...looks real good there Sunny....just keep in mind that those easily removable pins will vibrate out as well when travelling and make allowances for that...
madjack
Looks good Sunny
Perhaps you can find a pin that is drilled for cotter pins so it won't come undone.
Miriam
Posted:
Fri May 19, 2006 4:07 pmby sunny16
The pins require a good hit with a hammer and screw driver to get them to come out of the hinge so I don't think it will be a problem. But, thanks for the concern. It was something I didn't think about at the time when I decided on the type of hinge to use. I wanted to use the hurrican hinge but the hatch spares are cut at an angle and the hinge is at 90 degrees. So that made me change to what I have used.

But the trailer is getting there. I'm already planning where to take it on the maiden camping trip.

Posted:
Fri May 19, 2006 6:24 pmby WarPony
I'm with MadJack on the hinge pins. I've seen door hinge pins at home work loose and go "UP"!! I don't know how the hell that happens but that is just crazy!!! I'm afraid yours might rattle loose in time and cause the hatch to fall off. Sure would ruin a camping trip if you were far from home and it was raining, not to mention the guy's day who would be behind you when/if it did fall off. Maybe, if you can't figure out a way to keep the pins securely secured (Whuuuuh?), a couple of safety straps at the corners would do. Wouldn't take too much to do that.
I'm not trying to tell you how to build your camper, just some ideas to think about. I tend to overthink certain situations. I like that side window, though. Good idea!!
hinge pins
Posted:
Fri May 19, 2006 10:42 pmby waywardson
theres no way the pins will work their way out of the hinges,
it sure looks like you will have a rain water problem though,
i have a similar situation with the fish trailer
george / waywardson
Posted:
Mon May 22, 2006 10:08 amby sunny16
I think I have the rain problem figured out. I will put a strip of rubber, about the thickness of an innertube, accross the hatch split and hold it down with small strips of aluminum and some kind oif sealer. SOmeone has used this method already. Flexible yet water tight. Isn't that what we all are striving for?
Thanks for the comments and concerns. There is so much great information here on this forum.
Posted:
Mon May 22, 2006 10:31 amby Ira
Sunny, it looks great! And with waterproofing that hinge, go REDUNDANT--and test it heavily with the hose.
I was 100% sure my hatch hinge was solid against water--I did everything by the book, including rubber from a bike tire under a piano hinge (not hurricane) and using 3m's 5200 to seal. But lo and behold, I had a leak anyway--a BIG one. What probaby happened was that when I sealed the rubber down, it wasn't a 100% continuous seal.
Know what I mean? All it takes is a tiny gap in sealing that rubber to the wood and you're screwed.
So in my case, I added another piece of vinyl door jam on TOP of the hinge.
Granted, I'm a spastic and did few things right in the first place, but water can flow in from some really strange places and angles.
Posted:
Mon May 22, 2006 11:42 amby sunny16
Thanks, Ira,
I know you had the LEAKING problem so your comments are helpful. I don't want any leaking so when I get to that point, I will do the old water-from-the-hose leak test in the yard. Thanks again, everyone!
Posted:
Mon May 22, 2006 12:42 pmby Todah Tear
Sunny,
I am experimenting with attaching a strip of lawn soaker hose with about 3/8" of it cut out of the top along the section under the gap where the body and the galley meet. I attached it to the wall with staples and liquid nails. I coated the hose with polyurethane then coated with the undercarriage paint. This made a contious seal between the wall and the hose, which now forms a u-channel type trough. The water is directed through the rest of the hose down the inner sides of the galley to the ground. I have place a small RV hose filter at the end of the hose to keep bugs( mainly ants) from crawling in through it. I will try to post pictures of this soon.
The reason that I used a soaker hose instead of a regular water hose is because I didn't think that the undercarriage coating (which not only makes the setup water tight, but also hard) would stick to the slick material that a regular hose is made from . The open pores in the soaker gave the polyurethane and the undercarriage coating a place to fill.
Todah
