Windsong Construction

Did you just design your very own teardrop or tiny trailer? Want to discuss it? Here's the place to post your design for discussion!

Postby halfdome, Danny » Sat Jun 17, 2006 12:00 pm

Great framing job, has to be the strongest tear top cap around with all that laminating. It's going to be interesting to watch this tear being built with all that expertise at hand. Your doing a fine job. :thumbsup: :applause: Danny
ImageImage
"Conditions are never just right. People who delay action until all factors are favorable do nothing". William Feather
Don't accept "It's Good Enough" build to the best of your abilities.
Image
Teardroppers Of Oregon & WashingtonImage
User avatar
halfdome, Danny
*Happy Camper
 
Posts: 5894
Images: 252
Joined: Sun Aug 14, 2005 11:02 pm
Location: Washington , Pew-al-up

Postby jplock » Sat Jun 17, 2006 10:29 pm

Saturday I got the sides glued nailed and sanded flush to the frame. Also the first section of roofing glued and nailed.

Image
Keep smiling!
Image
jplock
500 Club
 
Posts: 507
Images: 233
Joined: Mon Jan 02, 2006 10:44 pm
Location: Broken Arrow, Oklahoma

Postby jplock » Wed Jun 21, 2006 10:25 pm

The dreaded hatch is begun. I have prefitted the parts, and the are ready to disassemble then reassemble with glue.
Image

:hammer:
Keep smiling!
Image
jplock
500 Club
 
Posts: 507
Images: 233
Joined: Mon Jan 02, 2006 10:44 pm
Location: Broken Arrow, Oklahoma
Top

Postby Yahnozha » Thu Jun 22, 2006 9:14 am

WOW, that is impressive, keep up the good work.
P@ = Pat, yep that simple
Yahnozha
Teardrop Builder
 
Posts: 34
Images: 4
Joined: Wed Jun 21, 2006 6:33 pm
Location: Land of Enchantment
Top

Postby Rob » Thu Jun 22, 2006 10:22 am

JP__
That looks great! :applause: :applause: :applause:
And I really like the expensive PVC clamps. That is a great idea. :thumbsup:
Rob
:wine:

:peace:
User avatar
Rob
500 Club
 
Posts: 777
Images: 58
Joined: Tue Jan 18, 2005 3:43 pm
Location: Calif, Woodland
Top

Postby jplock » Fri Jun 23, 2006 1:21 pm

The PVC pipe clamps are used by EAA homebuilt aicraft folks.
Keep smiling!
Image
jplock
500 Club
 
Posts: 507
Images: 233
Joined: Mon Jan 02, 2006 10:44 pm
Location: Broken Arrow, Oklahoma
Top

Postby jplock » Sat Jun 24, 2006 7:02 am

Well the hatch framing is glued up and ready for the skin. Also we came up with what seems to be a good hatch springback stiffener. The hatch at this point weighs abut 25 pounds.


Image

:twisted: Image

:hammer: :hammer:
Keep smiling!
Image
jplock
500 Club
 
Posts: 507
Images: 233
Joined: Mon Jan 02, 2006 10:44 pm
Location: Broken Arrow, Oklahoma
Top

Postby jplock » Mon Jun 26, 2006 10:24 pm

My father in law built the hatch latch for me. He sure did some precision metal work. This is the front and back view. He said that is the way he built the door latches on his airplane.

Image

:thumbsup: :thumbsup:
Keep smiling!
Image
jplock
500 Club
 
Posts: 507
Images: 233
Joined: Mon Jan 02, 2006 10:44 pm
Location: Broken Arrow, Oklahoma
Top

Postby Miriam C. » Tue Jun 27, 2006 12:24 am

:applause: :applause: :thumbsup:
JP that looks really good. I like the way you have framed. Good example for us newbeeeeeees.
Aunti M
“Forgiveness means giving up all hope for a better past.â€
User avatar
Miriam C.
our Aunti M
 
Posts: 19675
Images: 148
Joined: Wed Feb 15, 2006 3:14 pm
Location: Southwest MO
Top

Postby jplock » Sat Jul 01, 2006 9:46 pm

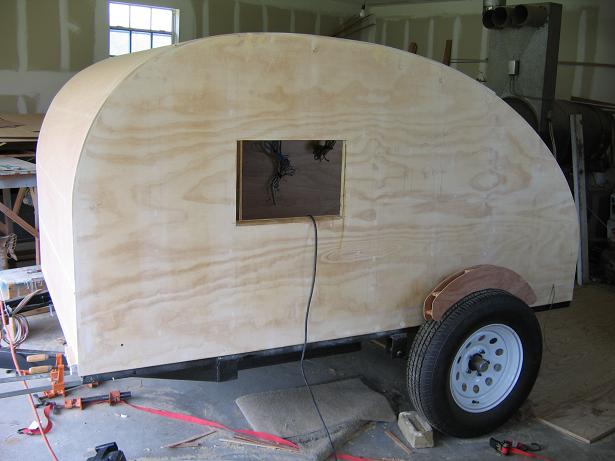
Progress made on Saturday July 1st. The paneling is installed, built door, and door Jamb. I am hoping to have it dryed in in the next 4 weeks. I may just take it Finished on the outside an unfininished on the inside on a 2000 mile trip to Brooks Lake Wyoming. We will see...

:worship: :worship: :worship:

Image

PS I may have to pigtail and black tape my wiring temporarily for the tail lights for the trip. Probaly not enough time to get the electrical in permenant.

Image

Image

Brooks Lake Wyoming.
Tenting would not be so bad if I am not finished though!
Keep smiling!
Image
jplock
500 Club
 
Posts: 507
Images: 233
Joined: Mon Jan 02, 2006 10:44 pm
Location: Broken Arrow, Oklahoma
Top

Postby jplock » Tue Jul 04, 2006 9:29 pm

Here is the progress made on The 4th of July.

Image
:campfire:
Keep smiling!
Image
jplock
500 Club
 
Posts: 507
Images: 233
Joined: Mon Jan 02, 2006 10:44 pm
Location: Broken Arrow, Oklahoma
Top

Postby jplock » Sun Jul 09, 2006 5:47 pm

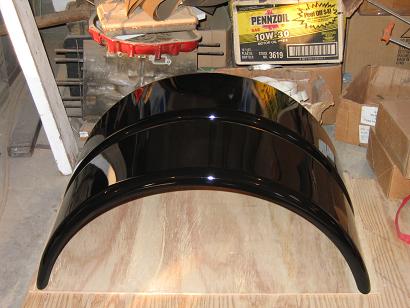
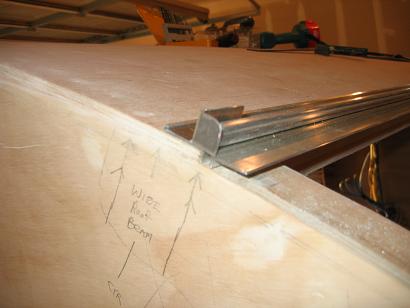
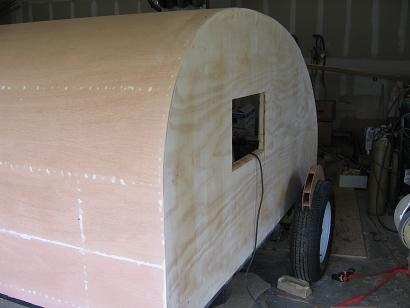
Here are some more pictures made of progress on 07-08-2006. The handle hole is bored on the hatch. My father in law painted the fenders good work he did! I spent all day Saturday triming the roof flush with the side puttying, and SANDING (ALL DAY). The Hatch hinge mounting was begun. I made a template for mounting the fenders, it sets on the tire the fender goes on top. the mounting goes from there. It was a busy day at the office.

:hammer: :hammer:

Image
Fenders!

Image
Side sanded and fender template

Image
Hatch hinge

Image

PS due to all the curved sanding my orbital sander bit the dust! Was not designed to be used on a convex curve. Wise word of wisdom, I did not know that could happen.
Keep smiling!
Image
jplock
500 Club
 
Posts: 507
Images: 233
Joined: Mon Jan 02, 2006 10:44 pm
Location: Broken Arrow, Oklahoma
Top

Postby jplock » Sat Jul 15, 2006 10:56 pm

Here is progress made on Saturday 07-15-2006. The TD could soon be traveling unfinished on the inside to Wyomoing! My dear wife got the foam rubber, and making the mattress cover for sleeping. I was able to trim the hatch lid to fit, replaced sheet rock screws used on the outside with galvanized srews so I would not be getting rust through the paint.

Image

Image
Keep smiling!
Image
jplock
500 Club
 
Posts: 507
Images: 233
Joined: Mon Jan 02, 2006 10:44 pm
Location: Broken Arrow, Oklahoma
Top

Postby peggyearlchris » Sun Jul 16, 2006 9:47 pm

:applause: :applause: :applause: It sure is looking good. looking real good!!! Just starting my build. Got my axle, ready to start. Have a great day :thumbsup: :thumbsup: Peg
User avatar
peggyearlchris
500 Club
 
Posts: 984
Images: 56
Joined: Mon May 29, 2006 8:49 pm
Location: corpus christi,texas
Top

Postby Miriam C. » Sun Jul 16, 2006 10:53 pm

Get er done. That is looking almost there.
Did you use 1/4" for the hatch?

Love in it
Miriam
“Forgiveness means giving up all hope for a better past.â€
User avatar
Miriam C.
our Aunti M
 
Posts: 19675
Images: 148
Joined: Wed Feb 15, 2006 3:14 pm
Location: Southwest MO
Top

PreviousNext

Return to Member Designs

Who is online

Users browsing this forum: No registered users and 7 guests