Page 1 of 2

My Room to Go design

PostPosted: Sun Jun 23, 2013 12:00 am
by brycelowe
First post here, been poking around for the last month as I designed our tear. Its getting close to time to break the saws out and I wanted to see what you guys might think.
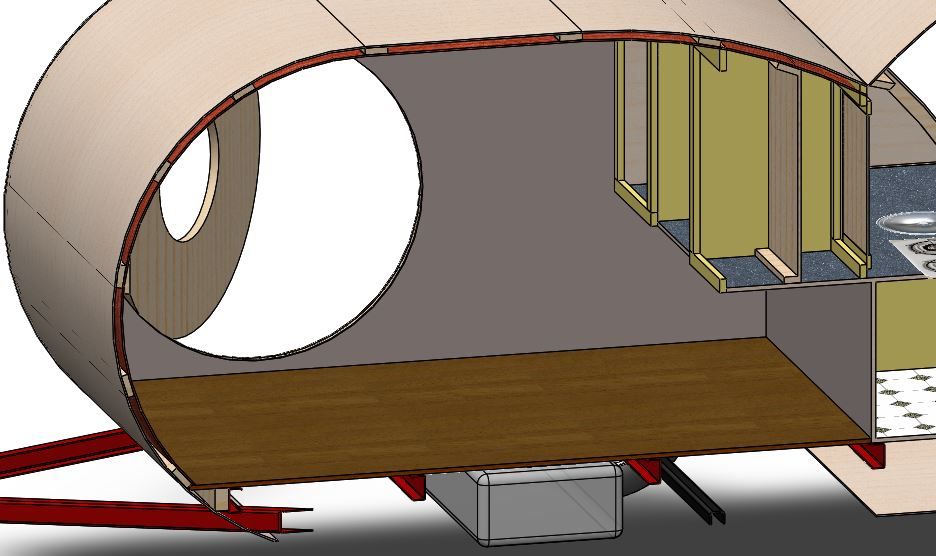
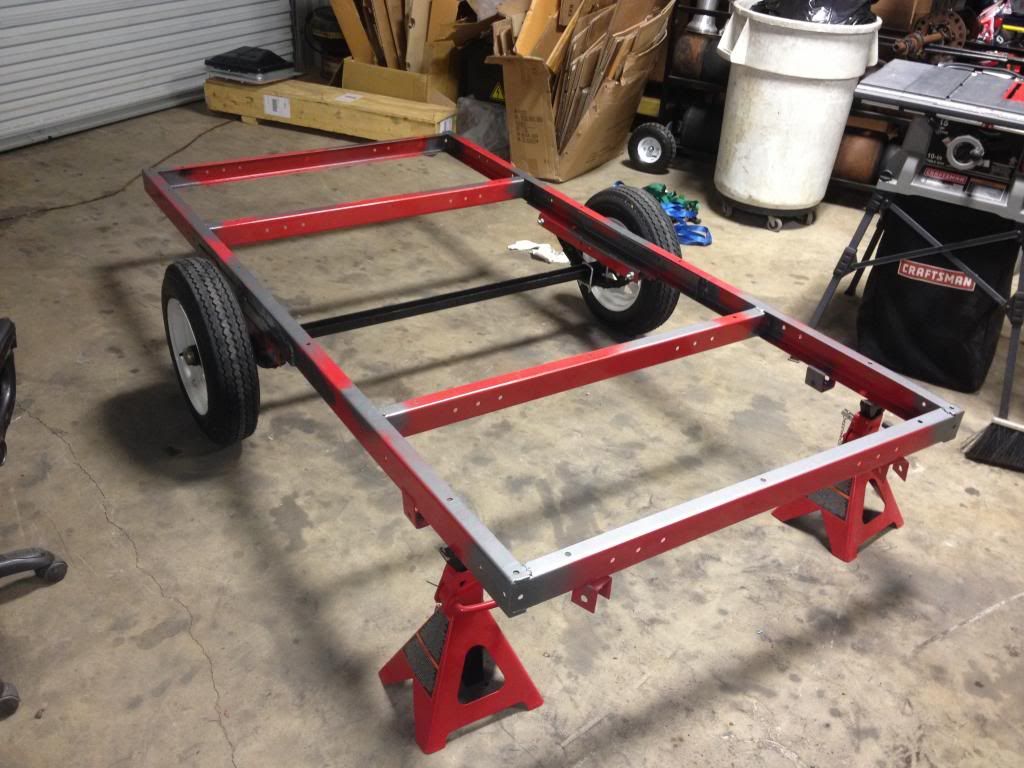
Its on a HF frame. Was planning to lower the frame by placing the axle on top of the leafs. Is there any known issues with that? I would pin the bolts to keep the nuts from backing all the way off.

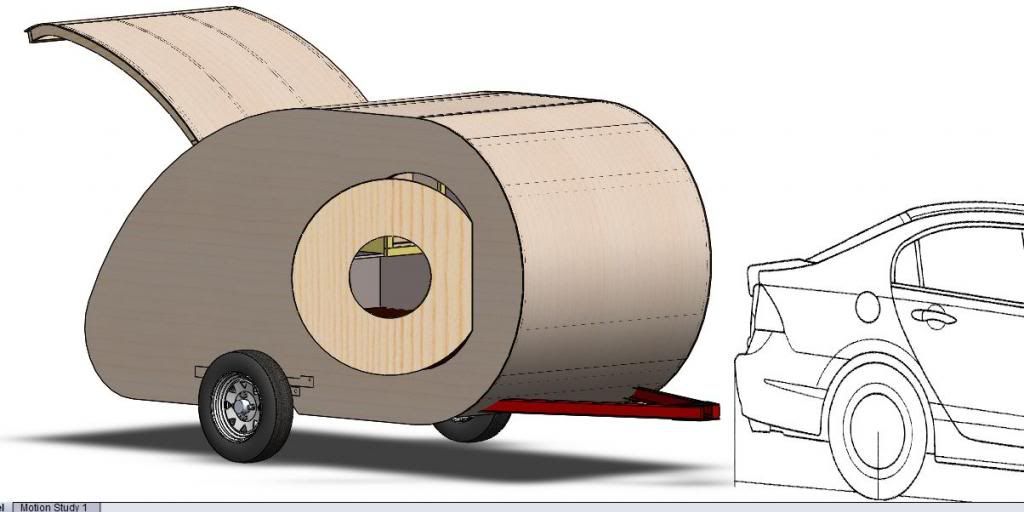
the fenders, tongue box/trunk, and the paint scheme aren't shown.

Image

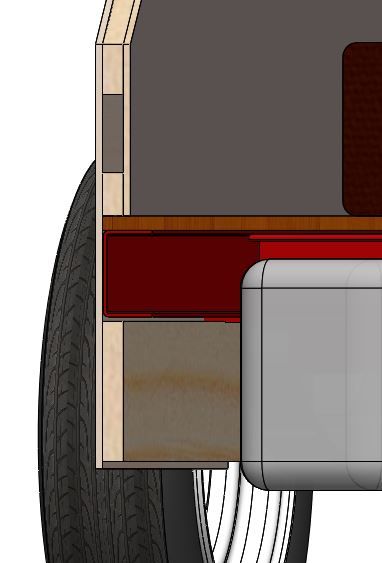
I'm not exactly sure what to do about the angle iron for the suspension. The plan is to build the fenders from wood as well so they will possibly cover that up.
Image

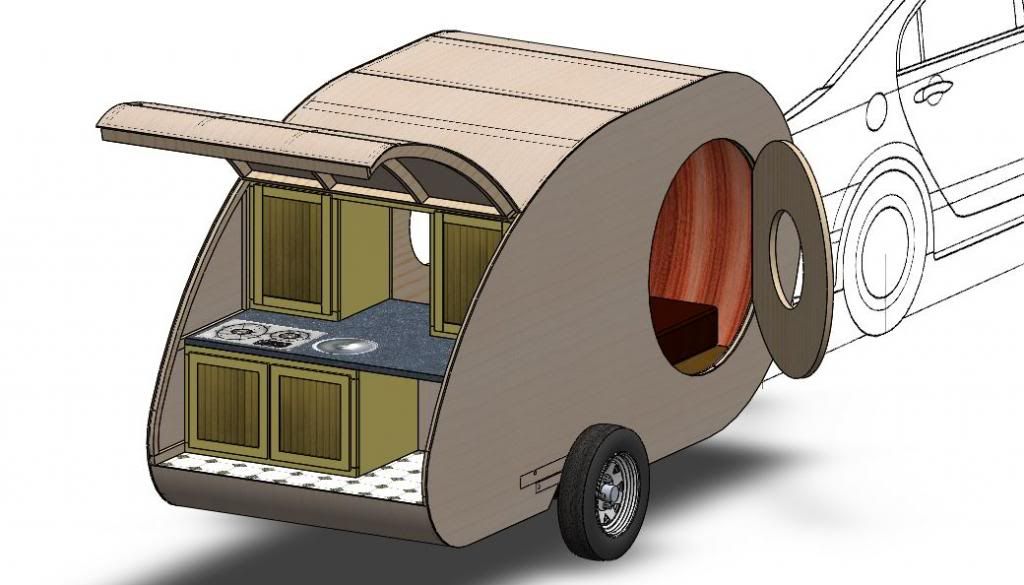
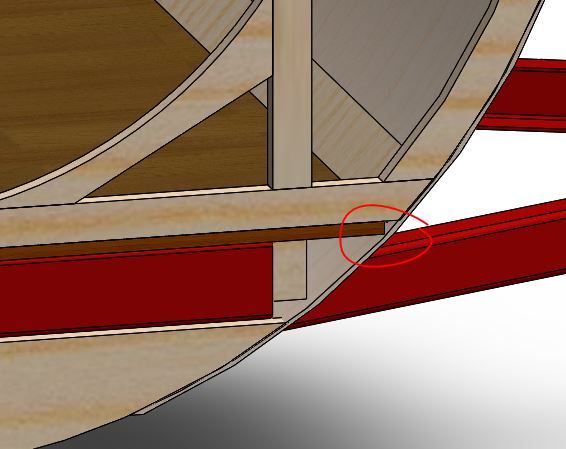
Any thoughts about the joints for the wall at the trailer frame?
Image

Any constructive criticism is welcomed.

-bryce

Re: My Room to Go design

PostPosted: Sun Jun 23, 2013 6:22 am
by Shadow Catcher
I like the design, one thing to remember is that the lower door sill needs to be below the bed/mattress as getting in and out pretty much requires you sit there. One of the reasons I like our wide doors.
54693

Re: My Room to Go design

PostPosted: Sun Jun 23, 2013 9:41 am
by rebapuck
I'm not a builder so can't comment on that. But I cook and can recommend that the stove be on one side and the sink on the other. Put your open counterspace in the middle.

Re: My Room to Go design

PostPosted: Sun Jun 23, 2013 1:00 pm
by brycelowe
Thanks for the replies.
Shadow,
That has been a concern of ours and we just changed to a 2 door design yesterday. I really like the way the round bottom looks but I can see it being a comfort issue. Here is a view of what the door opening will look like from inside.
Image

Judy, good point. I went with that configuration because Tia liked the one from clevercamper.co.uk But I'm going to move the cooler to the middle and split the cabnets to see how that looks.
Image

-bryce

Re: My Room to Go design

PostPosted: Sun Jun 23, 2013 3:19 pm
by Forrest747
Ok a couple of things. The circle door interesting, if you go for it make sure the mattress is above to help with your legs hanging over it. The mounting the wall to the floor your design looked good. set the wall on the floor and then the exterior panel drop to the bottom of the floor framing. (I didnt do this and hate myself for it) Sink and stove its your trailer put it where you want. although if you do the table extension dont do it where the cooler is I hate to think about trying to get into the cooler when the table has alot of stuff on it. i dont know harbor freight trailers all that well but do not see a reason why not put the axle on the inside. i did it to mine. in looking at the design do you have a box on teh inderneath just wondering. have fun and mocking up with cardboard and tape will not hurt especially the galley
96808

Re: My Room to Go design

PostPosted: Sun Jun 23, 2013 6:34 pm
by Junkboy999
When in doubt, Mock-it-up. Get some cheap chipboard and cut a hole for a door see how it goes. Even for the kitchen. You can use your stove at home if you got countertop next to it. Tape off an area the size of your estimated TD counter. It is nice to take stuff off the stove and set it down without having to place it over the sink.

A lot of people have left there galley unfinished and try it out first. After a few trips you see what you use and what you need. Just thinking out loud with you.

Re: My Room to Go design

PostPosted: Mon Jun 24, 2013 7:52 pm
by brycelowe
Mocking it up is a great idea. I was going to build a paper scale model but I think that sill wouldn't have answered my questions about placement. Cardboard it is.
should I start a build thread for questions about appliances, materials and hardware?
Edit: the container under the floor just in front of the axle is a 21 gal fresh water tank. I also plan to build some storage into the floor that will be hidden from the side by the skirts.

Re: My Room to Go design

PostPosted: Tue Jun 25, 2013 7:57 pm
by brycelowe
Threw on some "virtual" wood built up fenders. Anybody with experience building fenders from wood?
I would seal the wood and line the inside of the fenders with flashing to protect from rocks and road wear.
Image

I've been adding photos to my photobucket album if you want to take a look.
http://s990.photobucket.com/user/brycelowe/library/

Re: My Room to Go design

PostPosted: Wed Jun 26, 2013 2:29 pm
by Junkboy999
This thread has 3 on the first page.

AmyH has wooden fender but not pictures here, but on her blog is the pictures. This is her flickr stream. ( fender are near the end of her pictures ) Super nice build. I'm modeling my dream TD off her profile and size.
http://www.flickr.com/photos/herndal/25 ... set-319534


The bid aluminum sides with the polished circles are wood I believe as well. Just covered in metal.


And a nice wooden benroy with wood fenders.

Nice rendering. My poorman free cad software does not render at all ( well it passes stuff to POV Ray, but I clueless about it ). I modeled a nice true to scale Coleman 200A lantern, all but the mantle and the screw threads. looking for someone to place it in a scene and render it.

Re: My Room to Go design

PostPosted: Thu Jun 27, 2013 9:06 am
by celticquetzel
Somewhere is a build with wood fenders laminated. Looks like they mocked it up maybe in foam core. Cut out. Lot of pieces. Laminated. Then sanded the heck out of it to get the right shape. Beautiful. Still new and lurking so not sure where i saw it. Apologies.

Re: My Room to Go design

PostPosted: Thu Jun 27, 2013 11:43 am
by brycelowe
Amy's build is very impressive. The level of detail is very impressive.
The way she built up the fenders is exactly the way I was planning. Just with the extra on the back and a double ply ply on the outside so I can get the 1" radius.

Re: My Room to Go design

PostPosted: Mon Jul 01, 2013 10:12 am
by brycelowe
Modified the HF Trailer by removing the middle cross-beam and welding all the joints. I also lowered the frame by putting the axle inside the leaf. The tongue received a fresh coat of dark grey paint.
The welds are painted over with the same paint from the tongue as the frame will be completely covered by teardrop.
Image
This 4 day weekend will give us a chance to mock up and decide what changes to make to the doors and such.

Re: My Room to Go design

PostPosted: Mon Jul 01, 2013 12:24 pm
by Forrest747
Ok watch your side profile and the floor. sometimes they do not match up after you cut them. i cant find the picture i know i have seen. the curve at the bottom of the wall goes behind the floor

Re: My Room to Go design

PostPosted: Mon Jul 01, 2013 2:15 pm
by brycelowe
Forrest, I'm not sure I follow what you are saying.
Forrest747 wrote:Ok watch your side profile and the floor. sometimes they do not match up after you cut them. i cant find the picture i know i have seen. the curve at the bottom of the wall goes behind the floor

are you talking about here?
Image

Re: My Room to Go design

PostPosted: Mon Jul 01, 2013 3:02 pm
by Forrest747
Yes i cant find the picture and spent an hour thinking of every search term. Anyhow what a couple of builders cut thier profile with the radius at the very edge of the plywood and at the bottom curve it back in. well thier floors are too long by an inch or so and end up having to cut the floor back.