Step 6: Build your interior cabinets
Step 6: Build your interior cabinets – basic cabinets

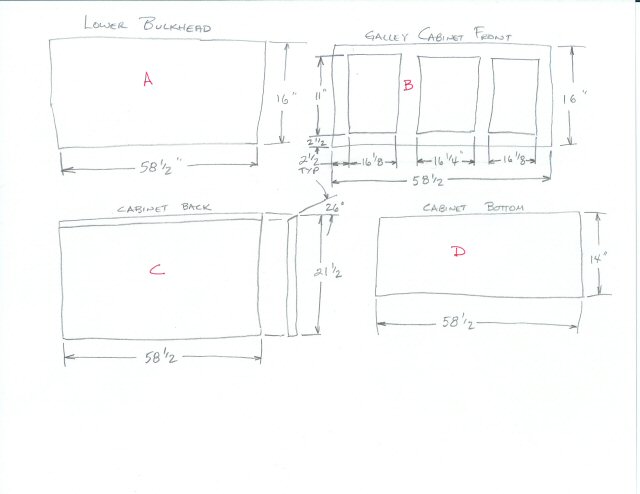
The cabinets are all built from good grade ¾” plywood. You could use birch, cherry, oak, or any other flavor that you like. Cut out your pieces based on these drawings…


You’ll assemble the cabinets separate from the teardrop, and then add it, as an assembly to the teardrop. The cabinet assembly will also serve as a method to keep the sides perpendicular to the floor.
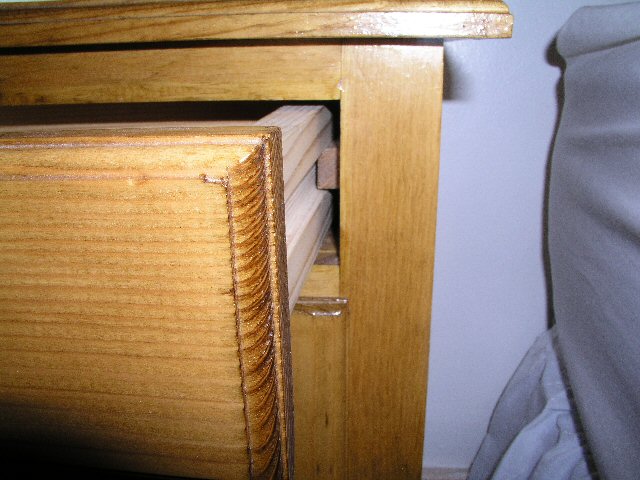
You’ll use a combination bit to drill the holes, counter sink and counterbore the holes at the same time. You’ll come back later with some wooden plugs that you will fill the counterbored holes in with, and then cut and sand flush.
The screws should be 6” from each end (approx) and about a foot apart. You’ll assemble the panels with the side edge sitting on the ground. Use an exterior wood glue for the cabinets, something like Tightbond III.
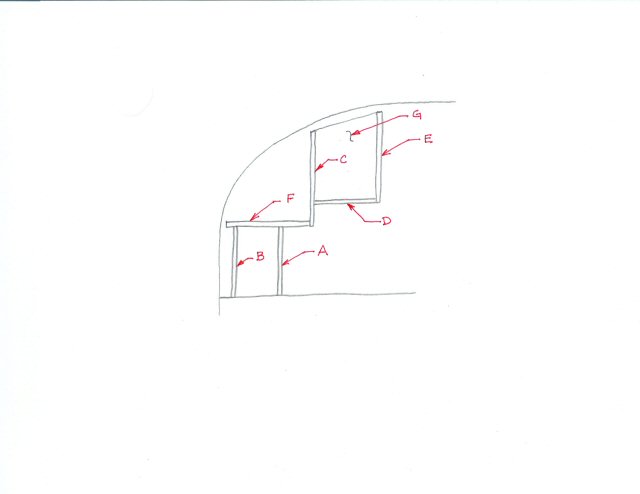
The first step is to assemble the main portion of the cabinet, as shown in this picture…

Then you’ll come back and add the electrical raceway, and the cabin cabinet divider partions…

Last but not least, you’ll add the cabinet doors and sliding doors…


The cabinets are all built from good grade ¾” plywood. You could use birch, cherry, oak, or any other flavor that you like. Cut out your pieces based on these drawings…
You’ll assemble the cabinets separate from the teardrop, and then add it, as an assembly to the teardrop. The cabinet assembly will also serve as a method to keep the sides perpendicular to the floor.
You’ll use a combination bit to drill the holes, counter sink and counterbore the holes at the same time. You’ll come back later with some wooden plugs that you will fill the counterbored holes in with, and then cut and sand flush.
The screws should be 6” from each end (approx) and about a foot apart. You’ll assemble the panels with the side edge sitting on the ground. Use an exterior wood glue for the cabinets, something like Tightbond III.
The first step is to assemble the main portion of the cabinet, as shown in this picture…
Then you’ll come back and add the electrical raceway, and the cabin cabinet divider partions…
Last but not least, you’ll add the cabinet doors and sliding doors…