Denali toyhauler build thread (in progress) 060813

Converting Cargo Trailers into TTTs

Re: Denali toyhauler build thread (in progress) 041313

Postby gregert12 » Sun Apr 14, 2013 3:07 pm

Update 041313-

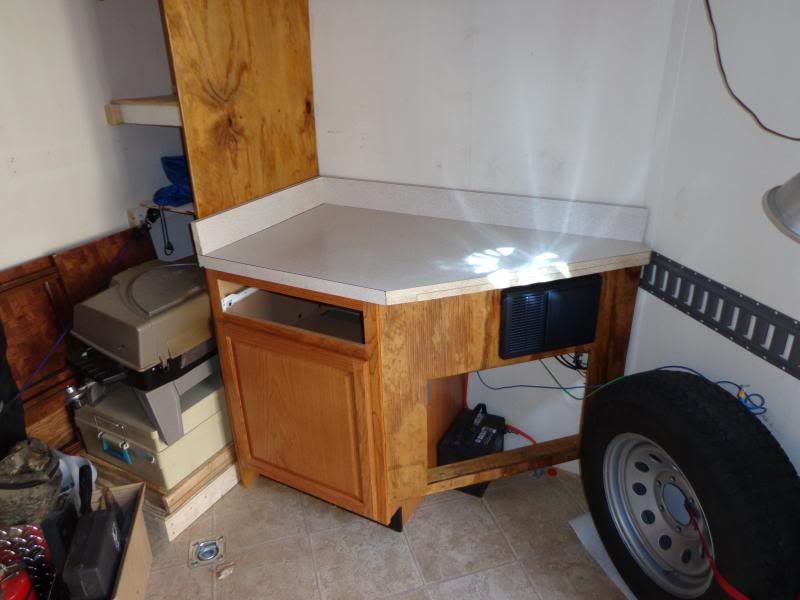
Since the kitchen remodel is in full swing, I wanted to upgrade from the freebie counter which had holes from the prior owner and was a bit too short to this with the built in back splash...
Image

The color contrast looks better.


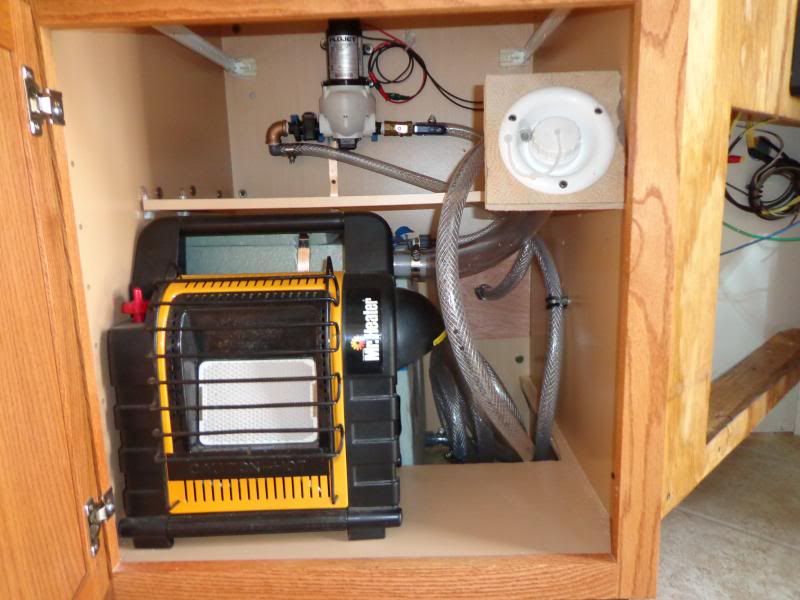
While the prior secondary (read as "interior", no shore hookup) fill was easy to use, it was not ideal since the stiff 1 1/4in ID hose from Lowes was, well, too stiff. It placed too much pressure on the tank fitting and since the hose looped under the shelf, there was a low point and water collected.

So I changed to this and cut off 15 inches of hose...
Image


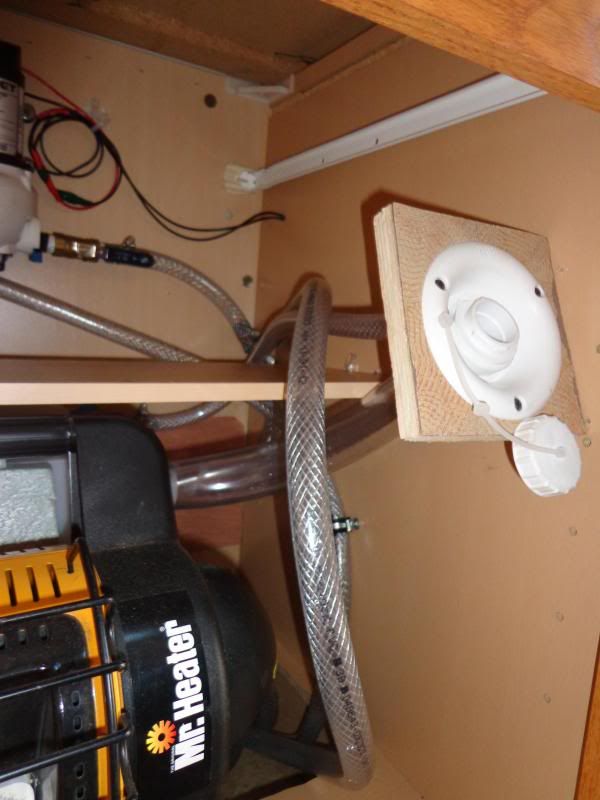
A nice/straight shot for the water to enter the tank and since the vent line is not capped, the hose is routed up for any sloshing water.
Image


To fill this from the 5 gallon such as below, there will be another hose connected between both of them.

Image


Now I need to get a hot water shower such as this and we will be ready to go wheeling!

Image
User avatar
gregert12
Teardrop Builder
 
Posts: 34
Joined: Tue Sep 25, 2012 3:44 pm
Location: NJ

Re: Denali toyhauler build thread (in progress) 041313

Postby pvangel » Sun Apr 14, 2013 3:19 pm

^^ I have the same water heater^^ Used it for the first time this weekend and it worked great!
How does that Mr Heater work? Does it smell when on?
pvangel
Teardrop Master
 
Posts: 221
Joined: Tue Sep 04, 2012 4:25 pm

Re: Denali toyhauler build thread (in progress) 041313

Postby gregert12 » Sun Apr 14, 2013 4:14 pm

pvangel wrote:^^ I have the same water heater^^ Used it for the first time this weekend and it worked great!
How does that Mr Heater work? Does it smell when on?


The Mr Heater can take a 1lb bottle and there is also a jumper to connect it to a 20lb bottle. It has a high/low setting and works well for my application. The 1 lb bottle lasts 5-6 hours on high. There is no smell but it still puts out carbon monoxide so keep a vent/window open.
User avatar
gregert12
Teardrop Builder
 
Posts: 34
Joined: Tue Sep 25, 2012 3:44 pm
Location: NJ
Top

Re: Denali toyhauler build thread (in progress) 041313

Postby roadinspector » Sun Apr 14, 2013 10:35 pm

http://www.adventurerv.net/pump-converter-winterizing-kit-camper-p-1574.html

This is what I have found to be the best winterizing item you can put on any camper. It connects before the water pump and flows rv antifreeze thru the lines. Adventure RV does not kill you on shipping and they don't mess around with getting it to you either.

Earnest
Dadgum it! I cut that board 5 times and it's still too short!
2001 quad-cab Dodge Cummins 3/4 ton camper special, 16x7x7 CT work in progress toyhauler, 01 HD Ultra Classic, 98 HD Heritage Softail, 88 HD 1200 Sportster. viewtopic.php?f=42&t=51510
User avatar
roadinspector
500 Club
 
Posts: 599
Images: 127
Joined: Wed Mar 24, 2010 10:33 pm
Location: Texas
Top

Re: Denali toyhauler build thread (in progress) 041313

Postby hankaye » Mon Apr 15, 2013 9:50 am

gregert12, Howdy;

As far as the drain for your water system ... you can add a 'T' between the
tank and the pump. run the line out the floor of the trailer with a shut-off valve.
That's how the set-up in my RV works. Or you can install a seperate outlet into
the tank and run the drai from it...

hank
Striving for a less complicated life since 1949 ...
Every day I beat my own previous record for number of consecutive days I've stayed alive.
hankaye
2000 Club
2000 Club
 
Posts: 2567
Images: 1
Joined: Thu Dec 06, 2012 5:35 pm
Location: S.W. New Mexico
Top

Re: Denali toyhauler build thread (in progress) 041313

Postby gregert12 » Mon Apr 15, 2013 7:18 pm

hankaye wrote:gregert12, Howdy;

As far as the drain for your water system ... you can add a 'T' between the
tank and the pump. run the line out the floor of the trailer with a shut-off valve.
That's how the set-up in my RV works. Or you can install a seperate outlet into
the tank and run the drain from it...

hank


Hey Hank,

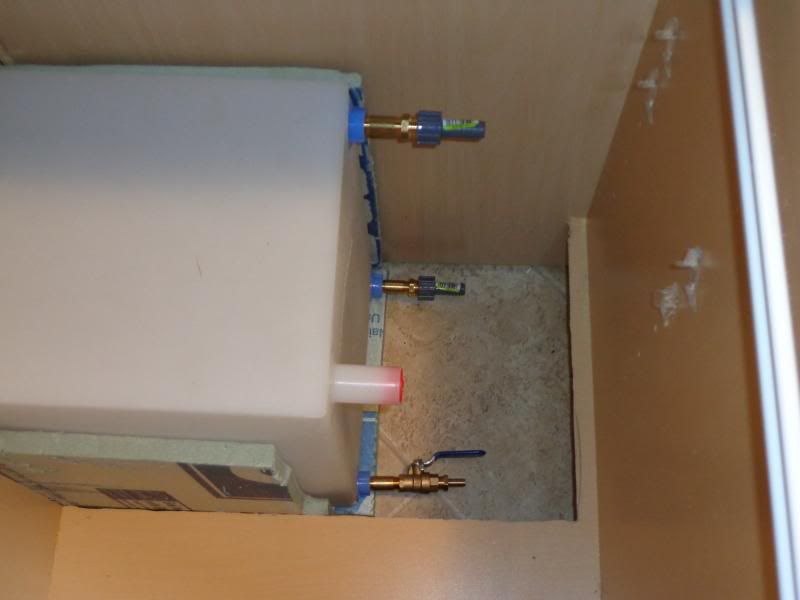
Good idea. I have the drain with the ball valve (lower right of the picture) and did not think to punch a hole into the floor. :thumbsup:

Image
User avatar
gregert12
Teardrop Builder
 
Posts: 34
Joined: Tue Sep 25, 2012 3:44 pm
Location: NJ
Top

Re: Denali toyhauler build thread (in progress) 041313

Postby roadinspector » Mon Apr 15, 2013 9:31 pm

hankaye wrote:gregert12, Howdy;

As far as the drain for your water system ... you can add a 'T' between the
tank and the pump. run the line out the floor of the trailer with a shut-off valve.
That's how the set-up in my RV works. Or you can install a seperate outlet into
the tank and run the drai from it...

hank


Hank is right about how to drain the tank. Mine was set up where the second port on the bottom of the tank was the drain valve and they had a valved line line before the pump like I previously posted to draw antifreeze instead of water. One thing people forget about is the water lines. There is two ways that I know of to protect them is to either pump RV antifreeze thru the lines or blow the water out with air. Your going to use a tankless water heater so this part would not apply to you. But for those that have a tank like mine. I advise a by-pass kit so you don't waste antifreeze filling the tank after you drain it.

Earnest
Dadgum it! I cut that board 5 times and it's still too short!
2001 quad-cab Dodge Cummins 3/4 ton camper special, 16x7x7 CT work in progress toyhauler, 01 HD Ultra Classic, 98 HD Heritage Softail, 88 HD 1200 Sportster. viewtopic.php?f=42&t=51510
User avatar
roadinspector
500 Club
 
Posts: 599
Images: 127
Joined: Wed Mar 24, 2010 10:33 pm
Location: Texas
Top

Re: Denali toyhauler build thread (in progress) 041313

Postby gregert12 » Tue Apr 16, 2013 4:58 pm

roadinspector wrote:
hankaye wrote:gregert12, Howdy;

As far as the drain for your water system ... you can add a 'T' between the
tank and the pump. run the line out the floor of the trailer with a shut-off valve.
That's how the set-up in my RV works. Or you can install a seperate outlet into
the tank and run the drai from it...

hank


Hank is right about how to drain the tank. Mine was set up where the second port on the bottom of the tank was the drain valve and they had a valved line line before the pump like I previously posted to draw antifreeze instead of water. One thing people forget about is the water lines. There is two ways that I know of to protect them is to either pump RV antifreeze thru the lines or blow the water out with air. Your going to use a tankless water heater so this part would not apply to you. But for those that have a tank like mine. I advise a by-pass kit so you don't waste antifreeze filling the tank after you drain it.

Earnest


Now I understand. Thanks.
User avatar
gregert12
Teardrop Builder
 
Posts: 34
Joined: Tue Sep 25, 2012 3:44 pm
Location: NJ
Top

Re: Denali toyhauler build thread (in progress) 041313

Postby gregert12 » Sat Apr 27, 2013 8:22 pm

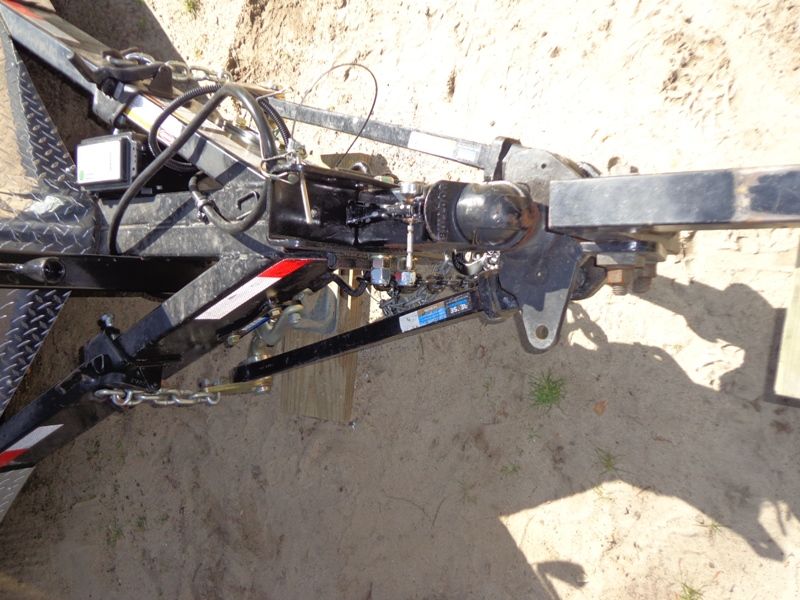
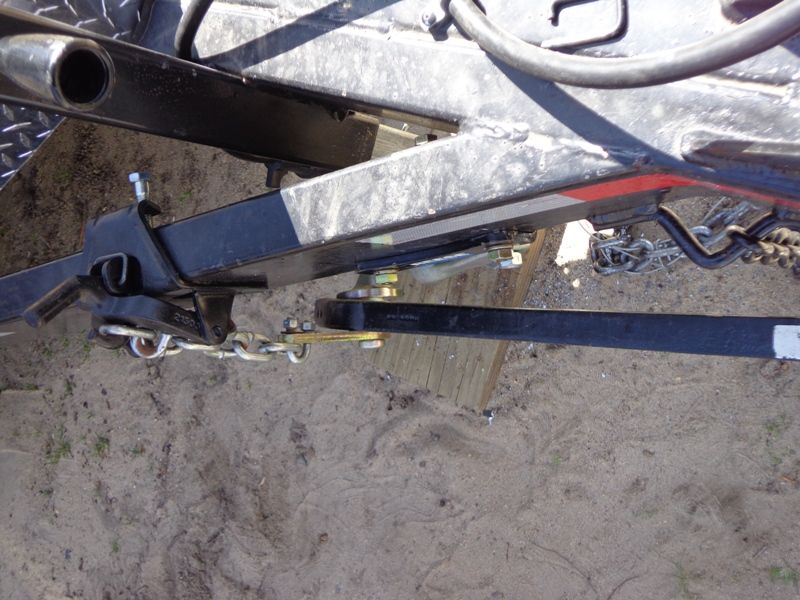
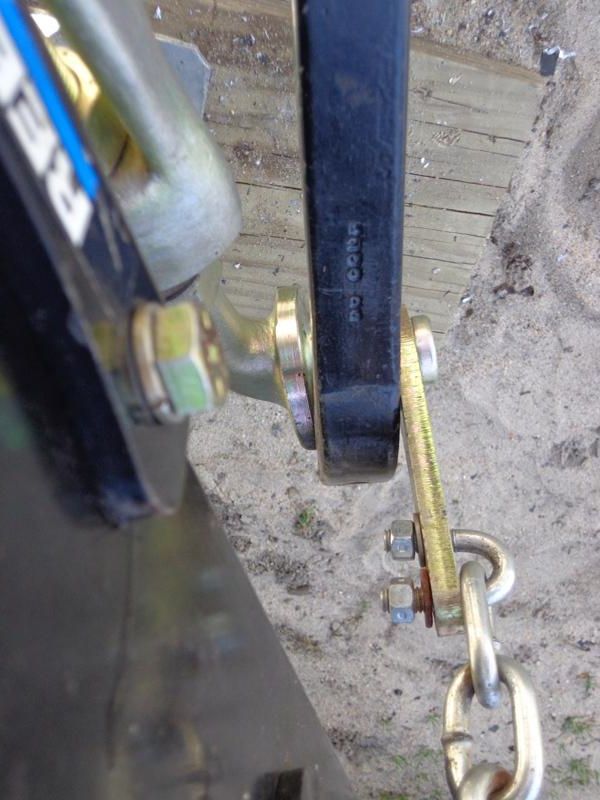
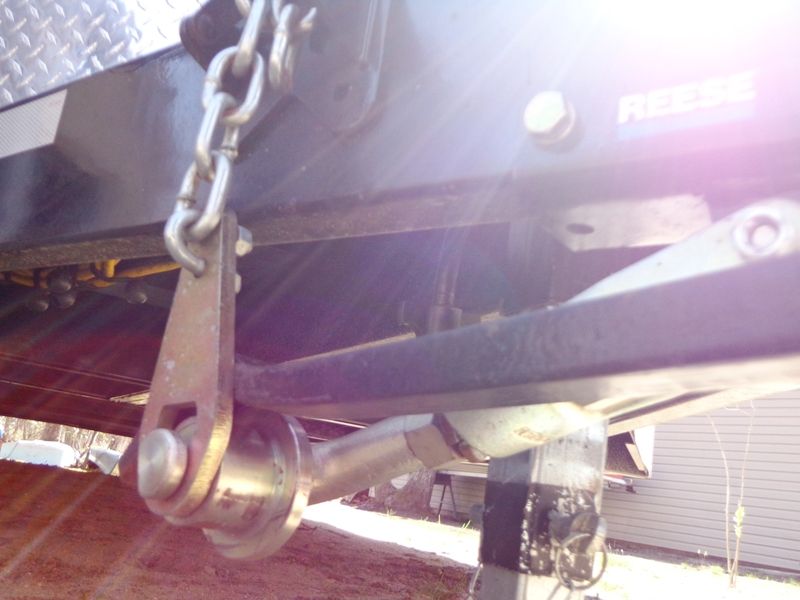
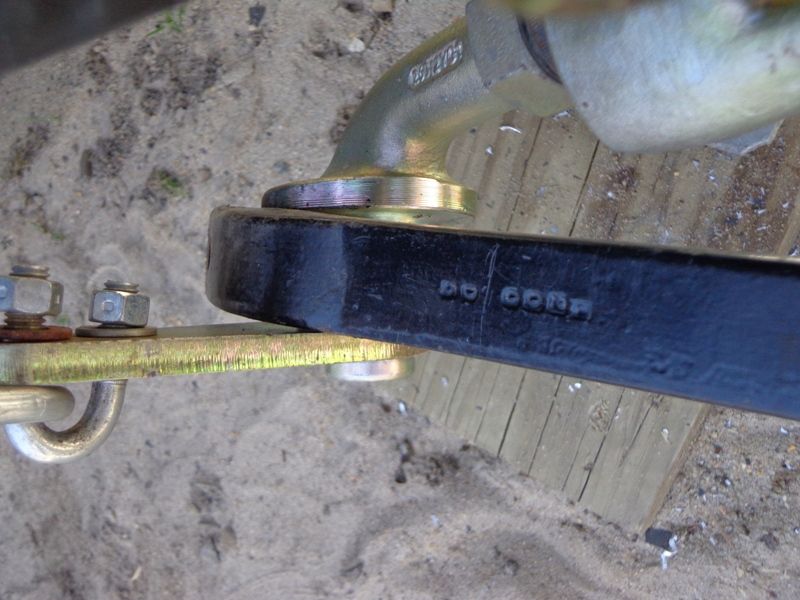
Picked up the Reese Dual Cam Sway Control and seem to have a problem with the tunion bars fitting correctly.


Any thoughts before I cut and weld the hanger on the frame bracket? I called then emailed pictures to a Reese tech almost a week ago and no reply. They must be stumped. :D


Image

Image

Image

Image

Image


Back to the Toy Hauler remodel!

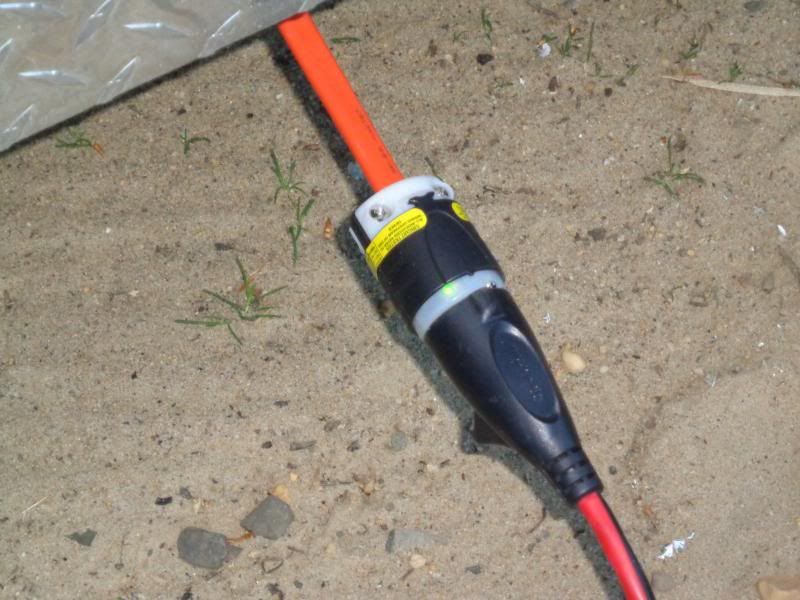
Power is on!
Image


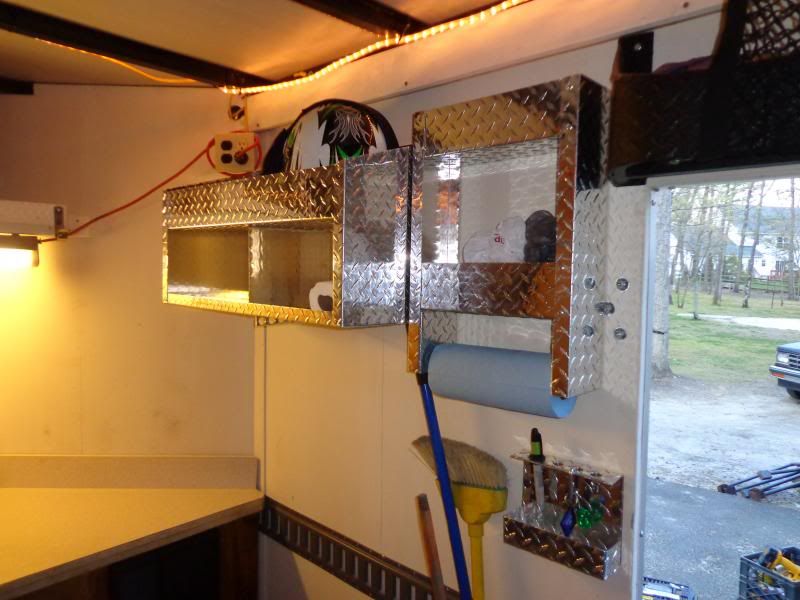
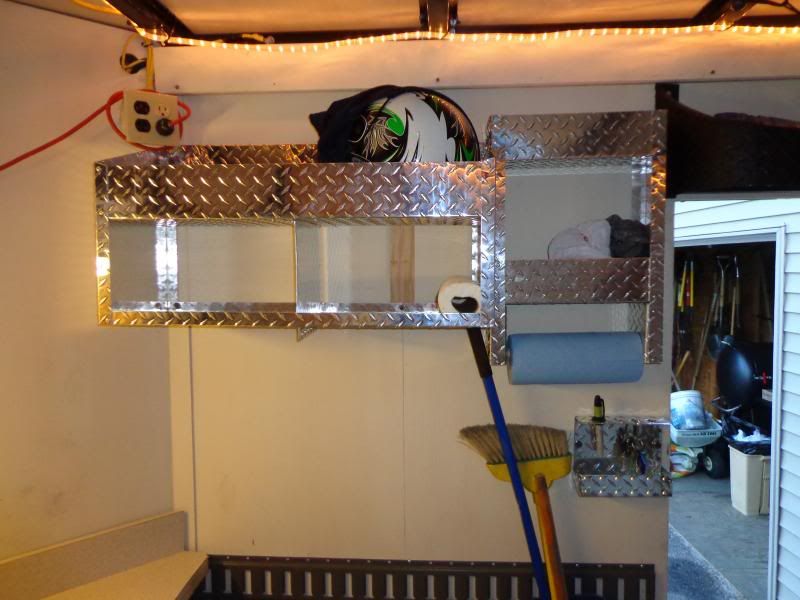
Purchased the 2 helmet holder from http://www.candjaluminum.com/ for $50, what a deal!

Image

Image

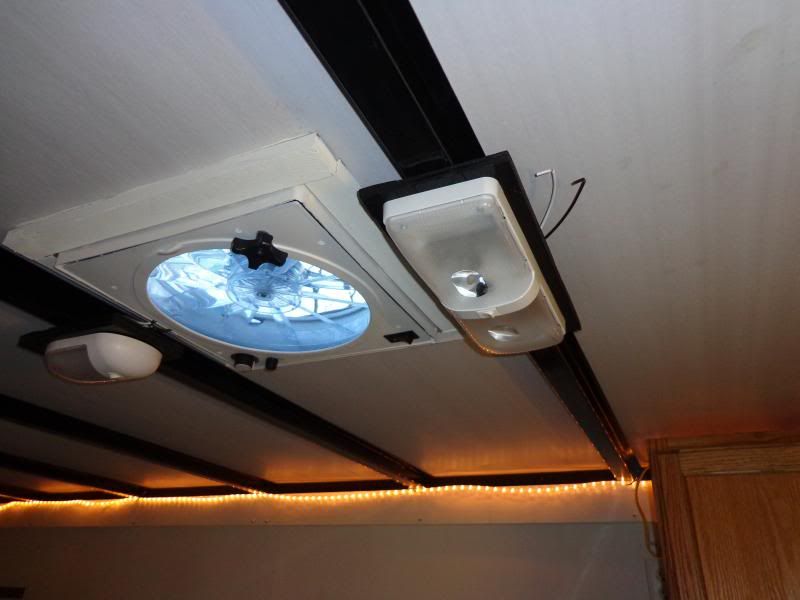
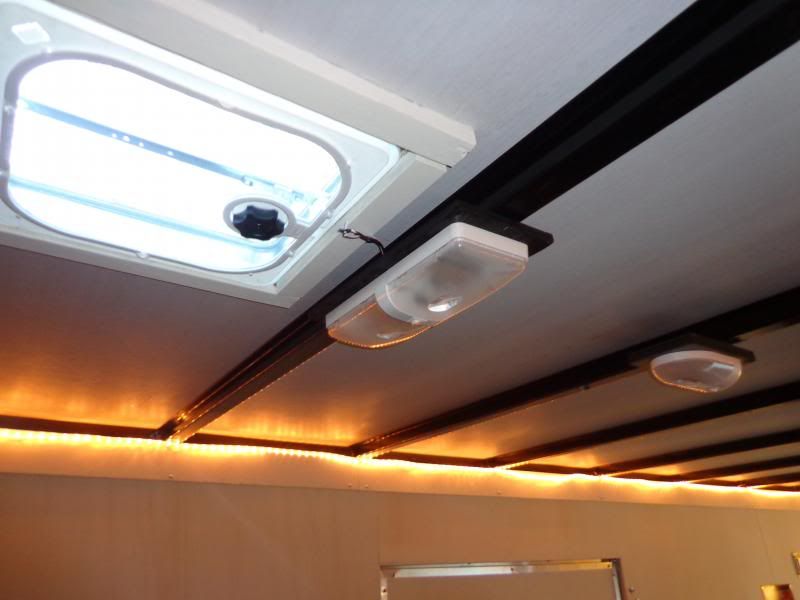
2 sets of dual filament lights to be ran on DC battery/converter power only (no truck) for $7 each.

Image

Image


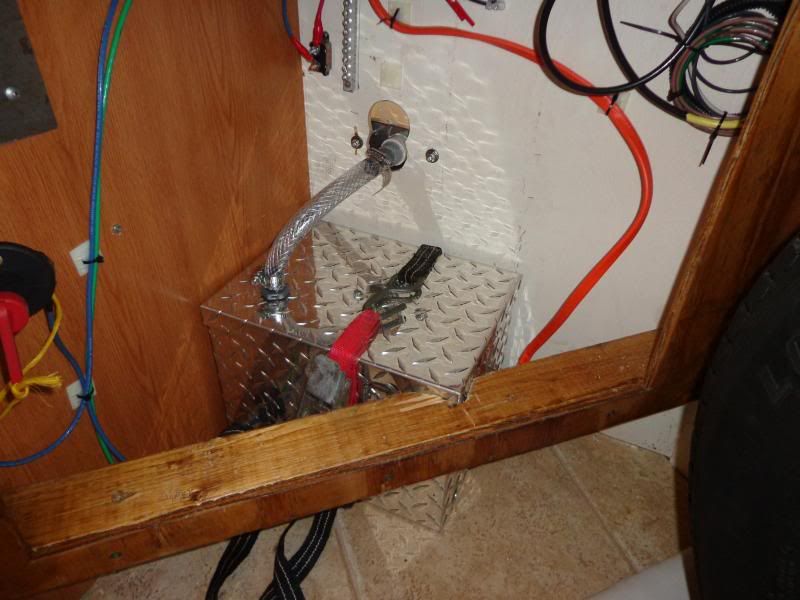
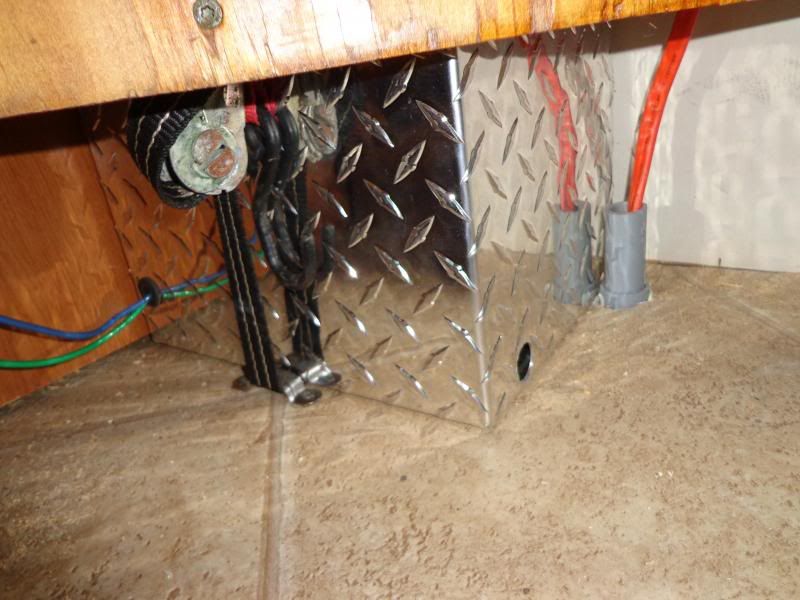
Battery box from the above listed company. I lined the bottom with 1/4 rubber to absorb vibration, drilled 2 sides of pos/neg feeds, bottom 1" vent in, the top for misc fittings, 5/8 sprinkler, 5/8" ID braided water hose, sprinkler blow off valve, water resistant cover on the outside.

Image

Image

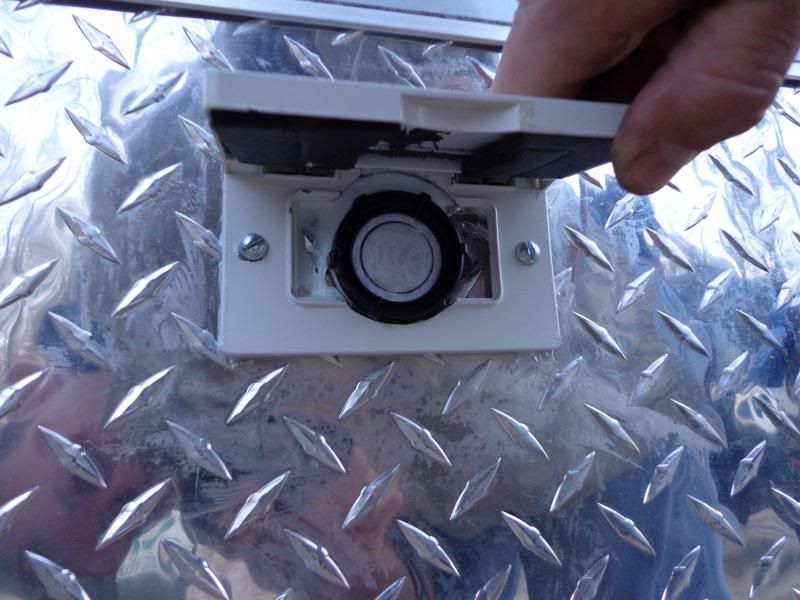
Vent out with spring loaded GFCI cover. That white is the secondary filter media to resist dirt/water intrusion.

Image

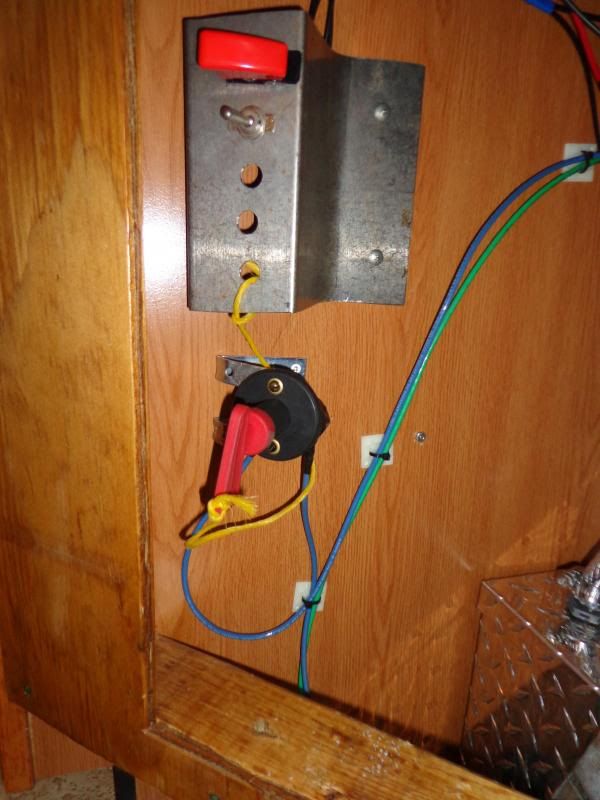
Battery cut off switch so the battery is not constantly feeding the DC side of the converter.

Image

Home sweet home

Image
User avatar
gregert12
Teardrop Builder
 
Posts: 34
Joined: Tue Sep 25, 2012 3:44 pm
Location: NJ
Top

Re: Denali toyhauler build thread (in progress) 042713

Postby roadinspector » Sat Apr 27, 2013 11:25 pm

Looks good! :applause:

Earnest
Dadgum it! I cut that board 5 times and it's still too short!
2001 quad-cab Dodge Cummins 3/4 ton camper special, 16x7x7 CT work in progress toyhauler, 01 HD Ultra Classic, 98 HD Heritage Softail, 88 HD 1200 Sportster. viewtopic.php?f=42&t=51510
User avatar
roadinspector
500 Club
 
Posts: 599
Images: 127
Joined: Wed Mar 24, 2010 10:33 pm
Location: Texas
Top

Re: Denali toyhauler build thread (in progress) 042713

Postby hankaye » Sun Apr 28, 2013 12:57 pm

gregert12, Howdy;

Not sure what your problem is with the Reese system,
Good pix. But what exactly is the problem ???

hank
Striving for a less complicated life since 1949 ...
Every day I beat my own previous record for number of consecutive days I've stayed alive.
hankaye
2000 Club
2000 Club
 
Posts: 2567
Images: 1
Joined: Thu Dec 06, 2012 5:35 pm
Location: S.W. New Mexico
Top

Re: Denali toyhauler build thread (in progress) 042713

Postby gregert12 » Sun Apr 28, 2013 4:05 pm

hankaye wrote:gregert12, Howdy;

Not sure what your problem is with the Reese system,
Good pix. But what exactly is the problem ???

hank


Hey Hank,


The problem with the sway cam is that the tunion bar does not rest in the "cup" of the cam arm for easy movement in and out. The bar actually rides on the shoulder and hits the outer bronze flange .
Image
User avatar
gregert12
Teardrop Builder
 
Posts: 34
Joined: Tue Sep 25, 2012 3:44 pm
Location: NJ
Top

Re: Denali toyhauler build thread (in progress) 042713

Postby hankaye » Sun Apr 28, 2013 10:43 pm

gregert12, Howdy;

My experience was with a Equi-lizer brand.
I noticed that the U-bolt is loose, supposed to be
I'd double nut them and use some lock-tight or some
of the DW or GF's nail paint (works jsut as good as the
expensive stuff).
I also see from the photo that it appears to be inside
of the "cup", all be it at an angle.
Have you contacted the maker of it? Asked their customer
service what might be wrong or if it is the proper size for
your application? Not being critical, just the stuff that runs
through my mind when faced with a same type situation...
Hope you find a solution soon.

hank
Striving for a less complicated life since 1949 ...
Every day I beat my own previous record for number of consecutive days I've stayed alive.
hankaye
2000 Club
2000 Club
 
Posts: 2567
Images: 1
Joined: Thu Dec 06, 2012 5:35 pm
Location: S.W. New Mexico
Top

Re: Denali toyhauler build thread (in progress) 042713

Postby A Plus MM » Mon Apr 29, 2013 6:25 am

No experience with this but it looks to me to be because of the adjustable hitch on the front. I don't know if the manufacture will have a kit or a different setup for that kind of hitch or not.
A Plus MM
Teardrop Builder
 
Posts: 38
Images: 7
Joined: Sun Sep 02, 2012 1:04 pm
Top

Re: Denali toyhauler build thread (in progress) 042713

Postby gregert12 » Mon Apr 29, 2013 7:25 am

Hank,

The u bolt's threads are suppose to be loose and only 2 threads showing.


A Plus MM,

Almost, if not all, 12k lb trailers have the adjustable coupler. The 6" coupler length is the smallest length from "Bull Dog."


I called/emailed Reese products customer service almost a week ago and if they have no idea then I will start modifying the sway bracket.
User avatar
gregert12
Teardrop Builder
 
Posts: 34
Joined: Tue Sep 25, 2012 3:44 pm
Location: NJ
Top

PreviousNext

Return to Cargo Trailer Conversions

Who is online

Users browsing this forum: No registered users and 16 guests