Thanks Richard for the links and info.
I like the way you think!
ris 8.5 X 18 new trailer build 11/1/17
Re: ris 8.5 X 18 new trailer build 11/1/17
![]() by 7sparky7 » Wed Jan 24, 2018 10:13 am
by 7sparky7 » Wed Jan 24, 2018 10:13 am
-

7sparky7 - Teardrop Builder
- Posts: 41
- Images: 11
- Joined: Sun Oct 01, 2017 10:34 am
- Location: Western North Carolina
Re: ris 8.5 X 18 new trailer build 11/1/17
![]() by ris » Thu Jan 25, 2018 8:06 pm
by ris » Thu Jan 25, 2018 8:06 pm
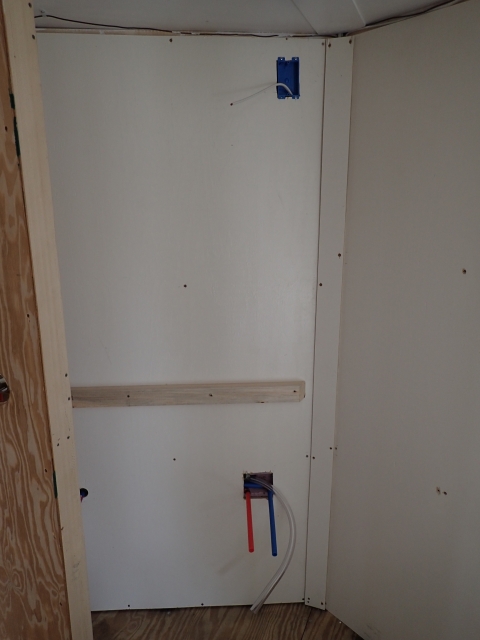
Well we decided to finish the bathroom up in the front of the trailer. We put up the primed, sanded and then 1 topcoat 3/8 plywood. This first pic shows the front wall up, with the wood center strip right in the V of the nose of the trailer. The blue box with the wire is 110 volt for wife's blow dryer and other electrical stuff for the wife. The unpainted board to the left of center is a ledger board for the bath cabinet top. The pex water lines are for the bath sink
This is the view which will be under the bath cabinet top. The first set of lines are for the sink. The second set of lines are for the shower valve. The water lines and drain line from the bath sink and shower are the only water lines behind a wall in the camper. Once they go behind the shower stall ( you can see them in the cutout at the back where they turn to go behind the stall) they will enter the kitchen cabinets and run in the cabinets all the way back to the water heater in the utility room at the back of the trailer.
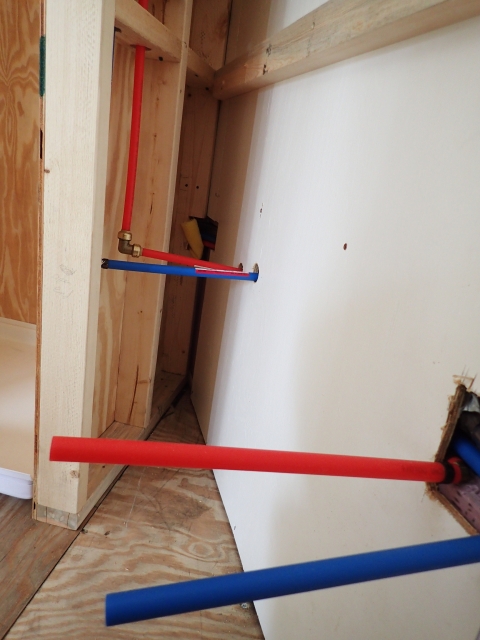
This is the view of the shower valve water lines which are pex and the white cpvc line runs from the valve to the shower head. The bare wood board to the right is the cabinet top ledger board on which the cabinet top will sit.
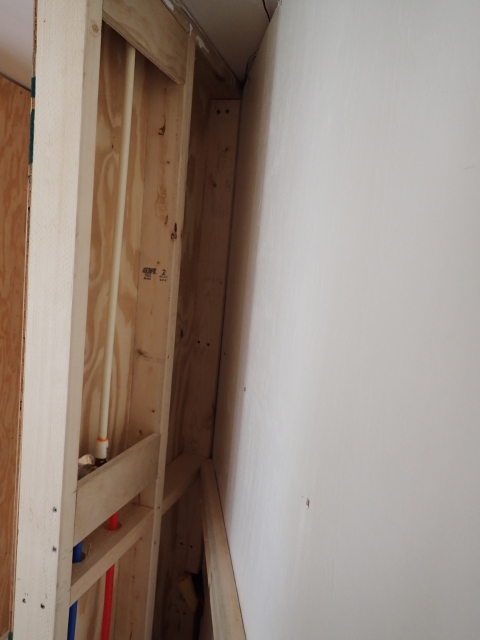
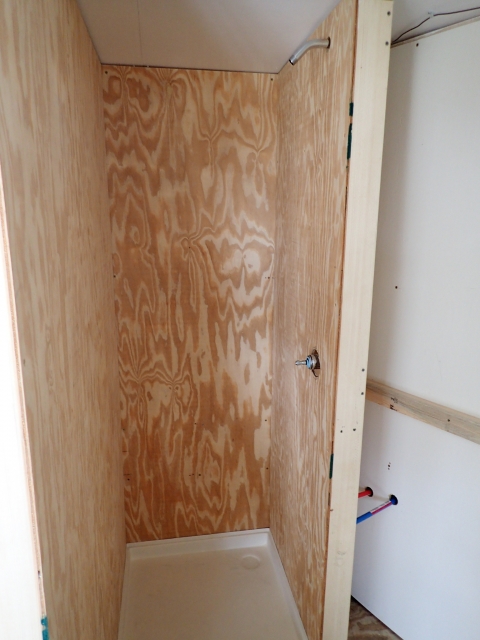
A view of the shower valve and shower pipe in the stall. All it needs now is FRP to finish the shower.
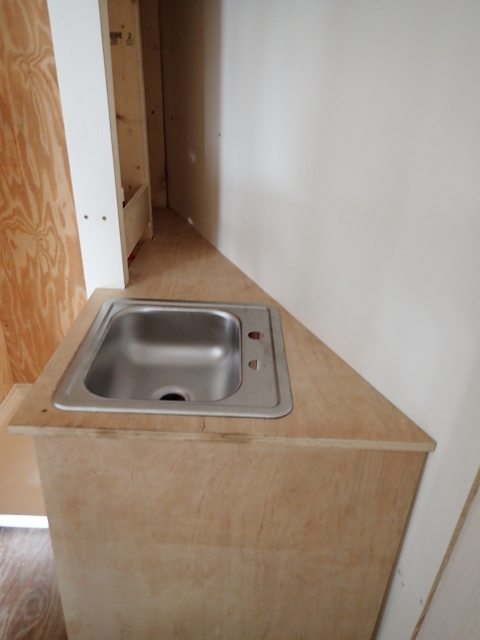
Here is the cabinet top with the sink just sitting in the hole to check the fit. There is a lot of storage from the sink to the back of the v shaped cabinet top. We will be putting another shelf up higher for additional storage. There will also be a shelf under the cabinet top also. You cannot have too much storage. We will not put up plywood on the valve side of the wall it will be left open.
This is the view which will be under the bath cabinet top. The first set of lines are for the sink. The second set of lines are for the shower valve. The water lines and drain line from the bath sink and shower are the only water lines behind a wall in the camper. Once they go behind the shower stall ( you can see them in the cutout at the back where they turn to go behind the stall) they will enter the kitchen cabinets and run in the cabinets all the way back to the water heater in the utility room at the back of the trailer.
This is the view of the shower valve water lines which are pex and the white cpvc line runs from the valve to the shower head. The bare wood board to the right is the cabinet top ledger board on which the cabinet top will sit.
A view of the shower valve and shower pipe in the stall. All it needs now is FRP to finish the shower.
Here is the cabinet top with the sink just sitting in the hole to check the fit. There is a lot of storage from the sink to the back of the v shaped cabinet top. We will be putting another shelf up higher for additional storage. There will also be a shelf under the cabinet top also. You cannot have too much storage. We will not put up plywood on the valve side of the wall it will be left open.
- ris
- Teardrop Master
- Posts: 154
- Images: 126
- Joined: Wed Nov 01, 2017 3:11 pm