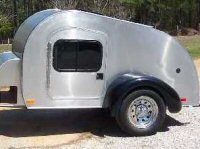
Wells Cargo 5x10, Wander Waggin - 20101011 update

Converting Cargo Trailers into TTTs

Postby PhotoGuy » Thu Jun 17, 2010 8:22 pm

Nathan.

I have been planning to build an off road tear. But after looking at your build.. I thinkl I am changing my mind. You have a very nice set up.
PhotoGuy
Teardrop Master
 
Posts: 132
Images: 2
Joined: Wed Jun 09, 2010 1:16 am
Location: St Thomas Ont Canada

Postby Nathan N » Thu Jun 17, 2010 8:36 pm

Thanks Ken (PhotoGuy),

We are enjoying the conversion. I have really enjoyed working on it and glad to be able to share with this wonderful community.

Check out Gage's saying about taking your time and thinking things through. Then Mike's signature, "The quality is remembered long after the price is forgotten, so build your teardrop with the best materials..."

Thanks for visiting!
Nathan
User avatar
Nathan N
Lifetime member
 
Posts: 587
Images: 153
Joined: Mon Mar 24, 2008 6:55 pm
Location: mid-Missouri

Postby PhotoGuy » Thu Jun 17, 2010 8:51 pm

Yes.. I agree. Take my time and plan before I start.
PhotoGuy
Teardrop Master
 
Posts: 132
Images: 2
Joined: Wed Jun 09, 2010 1:16 am
Location: St Thomas Ont Canada
Top

Postby Nathan N » Fri Jun 18, 2010 5:28 am

PhotoGuy wrote:Yes.. I agree. Take my time and plan before I start.


That doesn't hurt, but what I meant was during my work on our cargo I would come to some task and had several options. For instance where to mount converter. It could have been back in galley, under a bench, or up front where I ended up placing it.

On that and other decisions I either skipped on to other tasks that were not questionable or I sat down with a cold beverage and pondered on the issue.

The original plan for the inside of the galley changed due to the height of the inside benches with the cushions on it, where the thermostat and interior lights were mounted. We camped in it at Pershing gathering before the upper galley was completed. After that we had a better idea of what would work.

So I guess what I am saying it is easier and cheaper to stop and ponder a bit rather than plowing ahead and then having to tear out and redo.

:thumbsup:
Thanks again for visiting,
Nathan
User avatar
Nathan N
Lifetime member
 
Posts: 587
Images: 153
Joined: Mon Mar 24, 2008 6:55 pm
Location: mid-Missouri
Top

Postby Steve Frederick » Fri Jun 18, 2010 8:45 am

Nathan N wrote:Steve,
Thank you, I am honored.


You're most welcome! I've really enjoyed watching this build. You have done a wonderful job on the details.
Blessings, Steve
Adirondacks, Upstate New York
Building Journals
The Shop Manual's 8-years old!! Thank's everyone!
New! 'Rondack Lodge Plans!Order Here!
Image
User avatar
Steve Frederick
Custom Teardrop Builder
 
Posts: 1984
Images: 29
Joined: Thu Apr 15, 2004 5:02 pm
Location: Upstate New York, Adirondacks (Great Sacandaga Lake)
Top

Postby PhotoGuy » Fri Jun 18, 2010 2:23 pm

" sat down with a cold beverage and pondered " now there is a great idea for a friday afternoon. :) See you all later. Off to the deck to ponder my build
PhotoGuy
Teardrop Master
 
Posts: 132
Images: 2
Joined: Wed Jun 09, 2010 1:16 am
Location: St Thomas Ont Canada
Top

Postby Nathan N » Fri Jun 18, 2010 7:28 pm

Thanks again Steve.

PhotoGuy wrote:" sat down with a cold beverage and pondered " now there is a great idea for a friday afternoon. :) See you all later. Off to the deck to ponder my build


:thumbsup:
User avatar
Nathan N
Lifetime member
 
Posts: 587
Images: 153
Joined: Mon Mar 24, 2008 6:55 pm
Location: mid-Missouri
Top

I like that idea.

Postby Crazylegs » Fri Jun 18, 2010 10:55 pm

I like to do my pondering with the cold beverage and clamps boxes scrap lumber foam board or whatever I can find. It helps me to see the space and placement.

Image

Nathan you inspier me! I know I will have a higher quality product becaus of yall on this fourm. :applause:
User avatar
Crazylegs
Teardrop Advisor
 
Posts: 51
Images: 72
Joined: Tue May 04, 2010 12:50 am
Location: Salem Utah
Top

Postby Nathan N » Sat Jun 19, 2010 6:42 am

Aw shucks Crazylegs. I am looking forward to your reporting on your neat lil furnace. I've been watching your build and mocking it up and pondering on it allowed Mike to notice a conflict with the proposed furnace location and axle.

For inspiration we all look to those before us, the pioneers that were nice enough to share their builds. I just love looking at the builds and seeing how each of us reached their goals. Some need to haul motorcycles, others need to haul telescopes, while others don't need the large cargo ability. For some the kitchen or galley is important and for others it is not needed.

You are inspiring others as you build. I salute you and all the other members that share their questions, answers and builds.

:applause:

Nathan
User avatar
Nathan N
Lifetime member
 
Posts: 587
Images: 153
Joined: Mon Mar 24, 2008 6:55 pm
Location: mid-Missouri
Top

Postby Nathan N » Tue Jun 22, 2010 9:41 pm

I don't have any photos but I did get the brakes ordered and installed. I also highly recommend R&P carriages.

While I was under the trailer installing insulation and running the brake wiring I saw the tag on the Dexter axle. It states it is a 2000 lbs axle.

Earlier I had read R&P carriages how to determine what axle you have page. So to be safe I did pull the hubs and measured the spindle and sent the measurements to R&P. They matched the specs for a 3500 lbs axle. I ordered his kit for the 3500 lbs axle and it was a perfect fit.

Now I have to find a quick connect for propane. I have decided to use that and not permanently mount the propane tank and haul it around year round.

Thanks for visiting.
User avatar
Nathan N
Lifetime member
 
Posts: 587
Images: 153
Joined: Mon Mar 24, 2008 6:55 pm
Location: mid-Missouri
Top

Postby myoung » Sat Oct 02, 2010 7:40 am

Following now. Love the warm interior. Contrasting wood color adds a lot.

:thumbsup:
Mike Young
build thread: viewtopic.php?t=40459
User avatar
myoung
500 Club
 
Posts: 644
Images: 250
Joined: Sat Aug 07, 2010 11:21 am
Location: Nipomo, CA
Top

Postby Nathan N » Sat Oct 02, 2010 4:10 pm

myoung wrote:Following now. Love the warm interior. Contrasting wood color adds a lot.

:thumbsup:


Thanks Mike.

The trailer did fantastic on our recent 1300 mile trip. I was glad I had added the trailer brakes while traversing Hwy 7 in Arkansas. I still haven't completed plumbing the propane for the furnace. We did have a windy night with 47 degrees on top of winding stair campground with no heater. We both made it fine without getting out the large comforter.

Nathan
User avatar
Nathan N
Lifetime member
 
Posts: 587
Images: 153
Joined: Mon Mar 24, 2008 6:55 pm
Location: mid-Missouri
Top

Re: an update

Postby milkbone » Mon Oct 04, 2010 9:06 pm

Image

Like your trailer and very nice work on it, just wish I had half the talent.
I was wanting to know where you got the table bracket for the out side
milkbone
Teardrop Inspector
 
Posts: 14
Images: 6
Joined: Mon May 31, 2010 10:32 pm
Location: Alvin, Texas
Top

Postby SmilinJack » Mon Oct 04, 2010 9:23 pm

Milkbone,

Here's a source for the table bracket:

http://www.dyersonline.com/patrick-table-support.html
Jack
User avatar
SmilinJack
Teardrop Advisor
 
Posts: 99
Images: 32
Joined: Mon Oct 19, 2009 7:50 am
Location: North Carolina
Top

Postby Nathan N » Tue Oct 05, 2010 5:19 am

SmilinJack wrote:Milkbone,

Here's a source for the table bracket:

http://www.dyersonline.com/patrick-table-support.html


Thanks SmilinJack. That's where I purchased mine from.

We really like the side table. The external receptacle nearby makes it the ideal place for our old coffee maker "water heater".

Thanks for visiting.

Nathan
User avatar
Nathan N
Lifetime member
 
Posts: 587
Images: 153
Joined: Mon Mar 24, 2008 6:55 pm
Location: mid-Missouri
Top

PreviousNext

Return to Cargo Trailer Conversions

Who is online

Users browsing this forum: No registered users and 6 guests