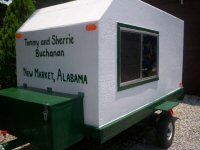
Project: Weekend Warrior 72

Converting Cargo Trailers into TTTs

Project: Weekend Warrior 72

Postby Backwoods Rambler » Tue Jul 29, 2014 10:50 am

After about 13 rough drafts of a floor plan I've finally settled on something I think it worthy of the scrutiny of the TNTT community. I had a lot of wild ideas. Some were born of the desire to use a 6'x10' trailer, but once I decided to move up to a 6'x12' the need for all of the creativity fell away so really this floor plan is probably pretty straightforward, but I was hoping to get some feedback for ways to either add more, or take away some of what I've added.

My wife and I will be camping in this trailer with our two young daughters next summer (#2 is still on the way), hence the bunks. In addition to sleeping space, we wanted to add some dedicated space for cooking meals during really bad weather. Other than that, we really just want our camper to be an "always deployed & ready for poor weather" tent. Nothing fancy or too complicated, like most pop-ups and hard sided campers on the market.

Things to note:

1. This will be a camper only. Not a multi-purpose utility trailer/camper so everything is meant to be permanently mounted.

2. I'm a bit of a minimalist so there will be no permanently mounted propane lines. Water "plumbing" will be as simple as possible and electrical will all be surface mounted for serviceability.

3. The camping I do with the family is always down questionable FS roads, so the stock (~12.25") of ground clearance will not be sufficient. Therefore I will be lifting it approximately 3-4". These roads also kept me at the 6' box width, which is comparable to my '93 Toyota Landcruiser tow vehicle. The trailer height is a bit taller since my vehicle is the stock height, but that won't be a limiting factor for the type of campsites I like to visit.

4. Forgive the quality... I created these floor plans in MS Excel, then converted to PDF. It's all I had to work with, besides graph paper I suppose, that would allow me to keep scale.
Attachments
Floor plan draft 12.1 - Pass Side View - PDF.pdf
(102.23 KiB) Downloaded 421 times
Floor plan draft 12.1 - Driver Side View - PDF.pdf
(113.11 KiB) Downloaded 370 times
Floor plan draft 12.1 - Top View - PDF.pdf
(109.37 KiB) Downloaded 398 times
Last edited by Backwoods Rambler on Tue Jul 29, 2014 11:43 am, edited 1 time in total.
Backwoods Rambler
Teardrop Inspector
 
Posts: 19
Joined: Sun Jul 27, 2014 4:39 pm

Re: Project: Weekend Warrior 72

Postby Backwoods Rambler » Tue Jul 29, 2014 10:57 am

A couple more things...

One area where I had the most confusion was in "proper" insulation. After reading about 100 posts on the subject, I came up with what I thought was a good solution for me and which I think will prevent most of heat/cold conduction I would otherwise experience.

See attachments for details.

Thanks for the feedback people :beer:
Attachments
CTC Technical Specs & Features.pdf
(105.94 KiB) Downloaded 383 times
Insulation Detail PDF.pdf
(125.51 KiB) Downloaded 367 times
Floor plan draft 12.1 - Rear View - PDF.pdf
(134.82 KiB) Downloaded 321 times
Backwoods Rambler
Teardrop Inspector
 
Posts: 19
Joined: Sun Jul 27, 2014 4:39 pm

Re: Project: Weekend Warrior 72

Postby OverTheTopCargoTrailer » Tue Jul 29, 2014 12:39 pm

Welcome aboard

Its easier to just print the info here vs downloading a PDF...
but you get 100 STARS :applause: :applause: :applause: - for the new idea

aaaa trailer.png
aaaa trailer.png (120.83 KiB) Viewed 3474 times


CAMPER CONVERSION INFORMATION:
DIMENSIONS:
Interior Height: 6' 1" (option to add 6") Interior Length: 10' 3" -or- 12' 4" (advertised 10 or 12 ft box respectively) Interior Width: 5' 8" Box Length: 10' or 12' Box Width: 6' (Denis' is 7' 2") Overall Width: 7' 7" Overall Height: 7' 7" (stock) Overall Length: 13' 10" -or- 15' 10" (Denis' is 19' 6") Ground Clearance 12.25" (Denis' is 16") Fits behind Landcruiser well @ stock height - width is almost perfect, although the tires do stick out
Plywood: 1/4" = .71 lbs per sq ft | 3/8" = 1.42lbs per sq ft | 1/2" = 1.42lbs per sq ft | 5/8" = 1.77lbs per sq ft | 3/4" = 2.13lbs per sq ft Studs" 2x3" = 1.25lbs per ft | 2x4" = 1.28lbs per ft | 2x6" = 2.00lbs per ft
Use a 2x6 stud for the bed frame "end cap" Use 2x4 studs for long bed spans Use 2x3 or 1x2 studs for most other framework Use 1/2" or 3/4" plywood for walls, in fullest lengths possible Use 1/4" plywood in fullest lengths possible for ceiling
Use 1" & 1.5" block insulation adhered directly to the roof and walls Sill plate gasket over exposed framework between blocks to limit/prevent heat & cold conduction Tuck Tape to cover voids between block insulation and Tuck Tape Vapor barrier as final layer before plywood Plywood kerfed and curved as needed Possibly add very short rug over play as final insualtion layer over ply. Also might improve asthetics. Floor insulation: Very short rug on interior & possibly block foam adhered to bottom, then covered in insulating paint Plan to wire for lights, switches, USP ports, 12v outlets, stereo & 4 speakers (2 inside, 2 outside)
2 -or- 4 RV windows (15"X30" & 30"X30") Cargo Mate installed them CHEAP!! 1 -or- 2 Skylights for over the bed 12v battery on tongue Spare tire on tongue
Maybe 20lb propane tank on tongue 12v LED interior lighting (or a battery operated lantern like the GE Enbrighten) One 54"x68" 'Full' size bed Two 27"x60" beds Floor space for "emergency" sleeping during BAD weather (not just a light rain) Storage space under Full bed and bench seat Possibly access to under bed storage from exterior front sides Counter for cooking and food prep

Camp stove to be used for cooking in camper (hence food prep area at rear of camper - include small window over cooking area) Sink in counter (under food prep/cooking cover) Basic fresh water container under sink
Hand pump water faucet at sink Grey water sink drain container under sink (or drain straight under the camper) Mr. Buddy propane heater (lg = up to 400 sq ft | std = up to 200 sq ft | camper is 72 sq ft) Screen door & curtains for windows 6" wire steel storage shelf around perimeter of ceiling Awning or shade canopy off rear of camper, over "patio" Small awning over side entry door - MAYBE Wired for lights, switches, USP ports, 12v outlets, stereo & 4 speakers (2 inside, 2 outside) 2 bike mounts on interior floor near Full bed base Tie downs on interior for cooler and misc. bins
No permanent propane lines to eliminate risk of gas leak for heater use two 1lb bottles, or adapt a 20lb tank to run directly to the Mr. Buddy heater
VERY minimal water plumbing lines to reduce risk of water leak
User avatar
OverTheTopCargoTrailer
1000 Club
1000 Club
 
Posts: 1628
Images: 0
Joined: Sun Jun 26, 2011 8:53 pm
Top

Re: Project: Weekend Warrior 72

Postby Backwoods Rambler » Tue Jul 29, 2014 1:43 pm

I didn't think anyone would read through my large amounts of information. I wanted to post the images as pictures, but I don't know how when they're in .PDF format. How did you convert it?
Backwoods Rambler
Teardrop Inspector
 
Posts: 19
Joined: Sun Jul 27, 2014 4:39 pm
Top

Re: Project: Weekend Warrior 72

Postby Backwoods Rambler » Tue Jul 29, 2014 1:56 pm

Okay, here's information I added as a download instead of typing it all in... :D

Enjoy the read...

CAMPER CONVERSION INFORMATION:

DIMENSIONS:

Interior Height: 6' 1" (option to add 6")
Interior Length: 10' 3" -or- 12' 4" (advertised 10 or 12 ft box respectively)
Interior Width: 5' 8"
Box Length: 10' or 12'
Box Width: 6'
Overall Width: 7' 7"
Overall Height: 7' 7" (stock)
Overall Length: 13' 10" -or- 15' 10"
Ground Clearance 12.25" (Raise to approximately 16")
Fits behind Landcruiser well @ stock height - width is almost perfect, although the tires do stick out

TECHNICAL DETAILS:
Plywood: 1/4" = .71 lbs per sq ft | 3/8" = 1.42lbs per sq ft | 1/2" = 1.42lbs per sq ft | 5/8" = 1.77lbs per sq ft | 3/4" = 2.13lbs per sq ft
Studs" 2x3" = 1.25lbs per ft | 2x4" = 1.28lbs per ft | 2x6" = 2.00lbs per ft
Use a 2x6 stud for the bed frame "end cap"
Use 2x4 studs for long bed spans
Use 2x3 or 1x2 studs for most other framework
Use 1/2" or 3/4" plywood for walls, in fullest lengths possible
Use 1/4" plywood in fullest lengths possible for ceiling
Use 1" & 1.5" block insulation adhered directly to the roof and walls
Sill plate gasket over exposed framework between blocks to limit/prevent heat & cold conduction
Tuck Tape to cover voids between block insulation and Tuck Tape
Vapor barrier as final layer before plywood
Plywood kerfed and curved as needed
Possibly add very short rug over play as final insualtion layer over ply. Also might improve asthetics.
Floor insulation: Very short rug on interior & possibly block foam adhered to bottom, then covered in insulating paint
Plan to wire for lights, switches, USB ports, 12v outlets, stereo & 4 speakers (2 inside, 2 outside)

FEATURES:
2 -or- 4 RV windows (15"X30" & 30"X30") Cargo Mate installs them CHEAP!!
1 -or- 2 Skylights for over the bed
12v battery on tongue
Spare tire on tongue
Maybe 20lb propane tank on tongue
12v LED interior lighting (or a battery operated lantern like the GE Enbrighten)
One 54"x68" 'Full' size bed
Two 27"x60" beds
Floor space for "emergency" sleeping space for tent campers during BAD weather
Storage space under Full bed and bench seat
Possible access to under bed storage from exterior front sides
Counter for cooking and food prep
Camp stove to be used for cooking in camper (hence food prep area at rear of camper - include small window over cooking area for ventilation)
Sink in counter (under food prep/cooking cover)
Basic fresh water container under sink
Hand pump water faucet at sink
Grey water sink drain container under sink (or drain straight under the camper)
Mr. Buddy propane heater (lg = up to 400 sq ft | std = up to 200 sq ft | camper is 72 sq ft)
Screen door & curtains for windows
6" wire steel storage shelf around perimeter of ceiling
Awning or shade canopy off rear of camper, over "patio"
Small awning over side entry door - MAYBE
Wired for lights, switches, USB ports, 12v outlets, stereo & 4 speakers (2 inside, 2 outside)
2 bike mounts on interior floor near Full bed base
Tie downs on interior for cooler and misc. bins
No permanent propane lines to eliminate risk of gas leak
For heater; use two 1lb bottles, or adapt a 20lb tank to run directly to the Mr. Buddy heater
VERY minimal water plumbing lines to reduce risk of water leak
Backwoods Rambler
Teardrop Inspector
 
Posts: 19
Joined: Sun Jul 27, 2014 4:39 pm
Top

Re: Project: Weekend Warrior 72

Postby lrrowe » Tue Jul 29, 2014 6:42 pm

Welcome aboard and I look forward to watching your work. Here is someone like me who analyzes almost everything. But you documented yours, and that is great. There is obviously a lot of thought and planning here. I did not have the patience for that. While I have a grand plan in place, I will design the details as I go along.
Bob

First Post on Purchase of Trailer: http://www.tnttt.com/viewtopic.php?f=42&t=60722
Hot water infloor and radiator heating project:[url]http://www.tnttt.com/posting.php?mode=reply&f=54&t=62327[/

Image Image
User avatar
lrrowe
Donating Member
 
Posts: 3285
Images: 439
Joined: Sun Feb 10, 2013 5:54 am
Location: SW Virigina
Top

Re: Project: Weekend Warrior 72

Postby Rainier70 » Tue Jul 29, 2014 7:26 pm

A lot of great details and ideas already thought out. I think what you have looks great.

We might be able to advise you better if you could tell us what kind of climate you camp in.

One idea for bunkbeds that I have always liked is how Camp-Inn did in their Raindrop Trailer. The top bunk swings down and becomes the back of a couch in the day time.

http://tinycamper.com/raindrop560ultra.htm

Image

Image

Anyway something you might consider.

I like your kitchen in the back and bed in the front. There are only two problems that I can think of with it. One is that the storage under the bed is marginally easier to get to if you can access it from the back also. Not really a deal breaker. The other problem you might have is tongue weight. With most of your storage up front it maybe hard to balance it out with weight in the back. I see you have your water in the back, so maybe if you don't carry much heavy up front all will be good.

Just some thoughts.
User avatar
Rainier70
1000 Club
1000 Club
 
Posts: 1083
Images: 244
Joined: Wed Jan 30, 2013 4:35 am
Location: Southeast Idaho
Top

Re: Project: Weekend Warrior 72

Postby Rainier70 » Tue Jul 29, 2014 7:30 pm

On looking again maybe it wasn't the Raindrop that had the swing down bunk as the back to the couch. Looks like theirs is the seat on top of the other bunk. Oh well, you get the idea. You could swing the top bunk either up or down and use the bottom bunk for a couch in day.
User avatar
Rainier70
1000 Club
1000 Club
 
Posts: 1083
Images: 244
Joined: Wed Jan 30, 2013 4:35 am
Location: Southeast Idaho
Top

Re: Project: Weekend Warrior 72

Postby Backwoods Rambler » Wed Jul 30, 2014 9:30 am

Yeah, I have this bad habit of OCD planning so laying out the details like this is par for the course. Luckily others often benefit from this ;)

The swing down top bunk is a really great idea! I'll kick that around and see what I can do. Since the bunk width is 27" and the height between bunks is 30", it would only take a minor adjustment (or pillows) to take up that small gap.

The storage under the front bed is for camp time. During travel, I plan to load everything as evenly on the floor as I can.
Backwoods Rambler
Teardrop Inspector
 
Posts: 19
Joined: Sun Jul 27, 2014 4:39 pm
Top

Re: Project: Weekend Warrior 72

Postby Backwoods Rambler » Wed Jul 30, 2014 5:12 pm

Can anything be mounted to the ramp door of the trailer? I understand that the coil spring is "matched" to the weight of the door, but if you exceed that weight does it just make the door more difficult to lift, or will it actually damage the spring/lift mechanism?

Thanks,
Backwoods Rambler
Teardrop Inspector
 
Posts: 19
Joined: Sun Jul 27, 2014 4:39 pm
Top

Re: Project: Weekend Warrior 72

Postby tnriverluver » Thu Jul 31, 2014 3:46 pm

Backwoods Rambler wrote:Can anything be mounted to the ramp door of the trailer? I understand that the coil spring is "matched" to the weight of the door, but if you exceed that weight does it just make the door more difficult to lift, or will it actually damage the spring/lift mechanism?

Thanks,

It will only damage your back :( The mechanism will not know the difference in load.
User avatar
tnriverluver
Teardrop Master
 
Posts: 162
Joined: Mon Sep 24, 2012 6:16 pm
Top

Re: Project: Weekend Warrior 72

Postby Backwoods Rambler » Fri Aug 01, 2014 4:41 pm

Thanks for the feedback about the ramp door :)

Here are some jpegs of my desired 12' floor plan. Note it's the 12th draft.
Attachments
CTC 6X12 - Floor Plan 12 - Rear Views.jpg
CTC 6X12 - Floor Plan 12 - Rear Views.jpg (91.47 KiB) Viewed 3079 times
CTC 6X12 - Floor Plan 12 - Top View.jpg
CTC 6X12 - Floor Plan 12 - Top View.jpg (74.33 KiB) Viewed 3079 times
Backwoods Rambler
Teardrop Inspector
 
Posts: 19
Joined: Sun Jul 27, 2014 4:39 pm
Top

Re: Project: Weekend Warrior 72

Postby Backwoods Rambler » Fri Aug 01, 2014 4:42 pm

Couple more of the 12' plan...
Attachments
CTC 6X12 - Floor Plan 12 - PS View.jpg
CTC 6X12 - Floor Plan 12 - PS View.jpg (78.33 KiB) Viewed 3079 times
CTC 6X12 - Floor Plan 12 - DS View.jpg
CTC 6X12 - Floor Plan 12 - DS View.jpg (93.03 KiB) Viewed 3079 times
Backwoods Rambler
Teardrop Inspector
 
Posts: 19
Joined: Sun Jul 27, 2014 4:39 pm
Top

Re: Project: Weekend Warrior 72

Postby Backwoods Rambler » Fri Aug 01, 2014 4:44 pm

Here's the insulation detail. I had to go through this imaging process to fully wrap my head around all of the posts I read here about "best practices" for insulating a CTC.
Attachments
Insulation Detail for ALL.jpg
Insulation Detail for ALL.jpg (80.52 KiB) Viewed 3079 times
Backwoods Rambler
Teardrop Inspector
 
Posts: 19
Joined: Sun Jul 27, 2014 4:39 pm
Top

Re: Project: Weekend Warrior 72

Postby Rainier70 » Fri Aug 01, 2014 9:05 pm

Generally don't need to glue the insulation to your outside wall. If you cut the insulation so that it fits tight between the ribs, it will stay in place. Plus a little air behind maybe a good thing to remove any condensation that makes its way through. My outer skin has many gaps at the bottom and where the panels over lap. I feel that is a good thing as the outside wall isn't fully air tight.
Last edited by Rainier70 on Sat Aug 02, 2014 9:28 pm, edited 1 time in total.
User avatar
Rainier70
1000 Club
1000 Club
 
Posts: 1083
Images: 244
Joined: Wed Jan 30, 2013 4:35 am
Location: Southeast Idaho
Top

Next

Return to Cargo Trailer Conversions

Who is online

Users browsing this forum: No registered users and 4 guests