Page 1 of 1

A Stainless Steel Dutch Oven

PostPosted: Mon Apr 19, 2010 2:52 pm
by Prem
A 3.5 qt. Stainless Steel Camp Dutch oven

Image

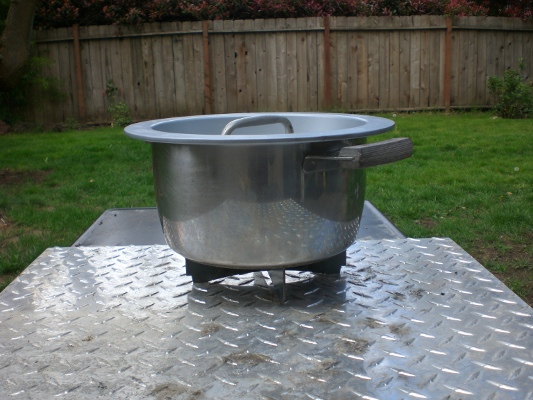
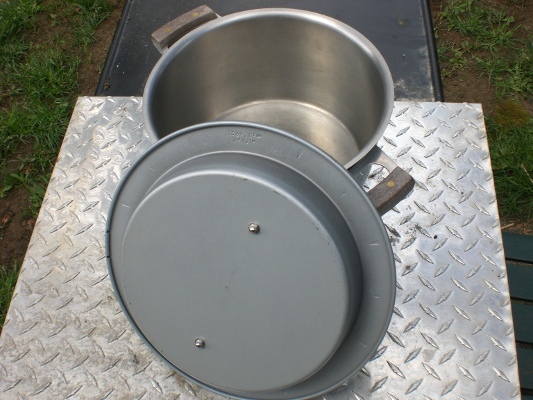
Got the SS thick bottom pot for $1 at the swap meet. The lid is a heavy baking pan that I found at the Goodwill for $1.69. The aluminum handle and #6 SS bolts, washers and cap nuts I already had. (The lid also fits my 12 quart SS thick-bottom stock pot if I want to use it with charcoal briquettes above and below to make a big batch of soup faster. ) :? :twisted: ;)
Image
Image
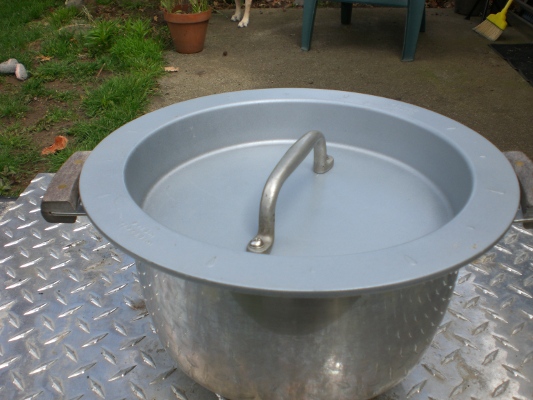
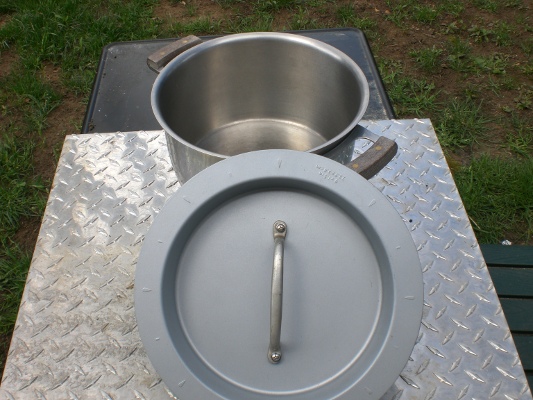
Marking the holes to drill for the handle was a bit tricky, but it looks like I got the handle in the center.

Image

Prem

PostPosted: Tue Apr 20, 2010 8:00 am
by Rock
Very cool but keep in mind that SS is a crappy conductor of heat compared to CI. I'm sure it will work great but you need to experiment a little with the coals.

Eric

PostPosted: Tue Apr 20, 2010 11:04 am
by Prem
Yeah, but there's a disk of aluminum in the bottom clad with thin SS on both sides on this pot. It heats faster than my 12" inch cast iron Dutch oven.

That baking pan lid is heavy for a pan, but light for a lid. I think I will cut a circle of aluminum diamond plate for an insert on top (flush and under the handle) so that it adds more mass and a protective, replaceable layer of metal between the coals and the pan surface. :twisted:

Lots of fun.

Prem

P.S. Nice teardrop you built Eric! :thumbsup: Polyester or epoxy resin over the glass?

PostPosted: Tue Apr 20, 2010 2:57 pm
by Rock
In that case that might be the ultimate DO. Yeah - a 3/8" piece of aluminum inside that lid will make the heat radiate down nice and even. Looking good.

Eric

PostPosted: Tue Apr 20, 2010 7:14 pm
by Prem
Good call! 3/8" is about the thickness of the bottom of the pot with the aluminum disk in it.

I'm going to the scrap metal place tomorrow. I'm gonna get smooth 3/8ths instead of diamond plate.

Must find a very fine tooth, metal-cutting jigsaw blade (or two or three) for this job. The diameter of the inside of the lid is a shade under 9 inches, so that's 27 inches of cutting the circle.

Cutting aluminum

PostPosted: Tue Apr 20, 2010 7:34 pm
by eamarquardt
I have found the trick to cutting aluminum is keeping it as cool as possible. When it heats up it gums up and sticks to the blade filling in the teeth. When this happens, your effort is doomed untill you pick the al out of the teeth of your blade. If you have someone spray water on it with "windex" sprayer while you cut, you will have better results. I often run the garden hose over the sheet (I have a lifetime supply of 1/8 sheet that I am slowly using up) right where I'm cutting and that works great (you gotta trust your double insulated tool and GFI if you wanna do this and you can't get over zealous with the water flow).

Good luck.

Cheers,

Gus

Re: Cutting aluminum

PostPosted: Tue Apr 20, 2010 7:37 pm
by Kevin A
eamarquardt wrote:I have found the trick to cutting aluminum is keeping it as cool as possible. When it heats up it gums up and sticks to the blade filling in the teeth. When this happens, your effort is doomed untill you pick the al out of the teeth of your blade. If you have someone spray water on it with "windex" sprayer while you cut, you will have better results. I often run the garden hose over the sheet (I have a lifetime supply of 1/8 sheet that I am slowly using up) right where I'm cutting and that works great (you gotta trust your double insulated tool and GFI if you wanna do this and you can't get over zealous with the water flow).

Good luck.

Cheers,

Gus
Either that or use a battery powered jig saw. Better yet, air powered.

PostPosted: Wed Apr 21, 2010 4:37 am
by Rock
Hey Prem - missed your question on my tear. I used System 3 throughout, with Silvertip Laminating resin for all coating and glassing. Just getting around to sanding it right now for a topcoat of a linked polyurethane.

Yeah - without industrial tools that will cut slow. Just gotta take ur time.

Eric

PostPosted: Tue Apr 27, 2010 6:40 pm
by Prem
Eric,

That's the way to do it right. You da man.


Prem :thumbsup:

PostPosted: Tue Apr 27, 2010 6:49 pm
by Prem
:thumbdown: I really don't like cutting aluminum with a blade, so I went looking for *something* else. I figured thin SS would never burn through, but I have never had any SS sheet that was thin enough to cut with hand sheers. Today I found the perfect solution at the Goodwill for a buck. It was a Korean SS frying pan, thin but with a copper bottom. I figured it was right at the limit of thickness to cut with my big, accurate metal sheers. Sure enough, it worked! :D

Image
The scrap to the left is the sections of the side of the fry pan that got cut away.

Image
The perfect fit left just a little of the up flip of the original fry pan interior. That makes it even better for use with hot charcoal. The other plus is that when I drilled it and put the handle back in the center of the lid, the insert sucked right down flush all the way around. :)

Sometimes things go right.

Total cost: $3.69 (And about $10 in gasoline. lol.)

Prem

PostPosted: Tue Apr 27, 2010 9:25 pm
by Mark72
So its time for pics of it in action right?

Mark

PostPosted: Tue Apr 27, 2010 10:18 pm
by Prem
That will have to wait for the weekend at the 17th Dam Gathering. It's pouring rain on and off all day thru Thursday here.

PostPosted: Sun May 30, 2010 9:40 pm
by Prem
Mark72 wrote:So its time for pics of it in action right?


Coconut-Raspberry-Chipotle-Ground-Turkey and Turkey Sausage Stew with Potatoes, Carrots, Celery, Cilantro, Onions and Garlic

Image

Image

Image

Image

Turned out *REALLY* tasty and nothing burned on.

(Next dish I cook in it I will increase the quantity by 3 or 4 times.)

PostPosted: Mon May 31, 2010 8:25 pm
by Mark72
:thumbsup: