Yes Yes Yes I have the power !

With Thursday off I stopped by Wednesday night and the weatherhead and mast were up and the power lines are reconnected. We have power. I found some new material called "Thermoply". This is a almost plastic like fiberboard to be applied as a insulation barrier. Almost the consistancy of a very heavy single ply cardboard with a plastic like face I decided to use this as a external barrier for the back wall. As the 10" I-beams held my back wall not quite a foot away from the steel pole barn wall I wanted to use it much like exterior sheathing. So how do you apply exterior sheathing to a wall from the inside of the building?????

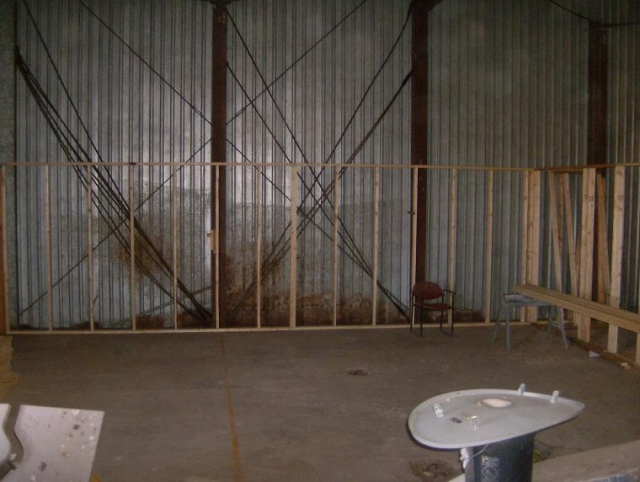
here is an mid september picture showing the gap between the stud wall and the steel buildings wall !
I chose to use the 17" plywood rips as the clamping force to trap the new "siding" to the back of the wall. I installed 20' of 17" plywood rips at the floor by screwing at an angle thru the studs into the thermoply and then the plywood. I laid the 4x8 sheets horizontally so I could install the bottom sheets. To do this I weaved in the flexible sheets thru the studs. I then took a loose 2x4 and clamped it behind the wall stud and also behind the plywood/thermoply sandwich to pull the materials close then used 3" construction screws to draw the sandwich tight together. The plywood being behind the thermoply drew everything up tight too each stud. At the 4' level I installed some 11 " scraps I had generated. I screwed low thru the now installed 1st layer and had my buddy Jimmy lower the 2nd ply down from the flat roof into the little 10" cravace and I guided it into the void between the wall stud and the plywood "clamp" after adjusting it to where it needed to go I screwed thru the 2nd level of thermoply into the plywood clamping this second section then Jimmy screwed the top edge into the top plate of the wall. I now have the entire exterior of the back wall sheathed.
It started out as a real head scratcher on how to keep creepy crawly critters out of the insulation and how to keep the insulation from escaping into the 10" plus deep void behind the wall. I now have a white pristeen exterior sheathed wall behind the wall studs.
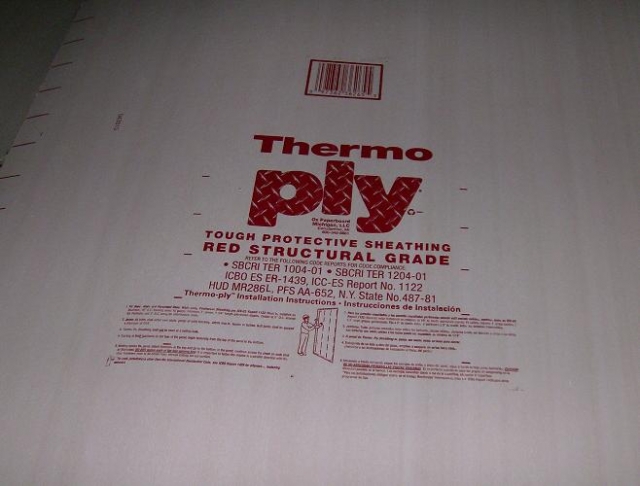
here is the product
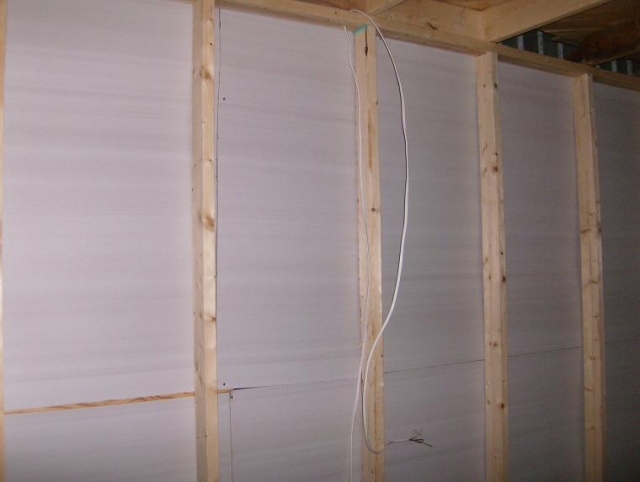
here is the bedroom wall sheathed
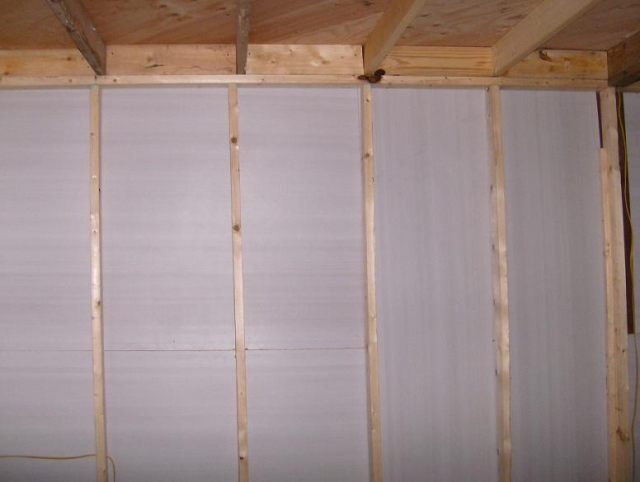
here is the kitchen wall sheathed
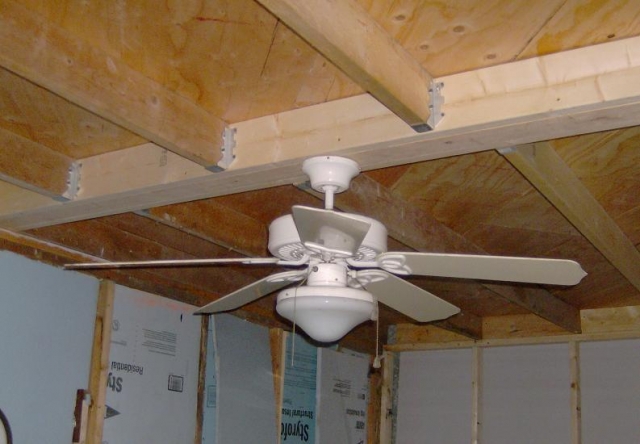
The insulation is next just gotta run a propane gas line before sealing up the walls and ceiling with insulation and drywall. Have the kitchen ceiling fan up temporarly.
We spent a couple hours toteing up small items up the rolling stairway to the second floor "mezzanine". Saturday we moved 2 small trailer loads of unnecessary furniture over to the house in a house. Some of it was boxes that went onto the "attic". Other light furniture like chairs , rockers and small tables were toted up also. We cleaned the little house very thoroughly and spent about an hour digging out Rip Van winkle to tow home for a possible sale.
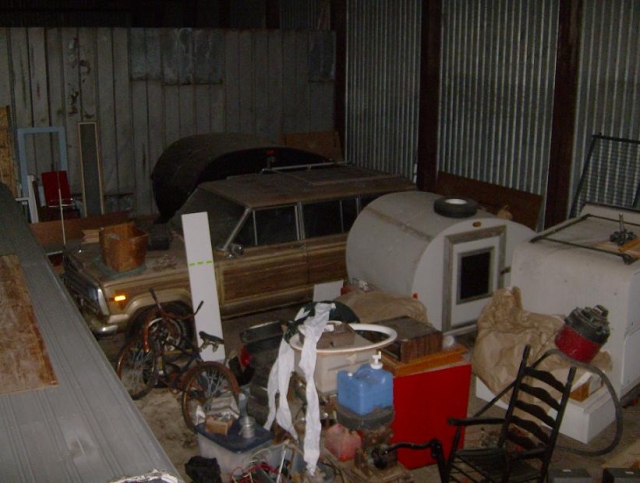
here is Rip Van Winkle ( with the tire on the roof ) It was kinda like an archeological dig to get him out of the building

Upon arrivel back at the "banks house" ( my home for the monent ) we washed up Rip and had him well bathed for his showing. Then it was time for some liquid saw dust remover.

I took Sunday off and fixed my Turkey breast in the dutch oven an had noodles and smashed taters and french style green beans with fire roasted tomatoes and a load of biscuits. The kids ( pups) even enjoyed a small helping. Later in the day Sunday I did go over and moved the last load of wall cabinets desks and base cabinets out of the doorway so I could return the trailer to it's original nesting site ( it was a no sale

) .
The pups liked the road trip but we didn't stay long. It was a very busy holiday weekend.


 .
. and the downed lines
 I gotta remember that)

