Full Resto 413F ( new pics 1-1-12)

Lanterns, stoves, etc... anything old!

Full Resto 413F ( new pics 1-1-12)

Postby campmaster-k » Sun Dec 25, 2011 7:10 pm

This is my 413F that I plan to use for camping. It needed a face lift and a tank cleaning. I traded my brother for this stove.
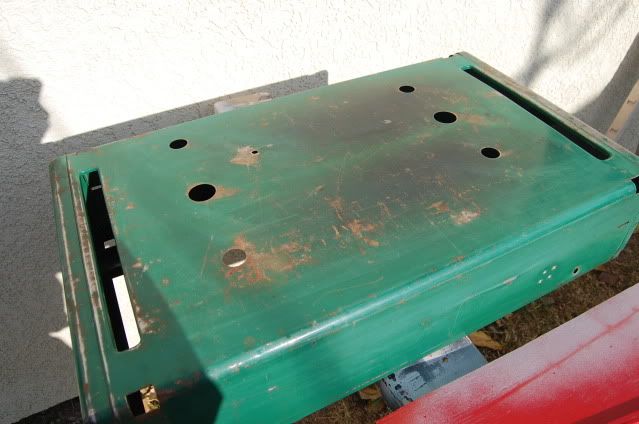
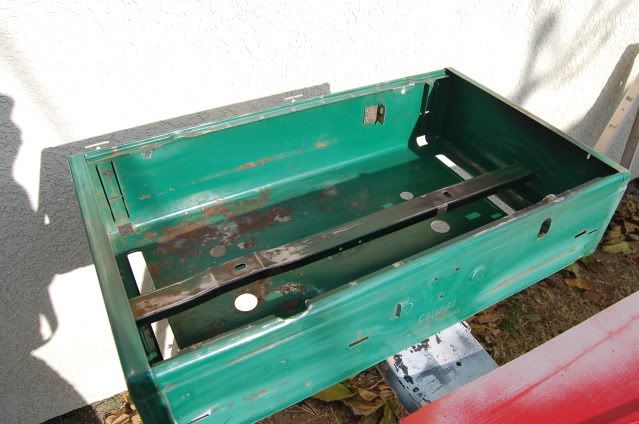
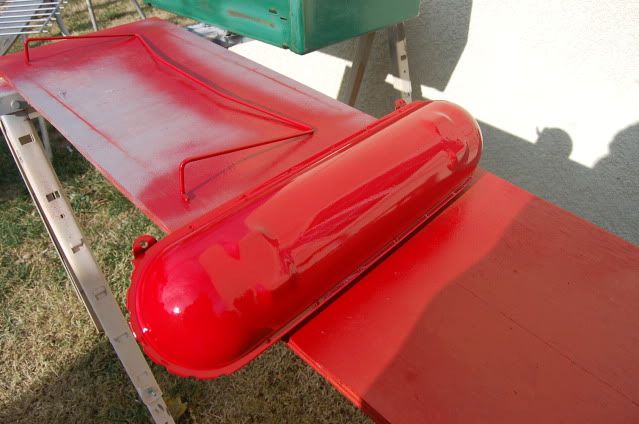
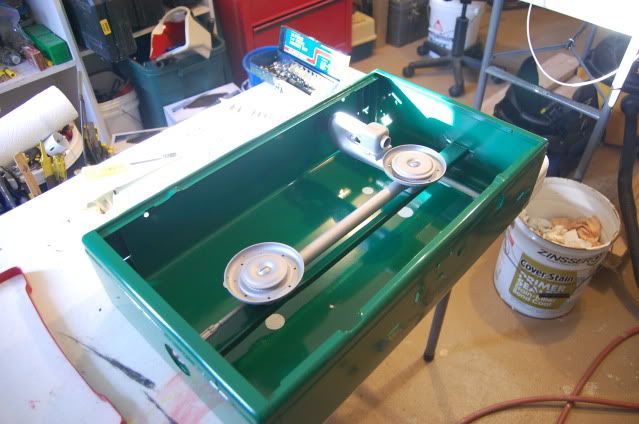
I did bb treatment to tank. Cleaned sanded and painted, I did not strip original finish. I painted the spring legs red because they were very rusty, plus I just thought it looked cool.

Image

Image

Image

Image

Image

Image

Image

Image

Image

Image

Image

Image

Image

Image

Image
Last edited by campmaster-k on Sun Jan 01, 2012 8:48 pm, edited 2 times in total.
-Kirk

>TnTTT ORIGINAL 200A LANTERN CLUB

>CEO Coleman Recovery Inc.

>Nor Cal Camping Pinewood Racing Team


Build thread -

viewtopic.php?t=45307&postdays=0&postorder=asc&start=180

Check out my Pictures -

http://s1199.photobucket.com/albums/aa4 ... 0QQtppZZ24
User avatar
campmaster-k
Lifetime member
 
Posts: 3030
Images: 17
Joined: Fri Jun 17, 2011 5:02 pm
Location: Colusa, California

Postby doug hodder » Sun Dec 25, 2011 7:16 pm

Very well done Kirk!!!! That's a great job on that one...kind of a hassle spraying without removing the wings huh? A stove box is a pain to paint, do you do it all in 1 shot with it suspended? Doug
doug hodder
*Snoop Dougie Doug
 
Posts: 12625
Images: 562
Joined: Tue Dec 14, 2004 11:20 pm

Postby campmaster-k » Sun Dec 25, 2011 7:23 pm

Thanks Doug,

I did it at home so I didnt have our hangers and all that. So I just painted one side then flipped it . Its Centari auto paint so it dried super fast. Its not perfect but good enough for a user.
-Kirk

>TnTTT ORIGINAL 200A LANTERN CLUB

>CEO Coleman Recovery Inc.

>Nor Cal Camping Pinewood Racing Team


Build thread -

viewtopic.php?t=45307&postdays=0&postorder=asc&start=180

Check out my Pictures -

http://s1199.photobucket.com/albums/aa4 ... 0QQtppZZ24
User avatar
campmaster-k
Lifetime member
 
Posts: 3030
Images: 17
Joined: Fri Jun 17, 2011 5:02 pm
Location: Colusa, California
Top

Postby doug hodder » Sun Dec 25, 2011 7:37 pm

What are you using for reducer on the Centauri? I'm told that I can't get any additives for Centarui anymore, and I got like 2 quarts of jet black. I've been doing mine up in an alkyd enamel with a gloss hardener in it. If spraying with a gun...I do the bottoms first and the rest of the parts...let it cure then next weekend support the stove on something and shoot the rest of the interior. It's hard getting in on those bent lips at the top edge huh? My detail gun can get inside the box, but for overall coverage, the larger gun does a better job for me.

I use the tape with a flap type thing so I don't get a hard edge on the bottom. I think you'll find that a nice gloss from the type of paint you used will clean up much better than a rattle can. If you wax the interior bottom and interior top and wings...it cleans up really well! (just something I do on my show pieces that may be used from time to time)

Some people think that I'd never cook on mine...but they all get cooked on...not on a steady basis though. I can pick and choose what I'm gonna take. I just try to not be a slob! Let's talk paint when you get to the Dam! Doug
doug hodder
*Snoop Dougie Doug
 
Posts: 12625
Images: 562
Joined: Tue Dec 14, 2004 11:20 pm
Top

Postby campmaster-k » Sun Dec 25, 2011 7:38 pm

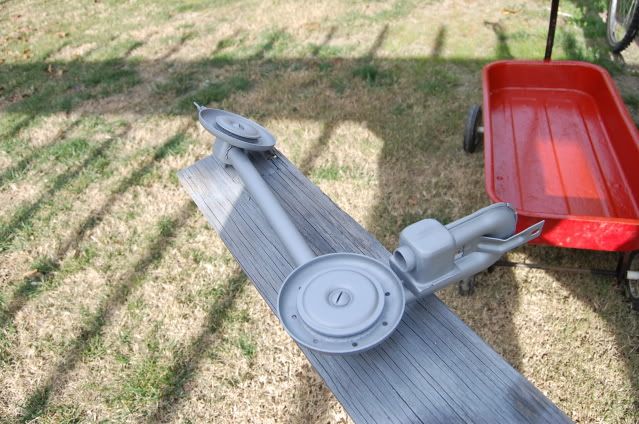
slowcowboy wrote:I just spotted something in your photos kirk that I did not know to do.

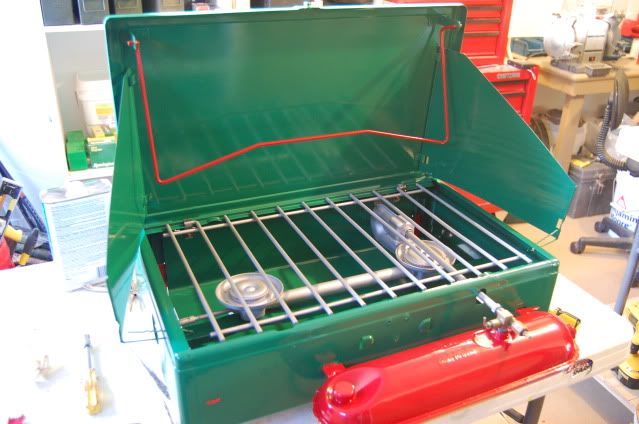
did you paint the burners and grill like a silver type of paint or heat resetant paint?

just courus as I might go back and do it on my 413E.

slow.


Yep. The flames dont bother that paint at all. It is truly amazing. Rustolem 1200 degree silver.
-Kirk

>TnTTT ORIGINAL 200A LANTERN CLUB

>CEO Coleman Recovery Inc.

>Nor Cal Camping Pinewood Racing Team


Build thread -

viewtopic.php?t=45307&postdays=0&postorder=asc&start=180

Check out my Pictures -

http://s1199.photobucket.com/albums/aa4 ... 0QQtppZZ24
User avatar
campmaster-k
Lifetime member
 
Posts: 3030
Images: 17
Joined: Fri Jun 17, 2011 5:02 pm
Location: Colusa, California
Top

Postby doug hodder » Sun Dec 25, 2011 7:40 pm

Slow...the VHT paint is great! I keeps your grate looking good and not attracting any rust. Doug
doug hodder
*Snoop Dougie Doug
 
Posts: 12625
Images: 562
Joined: Tue Dec 14, 2004 11:20 pm
Top

Postby campmaster-k » Sun Dec 25, 2011 7:49 pm

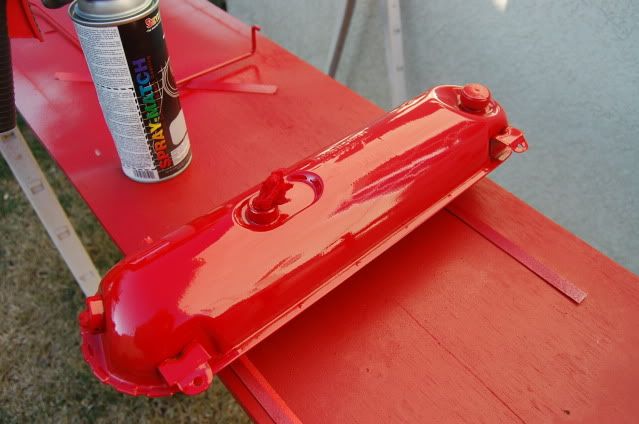
doug hodder wrote:What are you using for reducer on the Centauri? I'm told that I can't get any additives for Centarui anymore, and I got like 2 quarts of jet black. I've been doing mine up in an alkyd enamel with a gloss hardener in it. If spraying with a gun...I do the bottoms first and the rest of the parts...let it cure then next weekend support the stove on something and shoot the rest of the interior. It's hard getting in on those bent lips at the top edge huh? My detail gun can get inside the box, but for overall coverage, the larger gun does a better job for me.

I use the tape with a flap type thing so I don't get a hard edge on the bottom. I think you'll find that a nice gloss from the type of paint you used will clean up much better than a rattle can. If you wax the interior bottom and interior top and wings...it cleans up really well! (just something I do on my show pieces that may be used from time to time)

Some people think that I'd never cook on mine...but they all get cooked on...not on a steady basis though. I can pick and choose what I'm gonna take. I just try to not be a slob! Let's talk paint when you get to the Dam! Doug


I did not use reducer because the spray cans I make have the thinner and propellant already in the can. There is a reducer you can still get. It is called IMC thinner. Industrial Maintenance Coatings thinner. It replaces Naptha , Mek, Toulene and Xylene. It will work it most oil paints including auto paint. CA is really getting tough on VOC s. It drives me crazy.
-Kirk

>TnTTT ORIGINAL 200A LANTERN CLUB

>CEO Coleman Recovery Inc.

>Nor Cal Camping Pinewood Racing Team


Build thread -

viewtopic.php?t=45307&postdays=0&postorder=asc&start=180

Check out my Pictures -

http://s1199.photobucket.com/albums/aa4 ... 0QQtppZZ24
User avatar
campmaster-k
Lifetime member
 
Posts: 3030
Images: 17
Joined: Fri Jun 17, 2011 5:02 pm
Location: Colusa, California
Top

Postby DragonFire » Sun Dec 25, 2011 10:22 pm

You know I'm taking notes here...

I'd love to clean up and paint my 502. New decal and all But the 220f really needs help...if I can get it taken apart and unclogged, it would benefit from some silver paint on the frame, etc and a whole new paint job on the tank. If it's nice enough looking I'll spring for a new ventolator.
'79 Grasshopper
Coleman Keepers 200a Gang
User avatar
DragonFire
Donating Member
 
Posts: 1095
Images: 21
Joined: Sun Aug 21, 2011 9:22 pm
Location: Sacramento, CA
Top

Postby campmaster-k » Mon Dec 26, 2011 10:15 pm

All the parts came out really good except the inside of the lid and wings. You cant see it in the pic but the sanding scratches show. I used 180 grit because I was sanding alot of rust. I knew better but I was out of finer paper. Here is the lock on. I did it with stainless cap screws, they look cool but the heads interfere with the band on the latch.

Image

Here it is complete, the 5 foot look is pretty good.

Image
-Kirk

>TnTTT ORIGINAL 200A LANTERN CLUB

>CEO Coleman Recovery Inc.

>Nor Cal Camping Pinewood Racing Team


Build thread -

viewtopic.php?t=45307&postdays=0&postorder=asc&start=180

Check out my Pictures -

http://s1199.photobucket.com/albums/aa4 ... 0QQtppZZ24
User avatar
campmaster-k
Lifetime member
 
Posts: 3030
Images: 17
Joined: Fri Jun 17, 2011 5:02 pm
Location: Colusa, California
Top

Postby kzhorse » Tue Dec 27, 2011 11:21 am

I hope I dont look stupid :? 
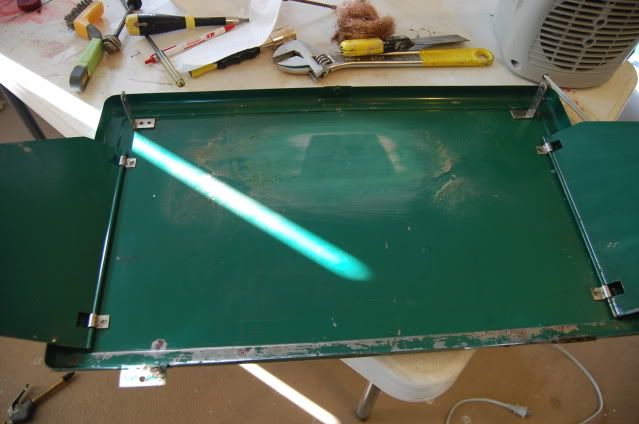
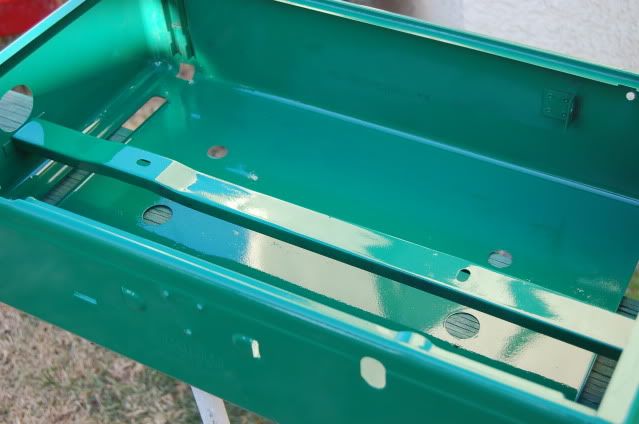
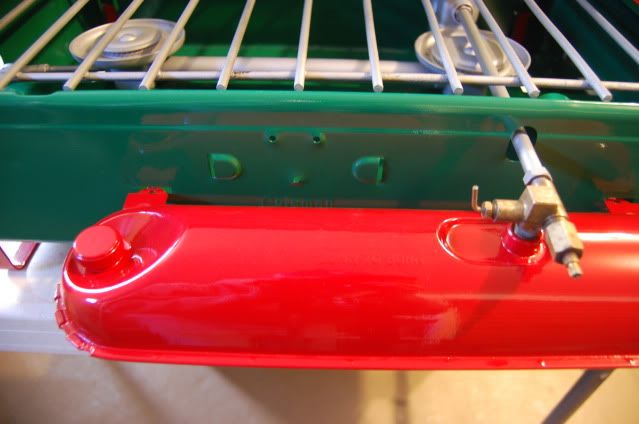
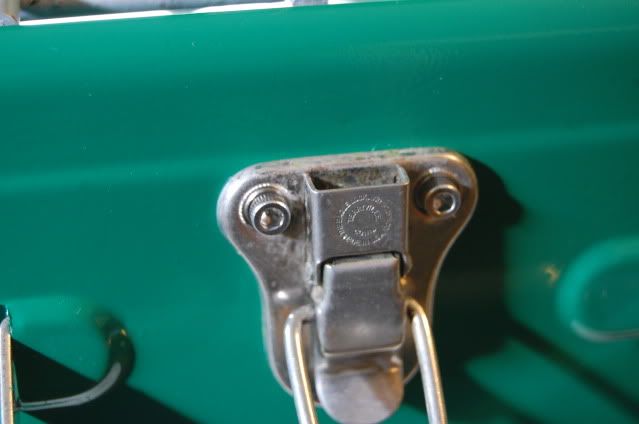
But what is the bar you painted red attached to the lid?What is it for?
Sorry, the stove looks great I need to paint mine to make it look better.

Scott
kzhorse
Teardrop Master
 
Posts: 201
Joined: Sat Jun 18, 2011 8:14 pm
Top

Postby Moho » Tue Dec 27, 2011 11:33 am

The bar flips back and is a towel rack
User avatar
Moho
Teardrop Master
 
Posts: 244
Images: 69
Joined: Tue Sep 13, 2011 8:17 am
Location: Indianapolis, IN
Top

Postby doug hodder » Tue Dec 27, 2011 3:54 pm

It also supports the lid when tipped completely back. Doug
doug hodder
*Snoop Dougie Doug
 
Posts: 12625
Images: 562
Joined: Tue Dec 14, 2004 11:20 pm
Top

Postby 3822sean » Tue Dec 27, 2011 8:11 pm

very nice job
User avatar
3822sean
Teardrop Master
 
Posts: 183
Images: 37
Joined: Wed Dec 22, 2010 1:44 pm
Location: SO CAL,BELLFLOWER
Top

Postby starleen2 » Tue Dec 27, 2011 8:27 pm

doug hodder wrote:It also supports the lid when tipped completely back. Doug

Make a handy tray for holding stuff :thumbsup:
User avatar
starleen2
5th Teardrop Club
 
Posts: 16272
Images: 224
Joined: Sat May 12, 2007 8:26 pm
Location: Pea Ridge ,AR
Top

Postby DragonFire » Wed Dec 28, 2011 9:18 pm

He's talked about using the hammered look silver on lanterns, too. But I don't know if that was high temp. I'll have to look through some of the posts to find out what it was. I bought a vise last night and will finally get to wrenching on the 520 this weekend. I'll do the warm citric acid bath then spray it when it's dry.

Hopefully Kirk didn't freeze to death in his tear last night...Or asphyxiate himself lighting a few lanterns in there.

Maybe he's just working on his build.

Or on CCF again, ignoring us.
'79 Grasshopper
Coleman Keepers 200a Gang
User avatar
DragonFire
Donating Member
 
Posts: 1095
Images: 21
Joined: Sun Aug 21, 2011 9:22 pm
Location: Sacramento, CA
Top

Next

Return to Vintage Camping Equipment

Who is online

Users browsing this forum: No registered users and 5 guests

cron