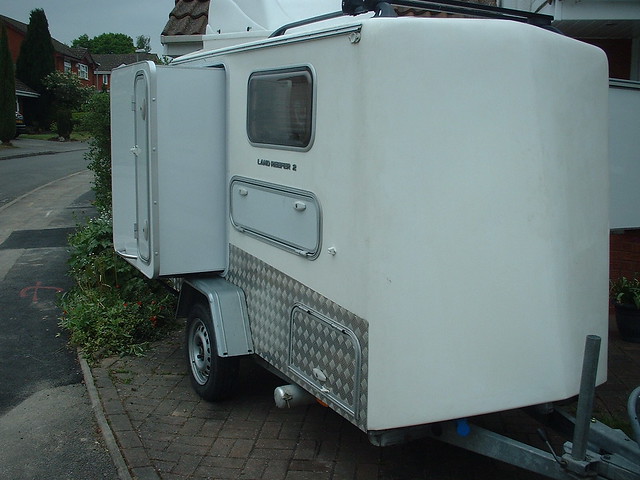
ultra lightweight floating popup camper

Design & Construction of anything that's not a teardrop e.g. Grasshoppers or Sunspots

Postby ktm_2000 » Thu Dec 11, 2008 10:38 am

Thank you for getting the discussion back on track!!

You mentioned that you'd cut with a circular saw because reciprocating saw delaminated the skin, I've used that trick before but not because of the delamination, throw-away skillsaw blades are inexpensive compared to router bits.

Speaking of delamination, I'm wondering if you perforated the insulation skin to allow some epoxy to get underneath the skin a bit and create a better bond. Corecell and divinicell have a rough surface that is porous which makes a lot more surface area for bonding. I took a ride to Lowes last night and they had some blue insulation which seemed to have a smooth surface, I haven't looked at what you were using but I'm guessing that it has a smooth surface as well.

As for the top maybe spending the extra cash on corcell or divinicell would be waranted there as it can be bent with a heat gun.

I have extra glass and epoxy left over from my boat projects so I'm going visit home despot to try and find the foam you used and get a piece of 1/4"birch ply. I am going to build some samples and do some destructive testing on them.

I'm problably going to end up with a heavier trailer as I plan on using 1708 biax cloth, it is a structural cloth that has 1.5oz mat stitched to it and is alot heavier than the stuff you are using. It would still be light but would probably be twice as heavy. In the grand scheme of things, what is 100#?
ktm_2000
Teardrop Master
 
Posts: 101
Joined: Tue Nov 18, 2008 8:08 pm
Location: Central, MA

Postby angib » Thu Dec 11, 2008 11:45 am

coal_burner wrote:i noticed that EVERY one of them failed when the compression side delaminated from the foam and buckled.

It sounds to me like the failure might have been in the foam - did you get some bits of foam still stuck to the 'delaminated' skin? This is exactly what you would expect using a non-structural foam and is really a failure of the foam right next to the skin, not the foam/skin bond.

Paying all that money for Divinycell or CoreCell is what gets you a structural foam, which really is at least as big a difference from insulation foam as hardwoods are from softwoods - just a different animal altogether.

But we're not really comparing similar structures - if you got a boatbuilder to build a teardrop body that was just strong enough, it would be using foam either 3/16" or 1/4" thick foam with very thin skins and the body would weigh tens, not hundreds, of pounds - but it would cost one or two thousand dollars!

Building an insulation-cored body seems perfectly practical to me - but I would be tempted to use either plywood for the skins (since that is made flat and smooth to start with), or to laminate my own fiberglass sheet on a flat mould (a sheet of gloss worktop laminate) and then bond a foam core to that.

Andrew
User avatar
angib
5000 Club
5000 Club
 
Posts: 5783
Images: 231
Joined: Fri Apr 30, 2004 2:04 pm
Location: (Olde) England

Postby brian_bp » Thu Dec 11, 2008 7:37 pm

angib wrote:Building an insulation-cored body seems perfectly practical to me - but I would be tempted to use either plywood for the skins (since that is made flat and smooth to start with), or to laminate my own fiberglass sheet on a flat mould (a sheet of gloss worktop laminate) and then bond a foam core to that.

I assume the intention here is to form a smooth exterior surface against the flat mould, then bond the foam core to the rougher (but still approximately flat) other side; the purpose would be to acheive a smooth and flat exterior finish with minimal filler and effort. Right?

What material would be used to bond the foam to the skin, considering that some space filling would be required due to the imperfect surface of the skin?
brian_bp
1000 Club
1000 Club
 
Posts: 1355
Images: 9
Joined: Sun Nov 19, 2006 1:25 pm
Location: Alberta
Top

Postby ktm_2000 » Thu Dec 11, 2008 10:00 pm

the easiest way to create a smooth exterior surface is to use gelcoat but that brings you down the path of using polyester resin.

When I built my hatch I built a torsion box and topped it with a non-textured countertop laminate. The laminate was waxed 5 times with carnuba wax to create a base which so the product would not stick. I also used a product called PVA which was sprayed on in 3 coats with an hvlp spray gun. The pva created thin film which made sure nothing stuck to the surface of the mold. One side note with pva is that you can't prep the mold overnight because the pva will pick up the moisture in the air and need to be redone. When done the part will lift off the mold easily and the pva can be washed off with water.
ktm_2000
Teardrop Master
 
Posts: 101
Joined: Tue Nov 18, 2008 8:08 pm
Location: Central, MA
Top

Postby angib » Fri Dec 12, 2008 12:30 pm

brian_bp wrote:What material would be used to bond the foam to the skin, considering that some space filling would be required due to the imperfect surface of the skin?

A long, techy answer, but someone may want to do it one day, when all the info will be needed.

To apply foam to laminate, it needs to be prepared like structural foam is, with breather holes drilled right through the foam - 1/8" holes on a 2-3" grid is typical. This will be suitable for foam being applied to flat panels or nearly-flat panels - a 3-4ft radius of a teardrop roof would just squeeze into the nearly-flat category.

Structural foams that are to be applied to curved surfaces are 'double-cut'. The foam is cut with a narrow (1/16"?) saw blade, part-way through, from both sides and in both directions. The cuts in one direction would look like this:

Image

If foam is being applied to 'wet' laminate, then a satisfactory bond will be made by rolling a coat of (catalysed) resin onto the foam before applying it. Then the foam must be pressed into place until the resin cures, either by a vacuum bag or by the cheaper alternative someone here has used, of laying a sheet of plastic over the foam/laminate and shovelling a good depth of sand/dirt all over it. Covering the surface with weights (eg, filled buckets, paint cans) would work but they would have to be touching each other all over.

If the foam is being applied to cured laminate (well sanded), then an adhesive is required - usually this is just the laminating resin thickened up with a filler mix (silica and lightweight filler) until it makes a gloopy paste that can be applied to the laminate by spreader. Additionally applying a coat of un-filled resin to the foam is good practice to get the best bond. Once the foam is in place, it needs pressure applied, like above.

Andrew
User avatar
angib
5000 Club
5000 Club
 
Posts: 5783
Images: 231
Joined: Fri Apr 30, 2004 2:04 pm
Location: (Olde) England
Top

Postby brian_bp » Fri Dec 12, 2008 2:07 pm

angib wrote:A long, techy answer, but someone may want to do it one day, when all the info will be needed...

Excellent - thanks! :applause:
brian_bp
1000 Club
1000 Club
 
Posts: 1355
Images: 9
Joined: Sun Nov 19, 2006 1:25 pm
Location: Alberta
Top

Postby darkghost » Tue Dec 23, 2008 7:27 pm

just out of curiousity how many feet of glass do you think you used and roughly how much epoxy cheers man
darkghost
Teardrop Inspector
 
Posts: 9
Joined: Sun Mar 23, 2008 1:22 am
Top

materials

Postby coal_burner » Fri Dec 26, 2008 9:11 am

darkghost
PostPosted: Tue Dec 23, 2008 7:27 pm Post subject:
just out of curiousity how many feet of glass do you think you used and roughly how much epoxy cheers man


Just a SWAG, but i think i used about 150 linear yards of 5 foot wide fiberglass fabric. I bought a 200yd roll because that's where the price break was. I probably have about 10 gallons of epoxy actually used on BUB.
There is also about $10 worth of 6" and 12" wide fiberglass tape actually applied.

I need to apply about 6 more yards of fiberglass to finish off the inside. I'll have to see if i can design an ultralight traditional to use up what i have left.
We may have philosophy and opposable thumbs, but most humans show all the wisdom of starved raccoons. It's amazing that more of us aren't found flattened on the side of our own roads.
the original bub build thread http://www.tnttt.com/viewtopic.php?f=5&t=19227
User avatar
coal_burner
Teardrop Advisor
 
Posts: 75
Images: 92
Joined: Mon Oct 01, 2007 11:08 am
Location: Berkley, Michigan
Top

Postby ktm_2000 » Tue Dec 30, 2008 7:44 pm

I finally went to home despot and bought a sheet of 1/4" birch ply and a piece of 1" pink foam insulation and then did a test layup sunday night. I did 4 samples with the following layup schedules.

All layups were with West System Epoxy and 1708 biax structural glass with the 1.5oz mat side laminated towards the foam.

1. 1" pink foam with 1 layer of glass on either side - No perforation of the surface.

2. 1" pink foam with 1 layer of glass on either side - the surface was perforated of the surface with a paint brush cleaner which left holes that were 1/32-1/16" diameter which were approx 1/2" apart

3. 1" pink foam with 1 layer of glass on either side - surface perforated both sides, 1/4" Birch ply bonded to the woven side to the glass

4. (My Control test) 3/4" Corcell foam with 1 layer of glass on either side, 1/4" Birch ply bonded to the woven side to the glass.

I've beat the bag out of the samples and have destroyed all and here's what I found:

1. The corecell sample is the strongest as well as the heaviest of the group.

2. The foam sample with ply was pretty close in strength, it flexed more and with less force

3. Pink foam samples always delaminated on the side without the plywood

4. The pink foam delaminated with or without the perforations. The glass always delaminated from the surface bond

5. The glass only surface would take a significant amount of effort to create a fair surface.

Conclusions:

1. I would not create the shell of a camper out of the pink foam due to the surface delaminations.

2. I would use the pink foam layups for interior partitions as it is lighter and significantly less expensive.

3. To create a fair surface I would want to laminate 1/4" ply on both sides as the best bond was achieved with that side. Also the 1/4" ply's additional strength seemed to prevent delamination.

I kept some pieces that I cut to see the quality of the lamination, I'll try and post some pics of the profile of the laminations.
ktm_2000
Teardrop Master
 
Posts: 101
Joined: Tue Nov 18, 2008 8:08 pm
Location: Central, MA
Top

Postby coal_burner » Wed Dec 31, 2008 8:48 am

Cool. I always like more data to help refine my engineering world outlook. Could you post some close ups of the 1708 profile both before and after wetting out?
One thing i noticed while testing some of the 1" by 6" pieces that i cut off the top of BUB's base is that they were about 5 times as strong as my original test samples. The fiberglass on these cut off pieces was wrapped around one edge of the piece and lent enough rigidity to some of the fiberglass to keep it from buckling and pulling away from the foam until alot more weight was applied. When the cut off samples did fail, they first started to bow on the non covered 1" side before twisting and collapsing almost instantaneously.
BTW- my cut off samples were about 2 ft long by six inches wide and covered with 4 layers of cloth on each of the three sides. they were set flat between saw horses, and 45 lb disk weights were hung from ropes in the center of the samples. the rope was padded by a 2x4 and some rags (to keep it from digging in and creasing the sample). The weight was slightly offset to the side that was wrapped in 'glass.
The samples held 135 LBS, but broke when the next 45 LB disk was added.
Another BTW to answer a question posed by Angib awhile back. there was some pink "fuzz" still attached to the back of the fiberglass when it pulled away, so this technically is a failure of the foam and not the foam/glass bond.
We may have philosophy and opposable thumbs, but most humans show all the wisdom of starved raccoons. It's amazing that more of us aren't found flattened on the side of our own roads.
the original bub build thread http://www.tnttt.com/viewtopic.php?f=5&t=19227
User avatar
coal_burner
Teardrop Advisor
 
Posts: 75
Images: 92
Joined: Mon Oct 01, 2007 11:08 am
Location: Berkley, Michigan
Top

Postby ktm_2000 » Wed Dec 31, 2008 11:31 am

I couldn't figure out the macro mode on my camera last night and it ran out of batteries after 3 pics which all came out blurry, so I don't have pics to post of the layups just yet.

Here's a site that has a pic of the glass before layup.

[/url]http://www.fiberglasssite.com/servlet/the-69/Biaxial-Mat-1708-5/Detail[url]

I'll get more batteries on the way home and take a pic of the layups.

I did not do any scientific testing of the pieces when I broke them, essentially I cut strips 4" wide by 1.5' long and then held each edge with my hands and put my knee in the middle and pulled with my arms. I'm guessing that I put more than 100# of pressure before any of the parts failed with plywood failed. The glass only ones failed with much less pressure. The pink foam ones failed when the my knee was on the side of the plywood and the glass delaminated off the foam on the other side. When I turned it around the other way and tried I ended up crushing the core and delaminating the glass but did not delaminate on the plywood side. All failures were with the glass delaminating from the surface of the foam.

At 4"wide I could not break the corecell sample, I cut it down to 2"wide and was able to break it and it failed in the core.

I'm begining to rethink the pink foam with the idea that if plywood was on both sides it would be more robust and would be strong enough for a shell of a camper.

I'm going to do the following additional tests:

1. layup with pink foam with 1708 on both sides with 1/4" birch ply both sides

2. pink foam with 1.5oz mat both sides with birch ply both sides

3. pink foam with thin woven glass both sides and ply both sides

4. pink foam with birch ply both sides - I would make up epoxy with west's high density filler to act as a gap filler.
ktm_2000
Teardrop Master
 
Posts: 101
Joined: Tue Nov 18, 2008 8:08 pm
Location: Central, MA
Top

Postby birddog1148 » Wed Dec 31, 2008 4:09 pm

I need to read thought this thread completely. I was discussing the teardrop idea with my boss and he sugested foam and composite. Since I work in the fiberglass industry I can get a REAL good deal on the glass (free) so this is an idea. I am most familiar with filter but the boss's experiance is mostly composite so I will have some local support.
Good Thread!! :D
I deny your reality and substitute my own!

We the willing, led by the unknowing, have done so much, for so long, we are now qualified to do anything with nothing.
birddog1148
Teardrop Advisor
 
Posts: 62
Joined: Tue Dec 30, 2008 7:47 pm
Location: North Coast of Ohio
Top

Postby slyeager » Wed Dec 31, 2008 4:26 pm

After seeing the vid of Coal_Burner trying to flip the bottom half of the BUB, I wouldn't be that concerned about the strength, I mean, it sure looked strong enough to me. :thumbsup:

But that's just my non technical opinion. ..... :D
slyeager
Teardrop Builder
 
Posts: 48
Images: 42
Joined: Fri Mar 21, 2008 9:00 am
Top

Postby Esteban » Wed Dec 31, 2008 4:33 pm

Gaston built his teardrop with a minimal wood wall frame, pink foam filled in between, and fiberglass over the foam/wood frame. His finished trailer is a beautiful work of art. I enjoyed meeting and chatting with him at IRG this last summer. He said while camping in hot weather in Florida his fiberglass skin separated from the underlying foam. Maybe he can add his two cents to this discussion. Hello Gaston!

All the pictures below are from Gaston's album:

Image

Image
It looks like Gaston has a second layer of foam, that he shaped, on top of the first one.

Image
Fiberglassed.

Image

Image
Gaston's beautiful teardrop trailer.


BTW, I've built wood framed sandwich walls with 1/4" plywood outside that is fiberglassed. So this is a very interesting and informative discussion.
Last edited by Esteban on Wed Dec 31, 2008 6:48 pm, edited 1 time in total.
Steve - SLO, CA
Esteban
Donating Member
 
Posts: 1684
Images: 15
Joined: Fri Jul 28, 2006 4:39 pm
Location: California, San Luis Obispo
Top

Postby birddog1148 » Wed Dec 31, 2008 4:54 pm

Do you think the delamination would have ocoured if he had used a light colored paint as opposed to the dark color he chose?
I deny your reality and substitute my own!

We the willing, led by the unknowing, have done so much, for so long, we are now qualified to do anything with nothing.
birddog1148
Teardrop Advisor
 
Posts: 62
Joined: Tue Dec 30, 2008 7:47 pm
Location: North Coast of Ohio
Top

PreviousNext

Return to Non-traditional Designs

Who is online

Users browsing this forum: No registered users and 10 guests

cron