ultra lightweight floating popup camper

Design & Construction of anything that's not a teardrop e.g. Grasshoppers or Sunspots

Re: how i am going to do it next time

Postby brian_bp » Fri Sep 12, 2008 10:54 am

coal_burner wrote:...Then i would reassemble the 4 sections back into a 4 by 8 sheet...

I'm picturing this as having all the seams running across the trailer (the 4-ft dimension of each 2'x4' piece being across) in a 4-in-a-row configuration, rather than a 2-by-2 pattern. That way, the webs of fiberglass between the foam sections with their expansion into the routed foam edges would form three I-beam crossmembers.

Is that what you mean?

coal_burner wrote:...A couple pieces of aluminum channel could be bolted to the bottom of the deck, to form an a frame tongue...

Would these A-frame members end at the suspension mounting plates to form a minimal frame (as Andrew has illustrated in other topics)?

Both of these features sound like promising schemes to me.
Last edited by brian_bp on Fri Sep 12, 2008 11:00 am, edited 2 times in total.
brian_bp
1000 Club
1000 Club
 
Posts: 1355
Images: 9
Joined: Sun Nov 19, 2006 1:25 pm
Location: Alberta

Postby coal_burner » Fri Sep 12, 2008 11:51 am

I'm picturing this as having all the seams running across the trailer (the 4-ft dimension of each 2'x4' piece being across) in a 4-in-a-row configuration, rather than a 2-by-2 pattern. That way, the webs of fiberglass between the foam sections with their expansion into the routed foam edges would form three I-beam crossmembers.


BINGO!!!

I'm thinking of starting a new thread called "SO @#$%ING light it's ridiculous"
I think i can get a fully functional teardrop designed for under 200 pounds.
IT would probably be too light to tow safely because aerodynamic effects of cars passing you on the freeway would be able to overcome the campers weight and make the drivers life far too interesting.
We may have philosophy and opposable thumbs, but most humans show all the wisdom of starved raccoons. It's amazing that more of us aren't found flattened on the side of our own roads.
the original bub build thread http://www.tnttt.com/viewtopic.php?f=5&t=19227
User avatar
coal_burner
Teardrop Advisor
 
Posts: 75
Images: 92
Joined: Mon Oct 01, 2007 11:08 am
Location: Berkley, Michigan

Postby slyeager » Sat Sep 13, 2008 3:16 pm

Can't wait to see the first pictures of this thing out on the lake towing the fire ring......... :thumbsup: :thumbsup: :thumbsup: :applause: :applause: :applause: :beautiful:
slyeager
Teardrop Builder
 
Posts: 48
Images: 42
Joined: Fri Mar 21, 2008 9:00 am
Top

Postby bgordon » Mon Sep 15, 2008 2:47 am

Hi,

Coalburner, thank you very much for the thorough reply. Your ideas are really something to think about!
Barrie

Keep moving forward.
Psalm 1:1-3.

Build Journal: bgordon's 5 week cardboard & fiberglass build
http://www.tnttt.com/viewtopic.php?f=50&t=38781
User avatar
bgordon
Teardrop Master
 
Posts: 299
Images: 122
Joined: Tue Apr 24, 2007 6:45 am
Location: Johannesburg, South-Africa
Top

long update

Postby coal_burner » Mon Sep 15, 2008 2:26 pm

Well, i got a bit more building done this weekend.
I shaved down and sanded the spray in foam that i put in place the other day. I noticed that some of the foam had collapsed slightly where i had cut and sanded it the day after spraying. I guess you have to wait a few days for the spray in stuff to cure really hard before it can handle the vibration that a belt sander throws off.
I cut more foam board and microed it in place. The foam portion of my front fairing is almost complete. It's just about time to fiberglass it.
Image

Image

Image

That last pic shows how big the ledge at the head of the bed is going to be.

I sprayed a little more foam into the various gaps and cracks and put things away for the night.

When i began work on sunday morning, I noticed cavities eaten into the pink foam.
Image

Image

Image

I couldn't figure out why my foam board was dissolving. Did i get a can of defective spray foam? Did the fact that i was spraying the foam in the rain cause it to set too exothermally and melt things?

You may notice that there is a red plastic cup sitting on the roof of the camper in one of the pics. That cup contained about an inch of kerosene that i was soaking the used spray foam nozzle in. Usually you can only use a can of foam one time, and if you have any left, you end up just throwing it away because the foam hardens inside the nozzle and the neck of the can. The kerosene kept things from hardening and the next day I was able to use the rest of the foam in the can.

Red plastic cups are not kerosene proof. The kero ate through the cup in the middle of the night and poured out onto the camper. Pink foam is also not kerosene proof. It melts into a thick pink sludge when kerosene is dribbled onto it. The spray foam was kerosene proof so it kept the kero puddled on the fairing until it was able to eat it's way to the ground.
I cut and scooped all of the pink sludge out of the way, packed the largest holes with pink foam, and used the rest of the spray foam to glue it all together. tuesday, the foam should be hardened enough to cut, sand, and fill any small gaps with wood putty.
Hopefully the next day, the fiberglass goes on.

A little work on each of three days, Two 18 packs of bud light drank.

:beer:
Last edited by coal_burner on Tue Sep 16, 2008 6:34 am, edited 1 time in total.
We may have philosophy and opposable thumbs, but most humans show all the wisdom of starved raccoons. It's amazing that more of us aren't found flattened on the side of our own roads.
the original bub build thread http://www.tnttt.com/viewtopic.php?f=5&t=19227
User avatar
coal_burner
Teardrop Advisor
 
Posts: 75
Images: 92
Joined: Mon Oct 01, 2007 11:08 am
Location: Berkley, Michigan
Top

Postby starleen2 » Mon Sep 15, 2008 9:21 pm

Well thats got to stink - after all that work. But on the good side at least you found the culprit and made the repair :thumbsup:
User avatar
starleen2
5th Teardrop Club
 
Posts: 16272
Images: 224
Joined: Sat May 12, 2007 8:26 pm
Location: Pea Ridge ,AR
Top

construction continues

Postby coal_burner » Mon Oct 13, 2008 8:23 am

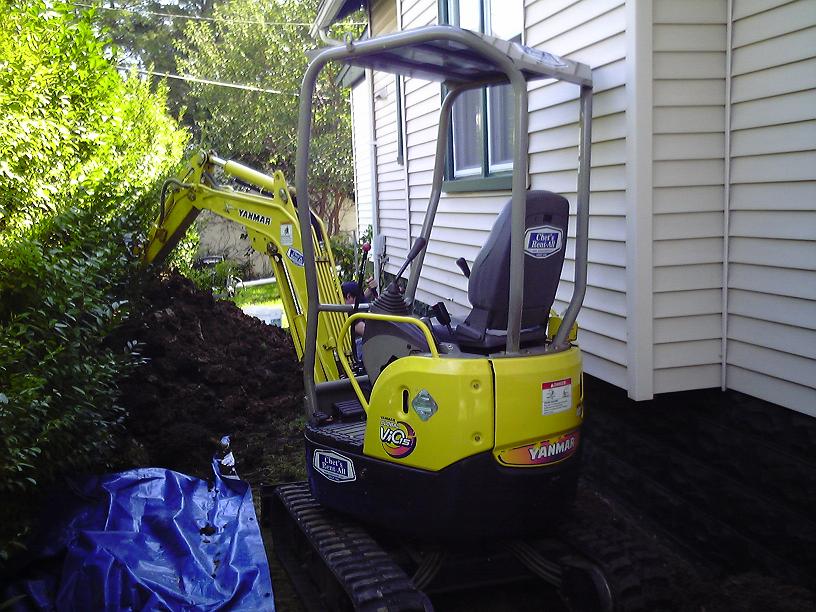
I think that this project may be cursed. Every time i get myself into full construction mode, something comes up and stops me. This time it was a flooded basement. 2 weekends of work with a small backhoe and lots of pipe and gravel, and i'm ready to fiberglass some more.
Image

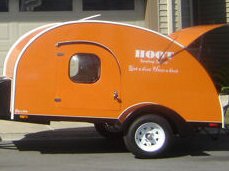
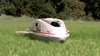
before starting work, i took a couple of pics of BUB in its "ready to camp" position.
Image

Image
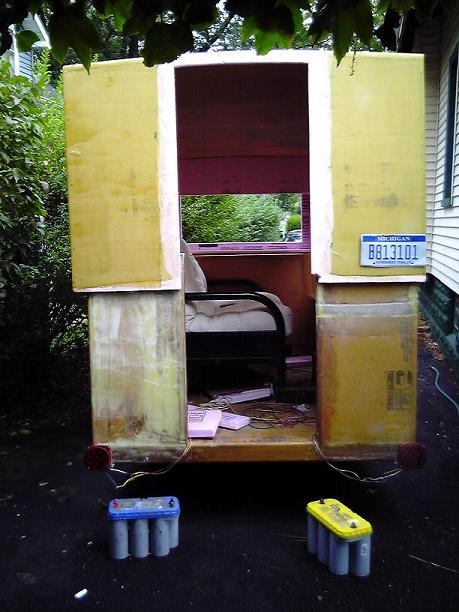
the 2 batteries in the last pic are the group 31 Optimas i'm going to use to run the refrigerator and microwave. I have to toss them in the back every time i move BUB to get the tongue weight down to something that my back doesn't complain about.


Image
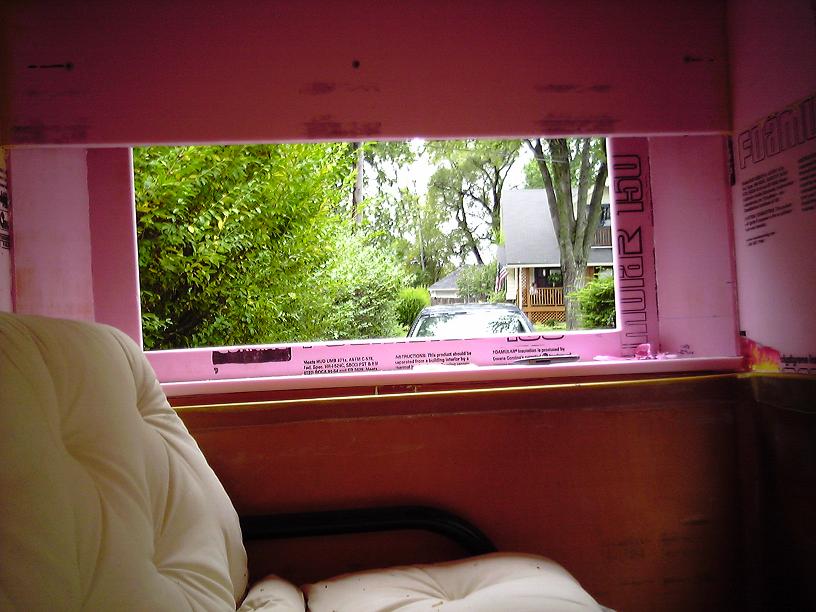
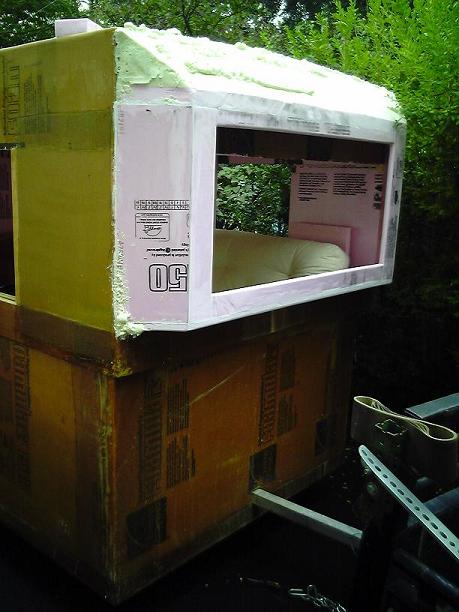
This is what the view is like sitting on the futon and looking out what will be the front window.


After 2 beers worth of laying on the futon dreaming about BUB's first camp out, i was ready to begin work. A passing neighbor helped me remove the cap and flip it upside down in my driveway. He looked at me, then at BUB, then at the mess in the garage, then silently shook his head. No one in my neighborhood can wrap their heads around the concept of a travel trailer that weighs less than 10,000 LBS.

Without the base unit in the way, fiberglass application went pretty quick. Since there were no large expanses of foam to cover, i was able to use 12" wide fiberglass "tape" instead of cutting fiberglass off of the 5' wide roll. I was able to wet out the fiberglass on the ground before placing it on the camper and smoothing it out with a squeegee. This ends up being about 5 times as fast as trying to wet out fiberglass that is already in place on a vertical surface.
Image
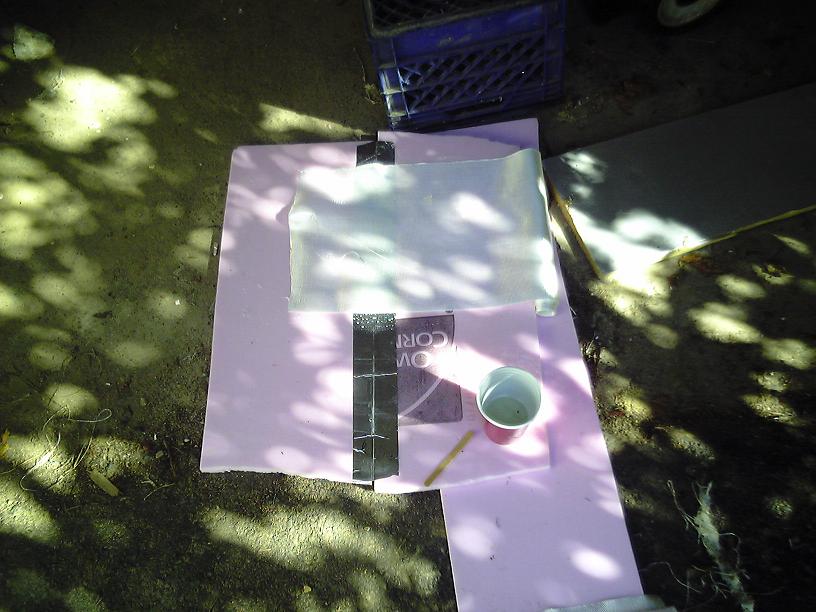
Here is one of the 12" wide 5' long rolls of tape about to be wet out.


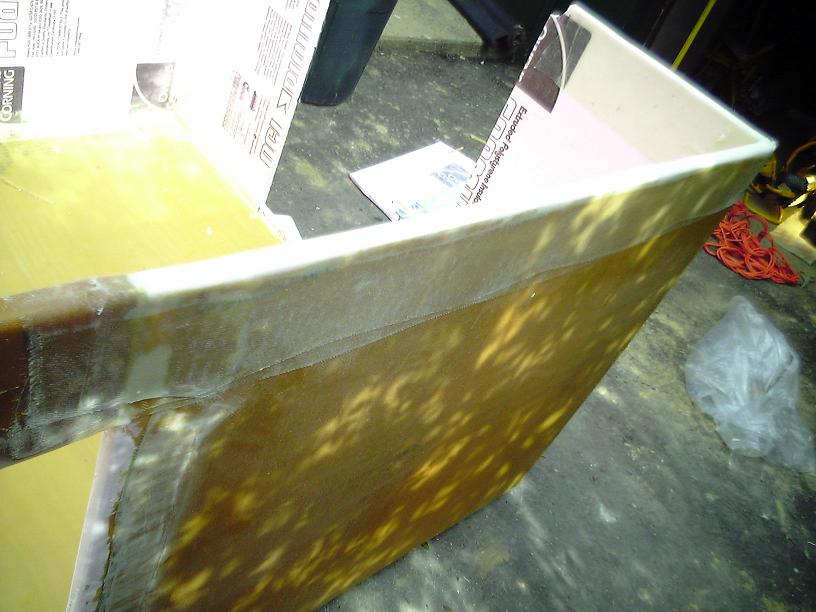
The front fairing is now completely covered in fiberglass and ready to handle freeway speeds.
Image


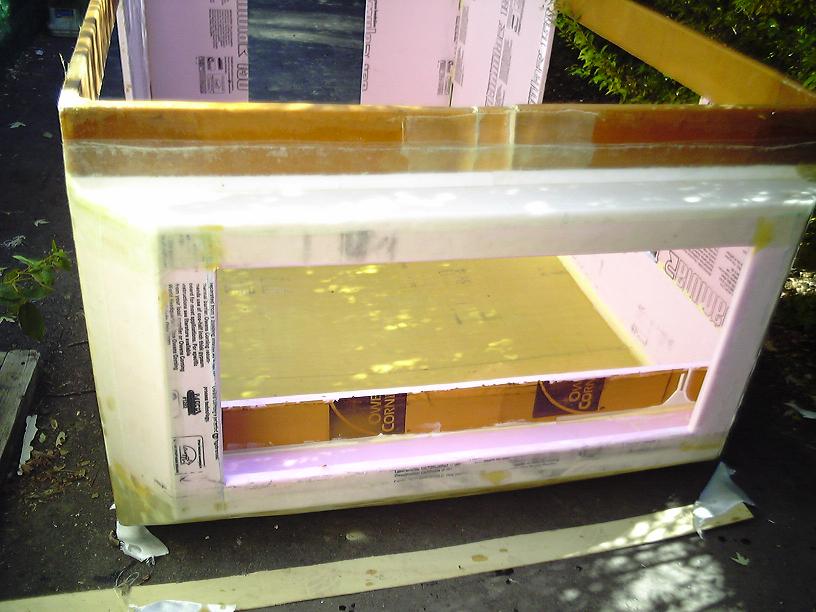
The bottom edge of the cap has also been shortened, rounded, sanded, and covered with 2 layers of fiberglass tape.
Image

The top edges of the side window frames, and the inside roof edges have also received 2 layers of fiberglass.
I think i may only have one more good outdoor building day left before it starts to rain over here followed by getting too cold for fiberglass to flow. hopefully, i will be able to finish framing the window openings during that time.
I'm getting a 4 x 8 sheet of tinted plexiglass to cut into windows. I'll make up some poplar frames for them and hinge everything from the top. The windows will open awning style. With the windows closed, i should be able to heat the inside of bub pretty easily this winter and be able to finish all of the interior fiberglass work.
I'm hoping that BUB will be camp-able (if not quite complete) for deer hunting this year.

3 days of work, 30 beers drank.
Not a bad little bit of progress.
:beer:
We may have philosophy and opposable thumbs, but most humans show all the wisdom of starved raccoons. It's amazing that more of us aren't found flattened on the side of our own roads.
the original bub build thread http://www.tnttt.com/viewtopic.php?f=5&t=19227
User avatar
coal_burner
Teardrop Advisor
 
Posts: 75
Images: 92
Joined: Mon Oct 01, 2007 11:08 am
Location: Berkley, Michigan
Top

done enough for windows

Postby coal_burner » Tue Oct 14, 2008 10:12 am

After work on monday, i had a mission; to put fiberglass on all of the foam that was needed for window mounting. The good news is: mission accomplished.

Here is the inside edge of the roof/wall junction. the fiberglass roof is now structurally connected to the top of the window frame.
Image


Now that the top edge of the windows have been glassed, the cap gets flipped over and set on kitty litter buckets. You can now see my handiwork covering the top part of the fairing.
Image


Here is a close up view of the fairing. You can see the distinct colors of the pink foam, spray in foam, and 2 different tubs of wood putty.
Image
. Notice how smooth those corners are. If you are gentle and work slowly, the cloth can be stretched and curved around some pretty complex corners. I'm finally starting to really get the hang of this fiberglass stuff.


If you are paying close attention, you may notice that some of the fiberglass is clear/white, while other pieces are brown. This is just 2 different brands of epoxy (they were out of what i normally buy when i placed my epoxy order). I couldn't smell any fumes when i was applying the clear stuff. I figured that this must be a remnant of my recent head cold. When i started mixing the brown stuff up though, my head started to spin and solid objects began to wave at me. since they cost the same, in the future i'll be buying the stuff that doesn't get me instantly stoned.

Now the 2 halves of bub will be put back together, and windows can be cut and temporarily mounted in a fixed position(they won't need to be opened until next spring anyway. Wood, silicone, and nut&bolt work will probably be done this weekend. It's a relief knowing that i can do the rest of the work no matter what the weather does.

Only 1 beer drank (i was afraid of the interaction between the epoxy fumes and the alcohol).
:beer:
We may have philosophy and opposable thumbs, but most humans show all the wisdom of starved raccoons. It's amazing that more of us aren't found flattened on the side of our own roads.
the original bub build thread http://www.tnttt.com/viewtopic.php?f=5&t=19227
User avatar
coal_burner
Teardrop Advisor
 
Posts: 75
Images: 92
Joined: Mon Oct 01, 2007 11:08 am
Location: Berkley, Michigan
Top

Postby Micro469 » Tue Oct 14, 2008 4:35 pm

Very Cool!!!! How are you going to keep the hitch up in the water? One idea would be to make a removable pontoon that you could put on, would give you more support and stop it from waggling around.

Also, how are you going to seal the edge of the pop top when up? You probably don't have to worry about rain getting in, but those little buggies can find the smallest cracks.....


:thumbsup:
John
Image
User avatar
Micro469
Super Lifetime Member
 
Posts: 3185
Images: 382
Joined: Mon Nov 07, 2005 10:46 pm
Location: Brampton,Ontario,Canada
Top

Postby Miriam C. » Tue Oct 14, 2008 10:49 pm

:applause: :thumbsup: :thumbsup: Your glassing looks great. I may have to consider doing that some day. Keep up the good work.

Image
“Forgiveness means giving up all hope for a better past.â€
User avatar
Miriam C.
our Aunti M
 
Posts: 19675
Images: 148
Joined: Wed Feb 15, 2006 3:14 pm
Location: Southwest MO
Top

questions answered and small progress

Postby coal_burner » Wed Oct 15, 2008 12:41 pm

Very Cool!!!! How are you going to keep the hitch up in the water? One idea would be to make a removable pontoon that you could put on, would give you more support and stop it from waggling around.


I'm going to fiberglass up a removable V shaped pontoon that should also make a more hydrodynamic bow.


Also, how are you going to seal the edge of the pop top when up? You probably don't have to worry about rain getting in, but those little buggies can find the smallest cracks.....


My thoughts on that are:
Image
The 1 x 2 wood cap strip is going to be held on with drywall screws, that way i can remove them and take the cap completely off for floating on the lake, down the river, whatever (convertible mode).


today's progress:
I rotozipped a notch in the cap to allow the tongue to pass through when the cap is down. (1 beer)
before
Image

after
Image

I also found most of a sheet of 1/16" clear polycarbonate in my garage and cut the 2 side windows out of it. (2 beers).
now my only question is: will 1/16" rattle around in the frame too much on the freeway and pop out? only a road test will tell.

Two small step closer to camping.
:beer:
We may have philosophy and opposable thumbs, but most humans show all the wisdom of starved raccoons. It's amazing that more of us aren't found flattened on the side of our own roads.
the original bub build thread http://www.tnttt.com/viewtopic.php?f=5&t=19227
User avatar
coal_burner
Teardrop Advisor
 
Posts: 75
Images: 92
Joined: Mon Oct 01, 2007 11:08 am
Location: Berkley, Michigan
Top

thinking along similar lines

Postby moreforles » Wed Oct 15, 2008 6:50 pm

the foam boards caught my attention as well. Like the Modular homes have been doing it (sips panels) but thinking lighter, using a light color, light weight paneling on interior and the thin plastic/fiberglass sheets similar to that used on many RVs nowdays for the exterior, glueing the three together.

I figure inch and half insulation board, one eigth in interior panel and the thin exterior with some sort of support (either aluminum or inch and half wood or wood laminate would be more than sturdy enough for side and roof panels.
User avatar
moreforles
Teardrop Master
 
Posts: 143
Images: 12
Joined: Wed Oct 15, 2008 5:47 pm
Location: Cleveland, Ohio
Top

Postby coal_burner » Thu Oct 16, 2008 12:43 pm

I figure inch and half insulation board, one eigth in interior panel and the thin exterior with some sort of support (either aluminum or inch and half wood or wood laminate would be more than sturdy enough for side and roof panels.


I'm helping a friend with a wood/foam/wood sandwich camper. I played around with gluing 1/8" luan plywood over 1"thick foam and there were some delamination problems. When i planed down some 2x2 boards to 1" thick and made a frame around the foam before gluing luan over the whole thing, the result was very strong and very lightweight. The wood picture frame around the edge of my test panel also gave me good attachment points for standard wood screws. 1 1/2" thick would work even better since the separation between the exterior skins is what gives you rigidity, and you wouldn't need to plane the wood down since 2x2 SPF is usually 1 1/2" thick anyway.

I dropped a bit over $100 dollars at home depot yesterday on plexiglass for my front window, enough 1x4 to frame all 3 windows, and some 2x4s to rip down into the seal strips for the cap to base interface.
Image


It was raining when i got back from the depot, so instead of working on the build, i laid down on a big scrap piece of 1/2" pink foam under BUB's cap and just listened for awhile. The pink noise from the rain on the roof, the settling dusk, and the mist being blown in by the gentle breeze lulled me into a half sleep for quite awhile.
I'm not sure whether you could call it a daydream or jest a part of REM sleep, but in it, i was using a ceiling vent fan (running in reverse) to pressurize the inside of bub and raise the cap into place before inserting locking pins to maintain it's position. Upon reaching full wakefulness, i did the mental arithmetic:

9' 4" by 5' 4" roof gives me 7168 square inches of ceiling area. If my cap weighs 75 LBS (with windows, top half of door, and fan) i would only need to generate .0104 PSI to lift it. That converts to .29 inches of water column (the scale used to measure very small pressures). Since 6" WC is common for small industrial axial fans, and 60" WC is not unheard of, i should be able to do this with a 6" DIA R/C airplane motor and 5 bladed prop. Running this at low speed should provide pretty good ventilation when not in "inflation mode". Now all i have to do is find my old box of R/C airplane junk, work out the CFM that my fan can supply, and figure out if it could overcome the air leakage around my cap to base interface until the 2 sections seat and seal. Then figure out exactly what kind of reinforcing i need to add to the lower edges of the cap to ensure that the sides don't bulge out and lose all of my air pressure.

There were a couple of beers drank before my nap so i'm counting those as build related.
:beer:
We may have philosophy and opposable thumbs, but most humans show all the wisdom of starved raccoons. It's amazing that more of us aren't found flattened on the side of our own roads.
the original bub build thread http://www.tnttt.com/viewtopic.php?f=5&t=19227
User avatar
coal_burner
Teardrop Advisor
 
Posts: 75
Images: 92
Joined: Mon Oct 01, 2007 11:08 am
Location: Berkley, Michigan
Top

Postby Micro469 » Mon Oct 27, 2008 2:43 pm

Any updates? :roll:
John
Image
User avatar
Micro469
Super Lifetime Member
 
Posts: 3185
Images: 382
Joined: Mon Nov 07, 2005 10:46 pm
Location: Brampton,Ontario,Canada
Top

windows and other little bits

Postby coal_burner » Fri Oct 31, 2008 12:02 pm

Image
after three passes through the table saw and 2 passes through the router, a 1 by 4 gets turned into two 3/4" by 1 3/4" pieces of window frame.


I HAVE WINDOWS!!!!
Image
Image
The windows are held together by gorilla glue at the miter joints and a lake of silicone in the groove where the glazing slides in. The 1/16" polycarb side windows slide in about 5/8" all around, and the 1/8" plexiglass in the front window slides into the frame a full 3/4".
Each window is surface mounted to BUB with ten screws and a generous helping of silicone(next spring, they will be re-mounted with top hinges and powered actuators).


Image
I cut and milled some 2 by 4s into cap strips to screw onto the bottom of bub.
Image
Image
I also ripped some 2 by 4s into 3/8" thick lath and epoxied that onto the inside of the cap. 1/2" weather stripping was then glued to the top of it.

how do you keep epoxy (wet micro) warm enough to apply when it is 45 degrees out?
Image
you keep it in a bowl of warm water and run into the house to microwave it every 5 minutes.(the timing worked out OK, since every 2 trips i could grab another beer from the fridge)

I also picked up a piece of 2 x 2 x 1/8" wall steel tube for the tongue.
All i need to do now is mount the new tongue, and build and mount a door, and i'll be ready to camp (lifting mechanism, powered futon transformer and making BUB pretty will have to wait until spring, when it becomes fun to work outdoors again).

2 weeks of on and off work, countless beers drank, and a tiny bit closer to camping. Life is good.
:beer:
We may have philosophy and opposable thumbs, but most humans show all the wisdom of starved raccoons. It's amazing that more of us aren't found flattened on the side of our own roads.
the original bub build thread http://www.tnttt.com/viewtopic.php?f=5&t=19227
User avatar
coal_burner
Teardrop Advisor
 
Posts: 75
Images: 92
Joined: Mon Oct 01, 2007 11:08 am
Location: Berkley, Michigan
Top

PreviousNext

Return to Non-traditional Designs

Who is online

Users browsing this forum: No registered users and 4 guests