Page 1 of 2

Stand-up (pop-up overhaul)

PostPosted: Fri Apr 17, 2009 10:47 pm
by ready2camp
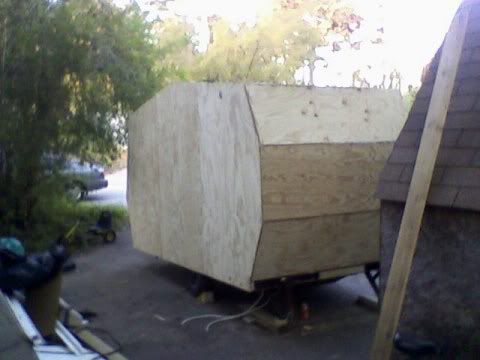
Well I have finally begun construction on the Stand Up. I stripped the camper down to the floor last weekend. Tonight I got the second of the sidewalls framed and sheathed. I did one on Wed evening. Last night was golf leaugue so nothing happened build wise. Here is the cad file I used, not sure who to gice the credit to. I found it on here somewhere, just cannot remember where.

Image

Image

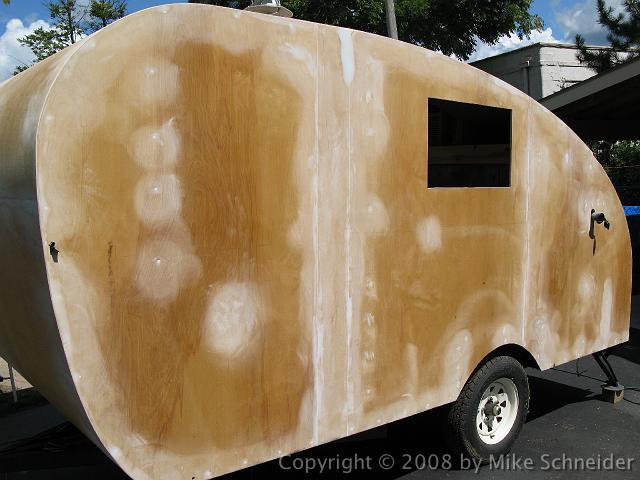
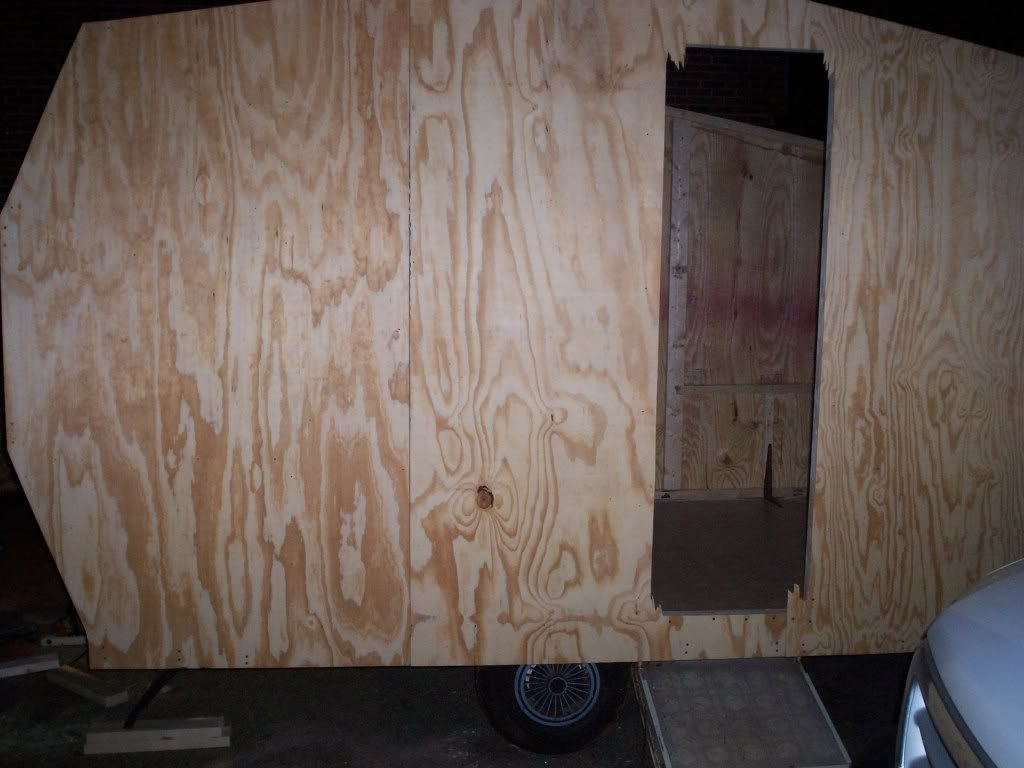
Heare are some of the construction photo's my 9 year old boy took most of the pics so far.

Image


Image
Image.

I will be back at it tomorrow. As for ammenities, it will have one 48" master bunk. @ bunkies on opposite end for the two kids. The top bunk will swing down to form a goucho during the day. A small dropdown dinette for kids friend's/cousins. Sink, 3 burner stove, dorm fridge, TV and DVD. Wish me luck. I am giving myself an aggresive deadline of May 1 for maiden voyage. There is a semi-yearly camping event with work collegues scheduled for that weekend.

Re: Stand-up (pop-up overhaul)

PostPosted: Fri Apr 17, 2009 11:37 pm
by Alan Wood
Interesting design. As for the May 1 camping trip looks like you'll have it closed in and campable by then. Not necisarilly finished but once the roof and doors are on it'll beat a tent any day of the week. :thumbsup:

PostPosted: Sun Apr 19, 2009 5:58 am
by ready2camp
Thanks Alan.

Well I got the entire thing sheathed yesterday. I am very impressed with the rigidity of it. It seems quite solid. I used liquid nails and 3 1/2" lag screws to hold in the spars. And LN's under the sheathing and screwed it into place. I used carraige bolts to attach the bottom of the sides to the trailer. Trying to decide on the siding and roof material.

Question

PostPosted: Sun Apr 19, 2009 7:00 pm
by Prem
Nice trailer Ready2Camp. Hey, where did you get the plastic wheel wells? I need some for my project.

Thanks in advance,

Prem :)

PostPosted: Sun Apr 19, 2009 7:52 pm
by ready2camp
Thanks Prem. They were OEM on the camper(pop-up). I started caulking some of the seams today between church services and family cook-out. So I did not get much accomplished on the camper, but it was not the top priority list today. I will be back at it Tuesday.

PostPosted: Tue Apr 21, 2009 5:50 pm
by mikeschn
Hey Ready,

Welcome to the forum. Mighty nice design, if I say so myself! :lol: :lol: :lol:

I drew that for Al a couple years ago. He's not quite as far along as you, so I'll bet he'd like to see your pictures...

Are you planning on putting that huge bunk in the back for the kids or the dogs?

Mike...

PostPosted: Tue Apr 21, 2009 6:34 pm
by ready2camp
Thanks Mike, great job on the design. I have altered the interior layout a bit. I am putting the larger bunk in the front and the over and under bunks in the back allowing the most headroom for everyone. Right now I am trying to understand the best way to fill the outside seams and seal the wood. Fiberglass filler or Fiberglass resin and cloth? If anyone knows the best method please fill me in(no pun intended). :worship:

PostPosted: Tue Apr 21, 2009 6:43 pm
by mikeschn
I use epoxy filler...

http://www.rotdoctor.com/products/fillit.html

Mike...

Image

Wow! Those plans look familiar

PostPosted: Wed Apr 22, 2009 1:19 am
by Alfred
Hi from Asheville!,

You're building the same (more or less) camper that I'm building! Mike S. drew the plans for me a couple of years ago.

My build thread is at: http://tnttt.com/viewtopic.php?t=21416

Any pictures or suggestions you can send my way would be greatly appreciated. By the way, I'm just a little further up I-26, in Asheville!

Al in Asheville :thumbsup:

PostPosted: Wed Apr 22, 2009 5:23 am
by ready2camp
Hey Al. Maybe when I get mine done I will pull it up Saluda grade and head to Ashevill and you can check it out, and I can take a look at yours.

Thanks for the link Mike.

PostPosted: Wed Apr 22, 2009 5:28 am
by Alfred
ready2camp wrote:Hey Al. Maybe when I get mine done I will pull it up Saluda grade and head to Ashevill and you can check it out, and I can take a look at yours.

Thanks for the link Mike.


Hey Ready2Camp,

I'm looking forward to it! Drop by anytime!

By the way the Tearjerkers are having a teardrop gathering in Glendale NC on 5/15, if you are interested. I am going, but probably in a tent (drat)! Will get mine done someday.

AL. :thumbsup:

PostPosted: Wed Apr 22, 2009 4:44 pm
by ready2camp
Here are a few more pics.


Image

Image

Working on sealing the seams and interior framing now.

PostPosted: Wed Apr 22, 2009 6:12 pm
by mikeschn
Al, you'll notice that R2C's camper is quite a bit higher than the 4' you are building. That's what I had in mind for you originally. :shock:

Mike...

Taller

PostPosted: Wed Apr 22, 2009 9:21 pm
by Alfred
mikeschn wrote:Al, you'll notice that R2C's camper is quite a bit higher than the 4' you are building. That's what I had in mind for you originally. :shock:

Mike...


Hey Mike,

Yes, I see...This will probably be the one I build for my second build, after I've finished the first one and determine you were right, the first one is too darn short! (Grin).

Al in Asheville :thumbsup:

PostPosted: Thu Apr 23, 2009 5:07 am
by ready2camp
Mine is around 75" high in the center. There is plenty of headroom for me. I am about 6'1".

I built the bases for the dinette seats last night. I re-used the metal frames for the seat supports as well as some corner brackets from the pop-up. I has plenty of 4' x 17" pcs of plywood left from the sheathing cut for the sides. Waste not want not, that's what Granny always said. I am re-using the Dinette cushions as well, but I will be recovering them first.

I am taking a vacation day tomorrow to get a big 2-day push on it. I am leary about making the May first completion date, but I am very pleased with my progress so far. Michelle is just happy it resembles a camper. :lol: