John and Kim's Benroy build

...ask your questions in the appropriate forums BUT document your build here...preferably in a single thread...dates for updates, are appreciated....

John and Kim's Benroy build

Postby JohnCarls » Thu Dec 26, 2013 3:09 pm

First, I want to thank all the enthusiastic TD folks here and around the net for taking the time to post all the TD info. I certainly nabbed many ideas from a lot of sources. Hopefully I can repay the favor by adding a few suggestions and ideas.

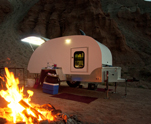
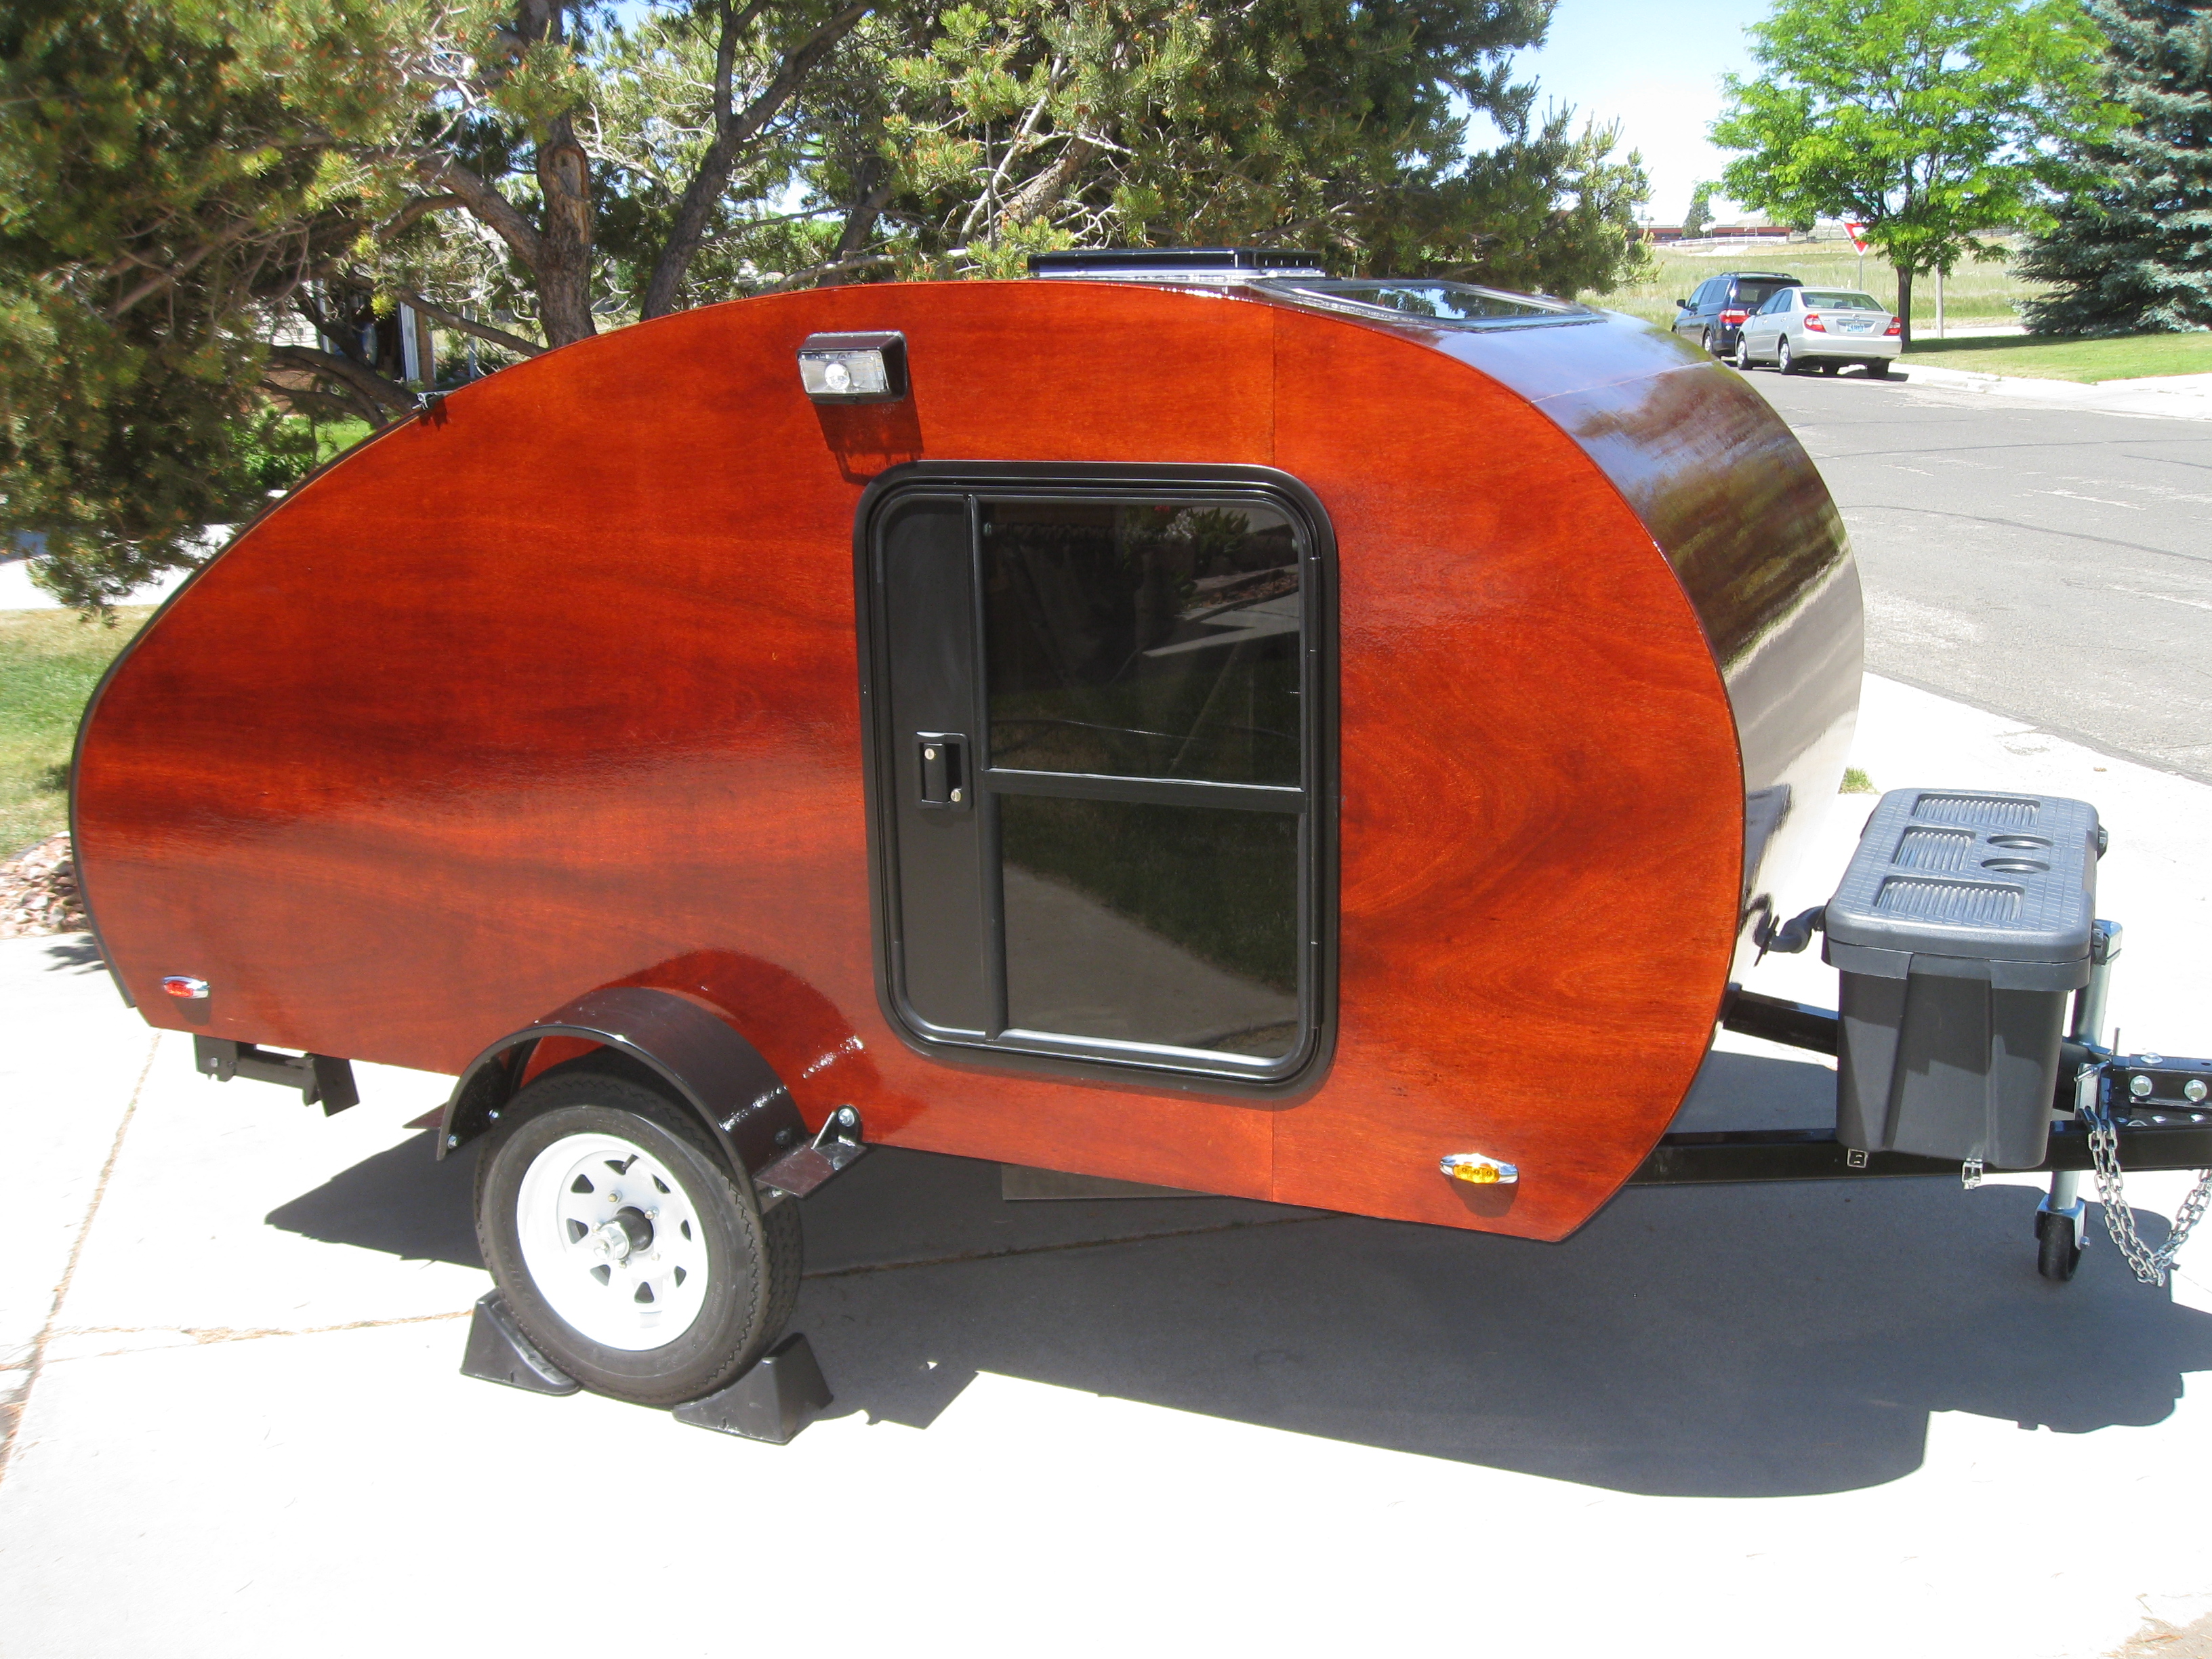
All Kim and I knew for sure when we started our TD project was that we wanted a 5x10 – so we could have a queen size sleeping area with room for cabinets plus a good sized galley – and it needed to be able to go 4 wheel driving behind our Trooper – so it needed good ground clearance. Most of our TD time will be spent off the main roads in primitive campgrounds or just out on the BLM lands in Colorado, Utah, Arizona and New Mexico so a good efficient electrical system – without a generator and with plenty of storage was a must. We also thought that maybe being able to sit on camp chairs inside and watch a movie or two would be nice during bad weather so I would need to build in extra headroom.

The frame:

115176

I couldn't weld anything together to save my life but am fortunate to have a friend who is excellent. I can cut the pieces though. So for strength and stiffness I started with 3x3 box tubing for the perimeter. Not having anything to easily cut 45's on 3” tubing, I used a reciprocating saw with a metal blade and the cut the corners square like so.

115177

It makes a strong corner and caps the tubing ends. To save weight I had the local metal supply bend 16 ga steel into 2x2 3/4 inch angles. Back to back angles tacked together make up the intermediate deck supports. The 2 3/4 inch side allows for the 3/4 inch treated plywood deck and leaves 2” for fastening the wood sides to the frame.

115178
115179

The deck is fastened down with self tapping wood to metal screws at about 8” centers on the edges and a foot or so in the field.

I left the tongue for later and added casters to the frame so I could easily move the frame around the garage during the build. The axle - a 3,000 lb Torxflex – used so I could get a 6 bolt pattern for the 15” wheels I planned to use for the 15 inch ground clearance that matches the Trooper – was saved for later since I really had no idea where it would need to be to balance the tongue weight. At this point I was still considering a water tank, sink and pump.

115180

Soon as I figure out how to add another page and resize the photos I'll stuff them in. Again thanks to all the past posters for the help and Ideas.http://tnttt.com/posting.php?mode=post&f=50#
Last edited by JohnCarls on Tue Jan 21, 2014 3:57 pm, edited 1 time in total.
User avatar
JohnCarls
Teardrop Inspector
 
Posts: 7
Images: 17
Joined: Tue Dec 10, 2013 6:41 pm

Re: John and Kim's TD build

Postby JohnCarls » Sun Dec 29, 2013 4:48 pm

Guess I should rename this post John and Kim's Benroy. I was cruising around other build journals today and realized that our TD has the Benroy profile. We love the extra height in the cabin and the tons of storage in the galley. Plus having the hatch cover up off the deck in the rear protects it from damage on rough roads and in the timber. The interior head height is 4' 8” and from the bottom of the frame to the highest point is about 60” and a couple inches over 6' from the ground – the same as our Trooper.

The wood part:

I laid out the side and endwalls on ½ plywood using a thin strip of wood cut from the side of a 2x4 to lay out the curved profile. Then started on the galley.

115584

The rear of the galley area, the counter top and the galley interior sidewalls are made of ¾ inch, 11 ply cabinet grade plywood. The 3' or so deep sidewalls were shaped and glued and screwed to the plywood exterior . The galley rear was added and screwed to the sidewall plywood and to the exterior. Same treatment for the counter top. I may have gone overboard here but I wanted to make sure the hatch and cabinet area had a rigid base for when we're pulling this on 4wd roads. Which is just about every time we take it out.

We started out thinking of putting in a water tank on the right side of the galley with pump, faucet and drain. As it progressed we decided that we didn't want water traveling in the TD and to let gravity save battery time. And now the area under the basin is storage accessible from both sides. The 3' deep center drawer opens both into the cabin for late nite cookie attacks as well as into the galley. The left drawer was reserved for the campstove with the areas under the drawers used for storage. The hatch was constructed from the same ¾ 11 ply plywood – with 2 pcs laminated together for each rib.

115585

With the galley done, I moved inside and finished the cabin interior walls - as in the drawing - and cabinets prior to putting the lid on. The plywood slats and oak plywood was held down an inch and ¼ to allow for the ceiling and the 1” insulation – 2 pcs of ½ inch foil faced foam with the foil facing in and out. I painted the ¼ plywood underlayment and stapled it down to the plywood slats. The ply had to be backcut where it bent around the front radius. The cross supports and fan supports were made of 2 pcs of the 11 ply ripped to an inch.

115589

115591

115587

115586

115588

All the wiring runs through the ceiling and walls with nothing under the deck.

With the woodwork done it was time to pick it up, add the tongue, the axle and the tongue mounted electrical compartment – then skin it.

115590
User avatar
JohnCarls
Teardrop Inspector
 
Posts: 7
Images: 17
Joined: Tue Dec 10, 2013 6:41 pm


Return to Build Journals

Who is online

Users browsing this forum: No registered users and 13 guests