aggie79 wrote:Very nice design and innovative structure!
Would you mind a couple of questions:
1. How did you adhere the interior paneling and exterior vinyl?
2. How did you join or fasten the aluminum door and wall framing?
Thanks
Thanks for the kudos - I certainly will answer any questions anyone has and try to provide pictures if necessary. I did this design so that we can stand and dress - if the bed is folded up. The interior height is about 6 feet. The box is only 4 foot wide so someone could do a bigger version. My wife and I are both under five and a half feet so this size works for us. Mind you, with the add-a-room we now leave the bed setup all the time. The flat floor area is 4x4' but with the front and back slopes and an air mattress in place we have about 6' head to toe.
Now for your questions:
1. I found 100% pure silicon (the type used for bath and kitchen chaulking) and screws to be the thing for fastening. You wouldn't normally think so but it makes an amazing glue. For instance, at first run I made my door too short (it is only the light paneling and coroplast, with an aluminum frame around it - and tenting fabric on the outside). So I thought I'd stagger the two layers on the extension. It took everything I had to separate the coroplast and panelling and it ripped the panelling layers apart!! That convinced me I found the right combo!! I used only silicon on the door panel - no screws or rivets.
I even silicones the final interior cedar pcs - screwed in thru the outside on the coroplast. The vinyl cloth was also put on with silicon BUT I found that you could only do about a foot at a time, lay on the vinyl and then had to smooth the silicon under the vinyl with a flat tool - or the silicon set up too quick and got lumpy. A closeup of a side wall will show that - I did the sides spreding the silicon on the whole thing first and then trying to smooth the vinyl

Thankfully I'd learned before I did the top. The stone guard is a BBQ mat that looks like metal - it hard rubber, but is only siliconed as well

2. The door frame is hinged at the top so it swings up and in for transport. When I setup, I have a spit hinge (half fastened to the frame and half fastened to the trailer) and hair-pin clip that secures it to the bottom - bit hard to explain - I'll take a picture if I don't have one. For transport i put a bar across and use the hair-pin clips to keep the frame sturdy enough to hang up on the hatch. (more pics would be helpful here, i'm sure)

For the door, I used a piano hinge and rivets - on both sides of the hinge. The small U channel aluminum around the door was just wide enough to drill and rivet. The door is quite light so it worked fine.
I do have more pictures then are on Facebook. I'll try to update some and post back here when i do. I originally used Facebook to keep friends and family joined in on the fun

but i did take other, more technical construction photos knowing I'd post here eventually. Just got around to it finally last weekend.
Karl
UPDATE: I uploaded another FB album - see my next post.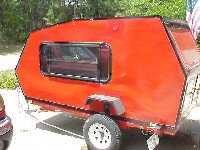


 <<Jeep Wave