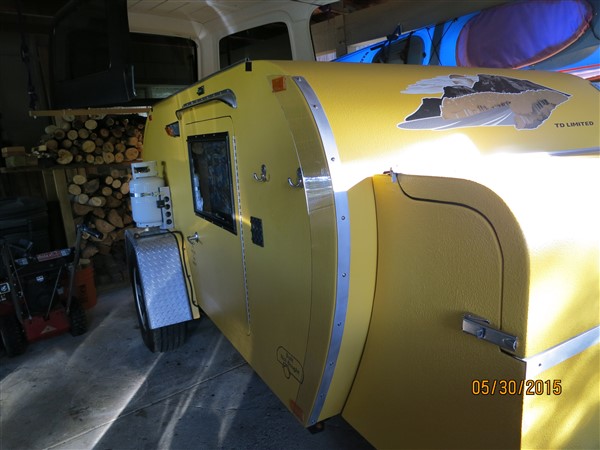
After two full summer and falls camping in the Teardrop trailer with a couple long (2-3 weeks each) and many shorter (1-4 nights each) trips I have made several modifications to my Teardrop trailer. I thought I would post them for other to get ideas of things to think about when building. Like always most of the ideas came from others on this web site and from test runs. This is my documentation of my design of those great ideas.
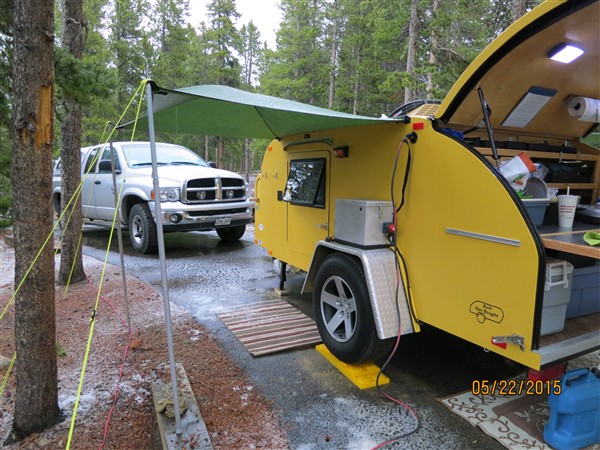
2" receiver hitch for bicycles - I had been looking for a way to carry bicycles with the Teardrop. I have an over 80" light bar on the rear center of my frame so I thought since I couldn't center a 2" receiver hitch that option was out. I looked at roof racks and had installed extra bracing for one but was looking at solar in the future and didn't want to clutter the roof up with more stuff. After thinking about it for a while I decided my best option was a rear receiver hitch so I could use my 2" receiver hitch bicycle carrier with my tow vehicle after I arrived at the campground. So I decided I could put a 2" receiver hitch off center on the rear of the Teardrop. I could easily make a bracket and weld it on and with the bicycle front wheels turning a little bit (bungee cord to hold them in place) they didn't stick out any more then the fenders did. I did a mock up and then found the right 2" receiver hitch, extended it with a 2” piece of tubing to reach to the next frame cross brace and welded it in place.
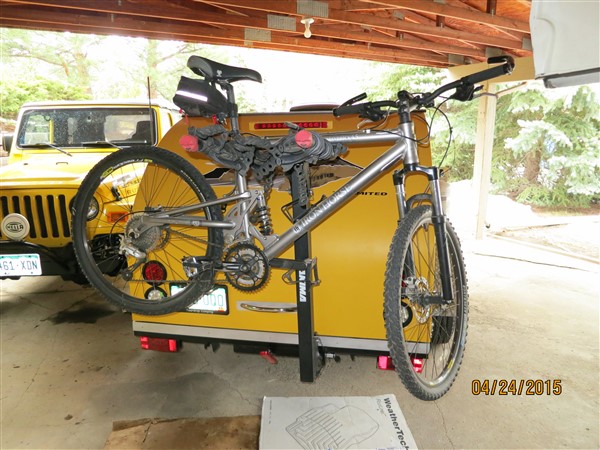
With the Timbren rubber suspension there is little bounce as I go down the road so the bicycles ride nice on the rear of the teardrop. Not sure I would use it for long cross country trips as I would then have to remove the bicycles to open the hatch on the road but it works great to transport to local campground base camps and then I can put the bicycle carrier on the Jeep or truck for day trips.
Foam Mattress Topper – After a couple nights on my 5” foam mattress my wife and I decided it wasn’t quite as comfortable as we wanted. I ended up getting a 1½” memory foam mattress topper from Walmart and that made a big difference.
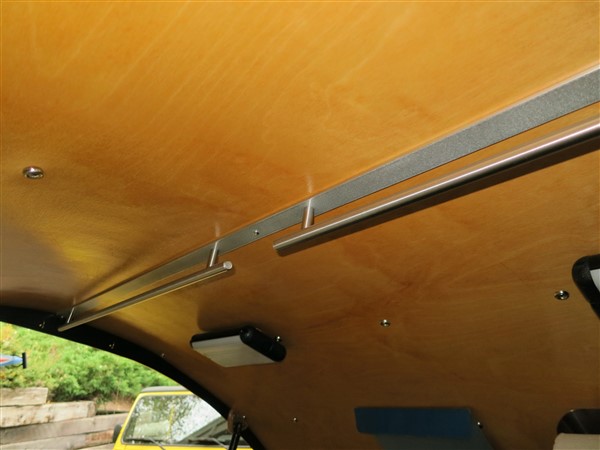
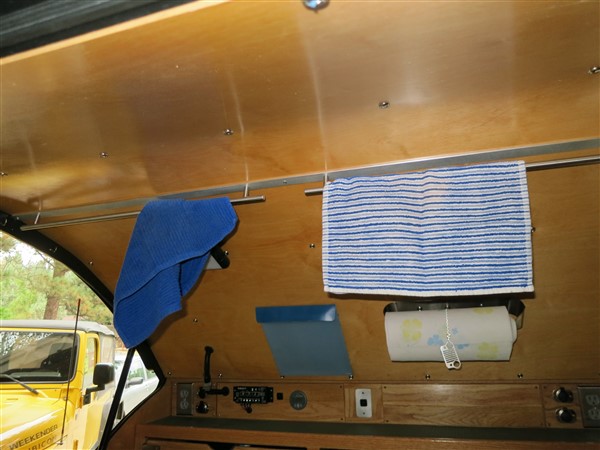
More towel hooks on side of trailer – After camping with the kids I decided we needed more places to hang towels from showers, swim suits and beach towels etc. Most campground prohibit a clothes line and the two double hooks I had one each side plus the Jeep/Truck two mirrors to hang stuff on wasn’t enough. I decided to add 4 more double hooks to the side of my teardrop for a total of 4 (two front and two rear) on each side would work.
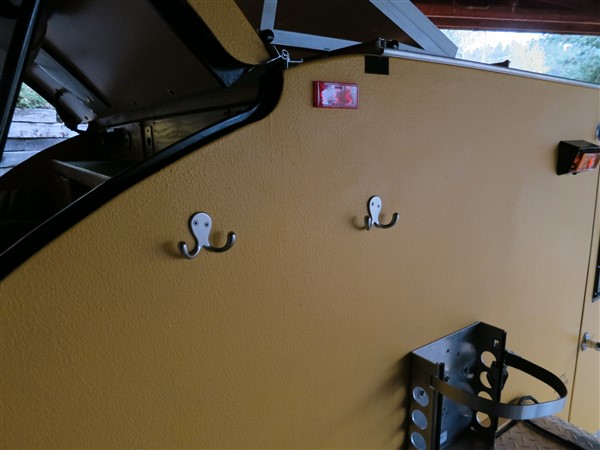
Works great for holding swim suits, towels, and shower bags etc. I also use it to hang my fly fishing vest on while making lunch at a lake or river.
Knife Holder – While stopping for lunch on the road or cooking dinner at the campsite many times I had the galley counter full of stuff and had to rearrange stuff to be able to open my drawers to grab a knife. I looked at magnetic holders but I have some ceramic knives I might want to use, so for quicker access I made a knife rack that mounts on the side of the galley.
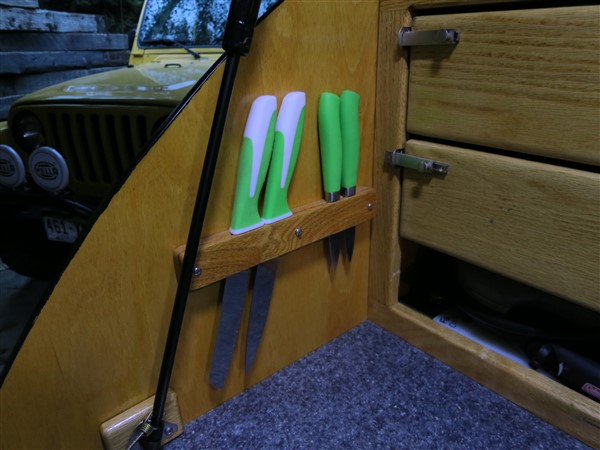
I can grab one quickly without moving stuff and opening the drawers. Comes in very handy.
Entry awnings with poles – originally we made awnings for both door that slide on the rope awning rail but no matter how tight the guy lines were they always sagged in the middle especially if it rained or snowed.
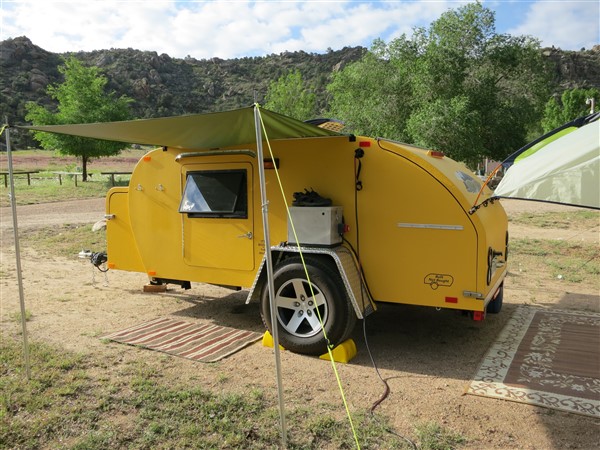
I bought some thin tent poles from Coleman and my wife made sewed loops for them to hold the awning roof up. This one even has some snow on it from my Memorial Day camping trip
Galley Towel Bar – I had a small clip on towel rack that I used and it always seemed in the way of the getting stuff out of the galley shelves, open the drawers or close the hatch lids and not smashing the paper towels
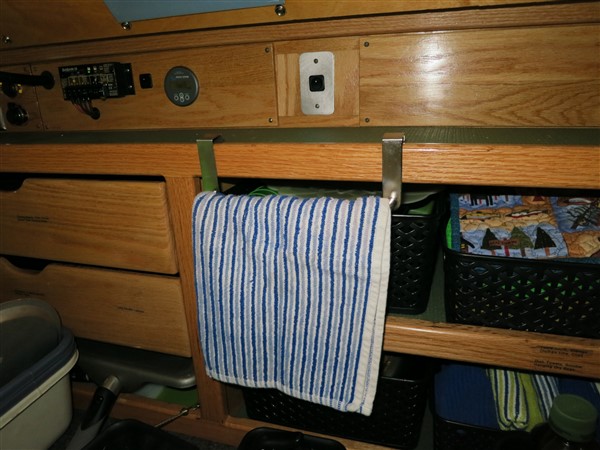
It also only supported one towel. I decided to add two long kitchen drawer pulls that work as towel bars to the galley hatch lid and now I can hang several towels out of the way.
They stay put even while the galley is closed and dry ready for the next meal. They hang high enough not to bother my head
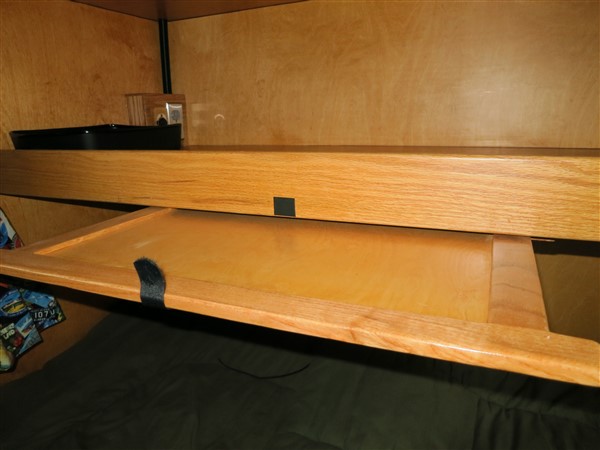
Slide Out Shelf in Cabin – I had all along planned a slide out shelf and after a few trips I decided it was a good additional. I can use it for my tablet to watch a movie or to place mirror for changing contacts or hold a drink. I used some left over plywood and wood scraps to build the shelf and slides and used a small piece of Velcro to keep it in place while driving.
Mud Guards – after few trips in the fall (late Sept/Oct) when it was sometimes rainy/ snowy I found that going on the dirt/gravel roads to the camp sites here in Colorado I picked up a fine silt all along the door hinge and door handle.

It would cake on about ½” thick and make the hinges gritty and the door handle messy to get inside and made it hard keeping mud out of the cabin. I used my pump sprayer bottle to rinse but then thought maybe there a way to prevent it from happening in the first place. I didn’t want mud flaps on the Jeep or truck so I thought about mud guards on the teardrop to help deflect the silt. I use some Lexan and aluminum and came up with these.
They seem to work pretty well and reduce the amount of splatter on the doors hinges and handles
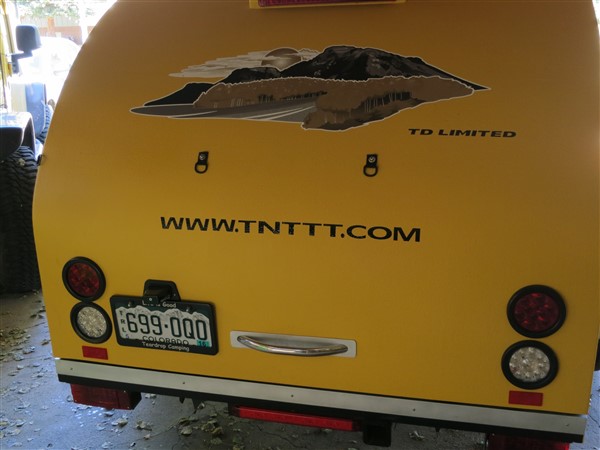
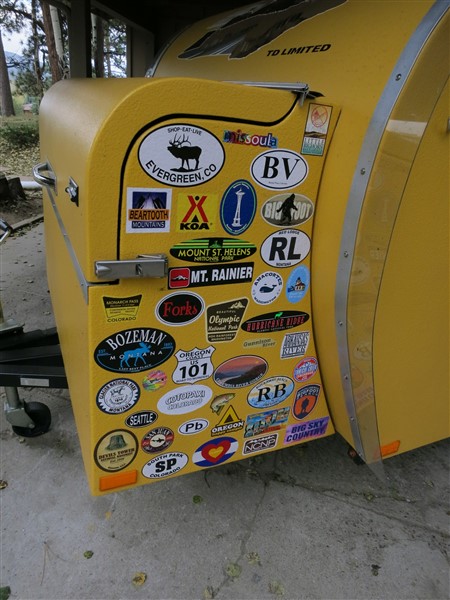
Graphics - Almost every time I stop for lunch, gas or pull into a campground I get people walking up asking questions or slowing driving by with thumbs up. Especially after it has been parked in a campground all day while I am out Jeeping or fishing. People have had all day to wonder by and are super curios by the time I get back to my camp site I probably handed out 30 plus post cards on a three week loop trip earlier this summer to Montana, Washington, Oregon and back home. I already have post cards to hand out and point them to the tnttt.com web site for more info. I decided to add the tntt.com web site to the back of my trailer for those driving. Good promotion for this web site and hopefully gets more people interested in building.
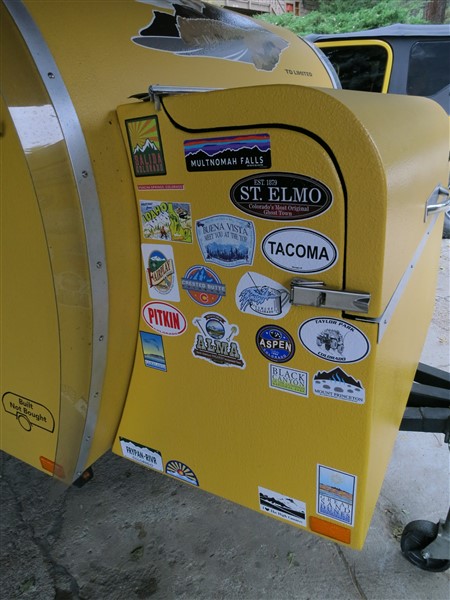
I also started collecting stickers for where I camped or went while camping in the teardrop. I have been putting them my Tongue box and they draw a lot of attention and visual appeal.
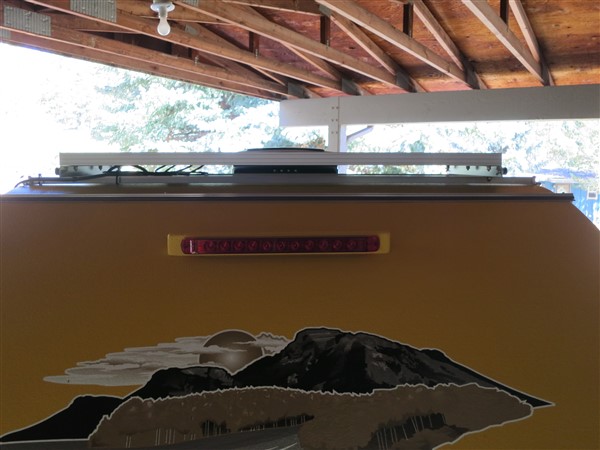
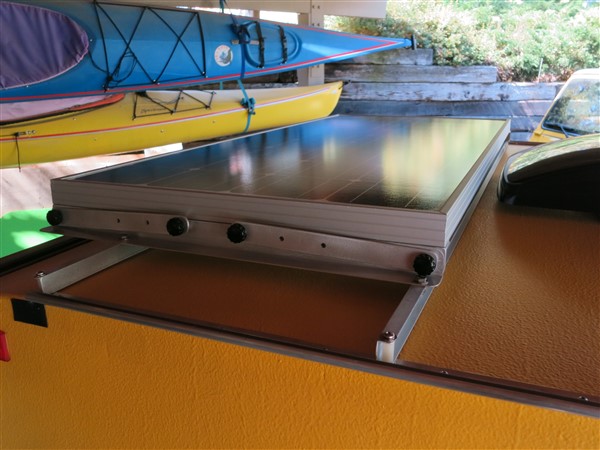
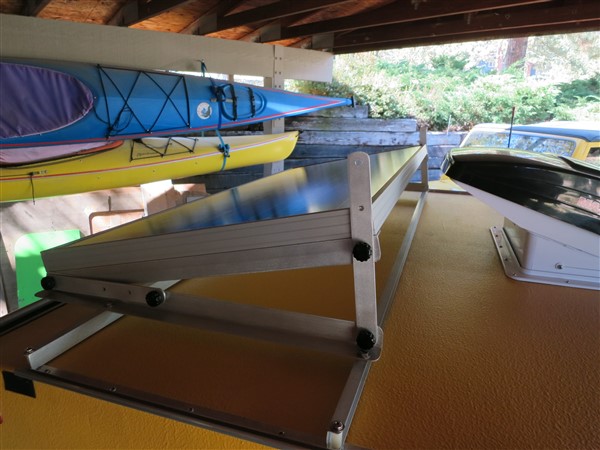
Solar panel and controller and battery monitor - I decided I wanted the option to camp for a week or more without plugging into AC at campgrounds and maybe do some more remote desert type camping in the future. I bought an AC/DC meter that clamps around a wire and measures 12 volt DC current. I used it to test each of my lights, charging cell phones, tablets, etc. and figure out a reasonable duration and updated my spec sheet estimates (using the RV Solar calculator spreadsheet I got off the web) and calculated how many amp hours per day I might need. It came to about a 45-60 Watt solar panel. I looked for some solar panels and most 50 watt were 26" wide which didn't fit on my roof. I needed one 21" or so. I also looked a portable unit but didn't like the idea of storing and setting up as I like the minimal setup most of the time. I found some 30 watt panels and thought about using two of them . I did some more calculating examples based on summer , winter and with and without kids usage and also with a future ARB fridge and decided a 100 watt would be just right and if I really needed more I could add two 30 watt for 160 total watts in the future. I decides I could mount the Renology 100 Watt panel on the roof behind or on either side of fan.
Here is a side view of the panel mounted on the back in flat travel mode
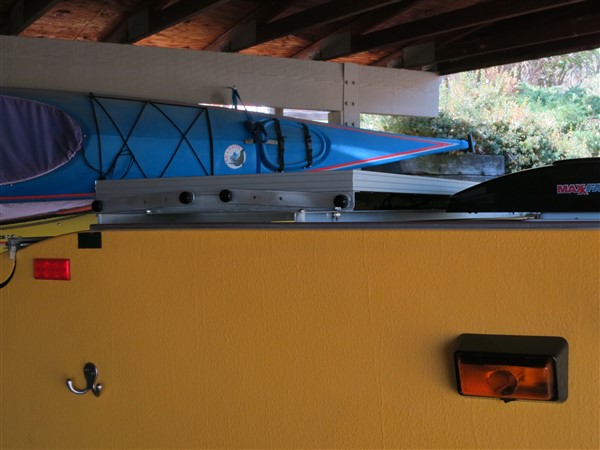
Here is a rear view of the panel mounted
Here is a top side view of the panel mounted
After looking at a lot of different options I finally just used some extra 10 gauge brake wire I had left over spliced it to a set of short MC4 cables and ran it through a hole into my electrical section and used black RTV to seal to hole.

I read that any shadow such as from my fan when the vent is raised would cripple the output so I decided I needed a tilting option in case I needed to minimize shadows. I bought a commercial made tilting mount but in the end made my own out of aluminum. It has more flexibility and allows me to tilt it either direction or even raise the entire panel above the roof fan/vent .
Here is a view tilted backwards
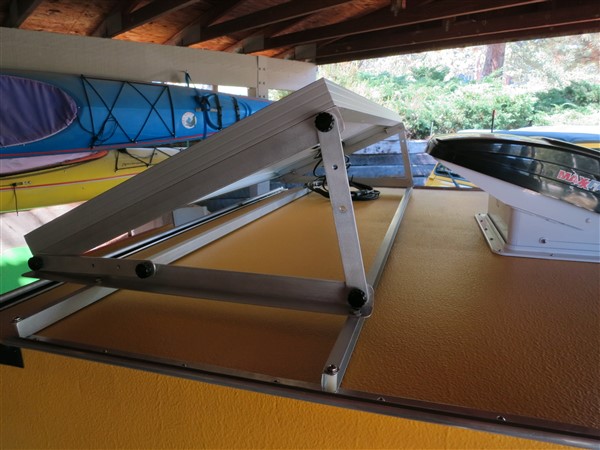
Here is a view partially tilted backwards
Here is a view tilted forward. Gives me flexibility to tilt either direction and various heights but I will probably leave it flat most of the time

I only have a small simple 10 led bars battery meter in the cabin and after researching some decided to add a MVM-700 small round battery meter along with my Sunsaver 10 solar charger. I mounted them both in the galley as that is the only place I decided they would fit with minimal impact. I wired a switch in place so I could turn off the solar panel going into the controller while plugged into AC or if doing service on my electrical system.
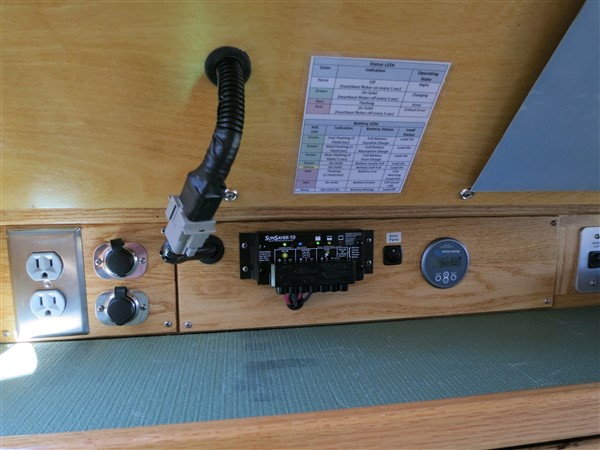
More 12V outlets – With the kids they have lots of devices that need charging and when they bring friends they have more. After my DC current test and a better understanding of what the power draw really is and since I was adding Solar I had a way to charge and was less worried about draining the battery so I decided to double up the 12V outlets in the galley and cabin. In the cabin I was able to add another outlet to one of my headboard panels, the other isn't able to be modified without a lot more work. I was also able to make two new panels for the galley to double my outlets.
I built a new panel and added another 12V outlet in the galley on both sides

I was able to just add another 12V outlet on one side of my headboard power panel

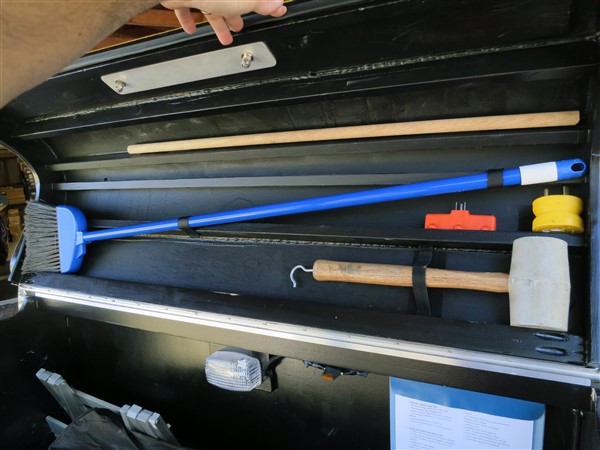
Lessons learned: I have found I like the minimalist setup and teardown. I pull in and park and can sleep without disconnecting. If more than one night I can disconnect and use tongue Jack. I use a couple wheel chocks and that is about it. I have rarely (only once) used the stabilizers I put on each corner. Once chocked my trailer doesn’t move and no suspension flex. I carry my awnings for the doors, galley etc. and only setup if we are parked for a week camping. They usually stay in the tongue box. My Timbren suspension has worked great, no bounce, smooth and no issues and I would use again. Using the boat curtain track on the inside of the cabin works great. I can slide the curtains in either direction and they do not blow when door is open. The Steve Frederick method for Door seal and hatch has worked great. I do not get any dust in the galley and the doors close nicely. My tongue box is big and several have commented on why such a large box. It has been great. The bottom half is full of charcoal, awnings, door mats, wheel chocks, and extension cords. Mostly light items. I fill the top with a shower bag (towels, toiletries, shower shoes) for each of the 4 of us and another bag with extra towels and that fills the Tongue box. I did decide I needed some better organization in the tongue box. There are few items(lid stick prop, stake hammer, 30Amp adapter, and extension cord adapter) I was always looking for and they seemed to get lost. I added them to my tongue box lids and used some Velcro straps to hold them in place
My teardrop and tongue box are on the large size and comes in real handy and I have no issues with tongue weight with the Jeep and Truck. Building 5” wide and almost 11 feet long was well worth it. I was able to keep within my weight limits but have lots of room. I would look at other options (Foam, less wood, etc.) to reduce weight before I made one smaller.
I really have no regrets or other changes that I have come up with. I have thought of building another Teardrop in the future and it would be modeled after Steve Frederick’s Rondack Lodge (I bought his plans just in case). The only reason would be as my wife and I get older and into retirement we may want to spend more time in place (1-3 months at a time) so, we would want a place to sit to use a laptop and to get out of the rain. I really like the outside galley cooking and don’t think I would want an actual standee but like the mixed standee and outside galley of the Rondack Lodge. Well that about sums up my modification, lessons learned and like and dislikes.
I got only a couple more camping trips this fall before the winter starts.
Happy Camping
Dan