So I will pick up where I left off..
Here are the water tanks installed. One for fresh and one for gray water. Of all things on this build, picking out the plumbing parts for this system was one of the hardest things to piece together! I currently have the drain hose running straight into the open end of the gray water tank. It works fine but its definitely not world class. Looking to improve it with actual fittings soon.

The 12v water pump that submerges in the fresh water tank. I cut the nozzle off the stock Coleman water spout and the 3/8" tubing fit really well in the hole. The two links on the 3/8" to the 1/4" reduction are quick release so that the pump can be disconnected an carried around with the tank.

I decided from the start that I wanted to be able to stand on the fenders for loading boats on the roof rack. The fenders I picked out are not the most attractive but they do have built in steps. First thing, I cut out some pressure treated lumber to stiffen the step area and distribute the load from the supports.

Here are the said supports that I made up to hold the fender. The reason that they are so complex is so that they will bolt to the same holes on the frame that the axle mounts to. This way I will be able to move the fender if I ever decide to move the axle. Making these was a big headache and for future builds I will use the information that I have gathered from this build to fix the axle location and just weld fender supports directly to the frame.

The fender supports installed after painting.

I cut out some of the inside of the fender so that it fits flush against the side of the trailer for a smoother look. Also shown is one of the four marker lights.


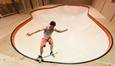
Layla testing out the camper as we near our first adventure in it! Notice the curtains that my wife made. They have compasses on them, similar to the cabinet knobs!

Letting the Towster get some sun!


Finally a tag and registration! With no good information about registering something like this in AL I was quite worried about how this would turn out. Fortunately the lade behind the counter just registered it as a an enclosed, home made, utility trailer under 10'. I didnt even have to bring it in for an inspection. It seemed simple enough so I was not about to ask questions!


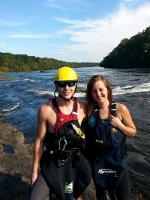
The weekend after getting the trailer registered it was time for our first of three kayak races of the year. As you can see from the picture we have a lot of boats that need to get to the race. This is why I was sure to include a sturdy roof rack on the Towster. In fact, this is the first time that the Towster ever left the neighborhood! Talk about a test run!!

It is obvious that with all of the boats and gear, my little Subaru is a little over loaded. I dont exactly remember on the gas mileage from this trip but I do know that it was not worth remembering haha. HOWEVER, I have made a couple trips with the Towster behind the Subaru (no boats) where I achieved over 20 mpg! While the Impreza WRX tows the trailer sufficiently power wise, its tired rear springs tend to be the limiting factor.
Here we are camping at the first kayak race! The Locust Fork Invitational on the Locust Fork River in Blount county AL.

Say goodbye to suitcases! We now pack everything directly into the cabinets! We each have plenty of space for our clothes as well as "his and hers" drawers for the extra doo-dads.

My wife testing out the new kitchen! It is next level compared to what we were used to! Notice that I still dont have the headline on the hatch yet.

Shot of the inside in "bed mode".

Now that we are back from the first trip, it was time to finish some things and make some more improvements..
Time to install the headliner on the hatch. Using 1/8" baltic birch.

Little bit of pine trim around the speaker boxes.

Added a kick stand to either side of the rear storage locker. It stays in place against the pivoting floor via Velcro when not it use.

I did not want to permanently affixing the carpet in the bottom of the foot well so it could easily be cleaned and replaced. Instead I installed 6 snaps around the perimeter and laid down that rubberized carpet blanket underneath. This worked out better than I expected and I can easily shake out the carpet as it gets dirty while camping!


A couple screws to mount the little buddy heater. This little heater combined with a fully insulated camper is definitely a game changer on the colder trips where there is no power! While we would never sleep with it on in the camper, we did preheat the camper to warm up all of the interior surfaces before crawling in for the night. On one trip where it dropped below freezing, just preheating (plus body heat from us and the 60 lb dog) was enough for us to wake up with the camper still 30 degrees warmer than outside! That is still with the widows and roof vent cracked for ventilation. It was also nice to hang out in the camper with the heater blasting right after getting off the river. Multiple times we comfortable sat 4 people in there to chat and warm up!


The embroidered throw pillow that my wife got for us! Again it has a compass to go with the theme.

Shots of the hatch after headliner and speaker box trim is in place.


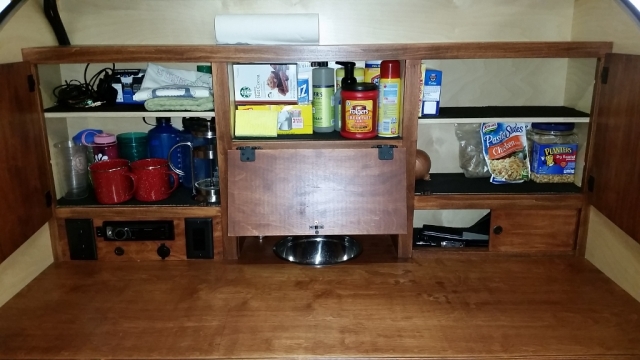
Random shot of the cooking station ready to go.

Galley cabinets loaded up ready for the next trip.
Rear storage area post carpet installation and loaded with goods.

On our way to the next race! The Mulberry For Canoe and Kayak Race on the Mulberry Fork River.

My wife cooking up some dinner on the griddle the first night at the race.

Why yes it was cold at this race. It was well below freezing both nights! HOWEVER, we did have access to a 120V plug this time so we left our little electric space heater in the camper set to 75 degrees! Even when it dipped below freezing, we were warm and toasty in the Towster! The electric blanket we were sleeping on top of definitely helped haha

Shot from the camping location at the National Collegiate Disk Golf Championships were I got to spend 4 nights in the Towster. It was warm sone of the nights and I was happy to discover that the fantastic vent does a fantastic job at keeping me cool! Notice my friends tent in front of the Towster is a VW bus. Made for a funny picture


And yes come May I finally graduate from college! Roll Tide!!

Here is our new house before a week of landscaping..

Here is our new house after a week of landscaping!

After mastering the Kregg jib while building the Towster, I built this kitchen island! Cant take credit for the counter top. That was a buy item. Anything seems easy after building a teardrop..

Our first purely recreational camping trip in the Towster. This is at Bear Den Campground off the Blue Ridge Parkway near Spruce Pine NC. The family has been coming here for over 15 years!

The Towster's new home! The detached garage at our new house. Finally getting it organized enough to use.

The recent camping trip with the family at Lost Mine campground near Bryson City, NC. Had a nice time paddling the Nantahala river and beating the heat! No power here but I was still able to run the roof fan on low both nights without incident. Wouldn't try for a third though haha

The new tow vehicle!!!! With my wifes car having engine problems for most of the year we sold it and bought a 2014 Honda Pilot! It sure is nice to be towing with a vehicle that was meant for it! It easily totes this trailer around and once I install a transmission cooler I can tow up to 4500 lbs. It comes stock with a 7 way harness and I was even able to easily find a pig tail to directly plug in my brake controller! After hooking up everything manually in the last two cars it was bizzare to just plug in the trailer and have everything work without having to splice even one wire!! That's even including back up lights and charging-while-towing!

Just some glamore shots of the trailer after cleaning it out after the last trip. Notice the new teardrop artwork in the cabin and the mosaic back-splash that my wife made for the galley!


That's all I have for now but I do have some more ideas lined up for the near future!
Canopies for the doors and an aluminum sealer to name a few..


 good photo's
  made if feel like we were there!!
 Well done you have made a fantastic job. But then I could see right from the beginning that you were putting a lot of good though into this.

 ictures: good photo's