Finally time for a couple more pictures. It's been a busy summer and I missed the first big deadline for a family camping trip in MN last week, so I haven't been as motivated as I'd like. Now I'm just trying to get it weather tight so we can use it a few times this season, then take the winter to put some finishing touches on it.
So, on to the V-nose/Tongue Box.
Things got a little tricky here. The tongue box - not sure if I should call it the tongue box or the v-nose - anyhow, the two side walls are each made of two skinny (~6" wide) vertical panels and two small horizontal panels (basically making a door frame). Then there's a skinny (6" wide) center panel between the two side walls (the front of the V). The tricky part was cutting the angles. The angles between the center panel and the two sides are slight (about 30deg), but the angles where the sides meet the cabin walls are well beyond the 45deg tilt of the table saw.
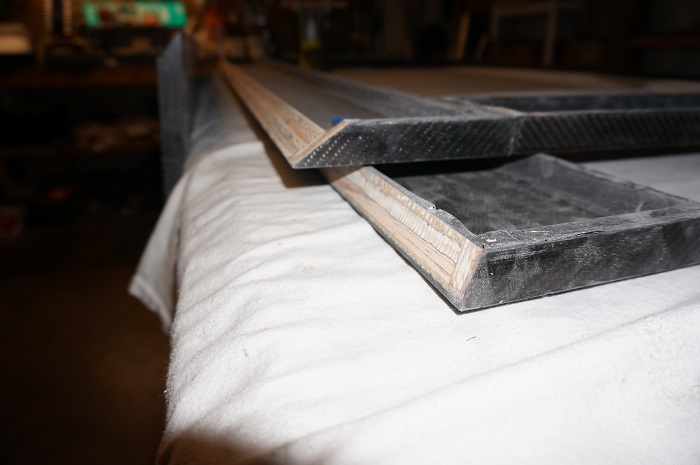
In this picture, you can see the middle panel on the bottom and the part of the tongue box wall that meets the cabin on top. The center panel angles were pretty easy to cut on the table saw, but the other angles being greater than 90deg were pretty tricky. We (my brother-in-law and myself) ended up running the panels through vertically, with the fence on the left side of the blade, which really messes with your mind after decades of always cutting with the fence on the right.

- DSC00284.JPG (104.74 KiB) Viewed 3190 times
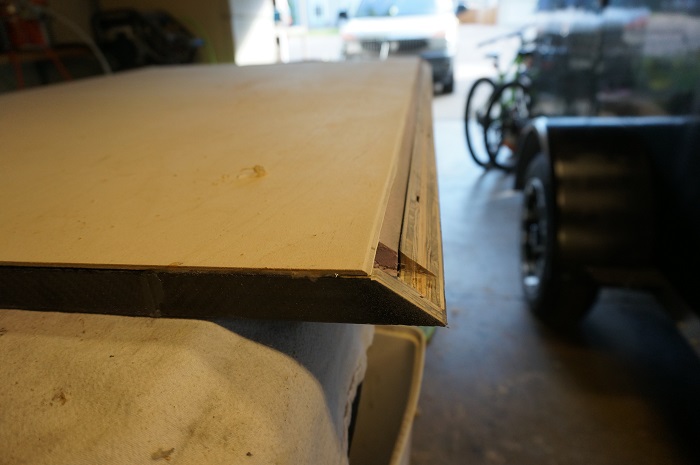
Luckily, my brother-in-law is a master wood worker and with a lot of patience, planning, contemplating and so on, the cuts all turned out perfectly. Here's a shot of one of the difficult angles with the inner BB skin on. The notch you see nearest the camera is where the wires pass through the cabin walls into the tongue box.

- DSC00295.JPG (107.18 KiB) Viewed 3190 times
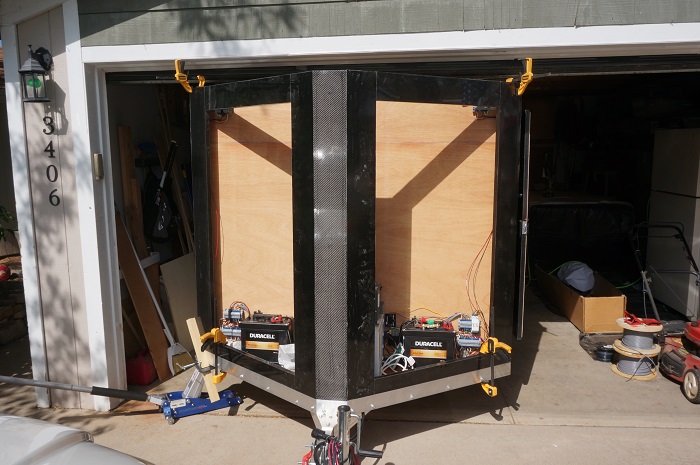
And the money shot... all three panels dry-fit and mocked up in place with clamps. They all fit great.

- DSC00292.JPG (156.12 KiB) Viewed 3190 times

Steve

