Where or When Jr. --Paint & New Tow Vehicle--update 5/17/15

...ask your questions in the appropriate forums BUT document your build here...preferably in a single thread...dates for updates, are appreciated....

Postby emiller » Sat Jan 29, 2011 9:40 pm

Wow you have done a lot in a little time. fantastic. :thumbsup:
User avatar
emiller
Donating Member
 
Posts: 3421
Images: 157
Joined: Sun Jun 13, 2004 11:00 pm
Location: Arizona, Phoenix

Postby S. Heisley » Sat Jan 29, 2011 9:44 pm

It looks like it will be a very comfortable trailer. You're doing a good job. (I knew you would.) :thumbsup: :applause:
User avatar
S. Heisley
Super Lifetime Member
 
Posts: 8866
Images: 495
Joined: Mon Sep 17, 2007 10:02 am
Location: No. California

Postby myoung » Sat Jan 29, 2011 9:47 pm

Eddie, Slowcowboy, Sharon, Miriam, and Cliff,

Thanks all for the encouragement. One piece at a time is all it takes. Right?

And, a lot of other builds from which to learn.
Last edited by myoung on Sun Jan 30, 2011 12:32 pm, edited 2 times in total.
Mike Young
build thread: viewtopic.php?t=40459
User avatar
myoung
500 Club
 
Posts: 644
Images: 250
Joined: Sat Aug 07, 2010 11:21 am
Location: Nipomo, CA
Top

Postby Miriam C. » Sat Jan 29, 2011 10:20 pm

:thumbsup: :thumbsup: :applause: Nice and straight! It is looking great! I can't wait to see your linear act. installed. I so need something like that!
“Forgiveness means giving up all hope for a better past.â€
User avatar
Miriam C.
our Aunti M
 
Posts: 19675
Images: 148
Joined: Wed Feb 15, 2006 3:14 pm
Location: Southwest MO
Top

Postby Cliffmeister2000 » Sun Jan 30, 2011 1:16 am

Very nice, Mike! :thumbsup:
God Bless

Cliff

♥God. ♥People.
1 John 4:9-11

My Teardrop build pictures
User avatar
Cliffmeister2000
Titanium Donating Member
 
Posts: 3622
Images: 157
Joined: Thu Jul 26, 2007 10:18 pm
Location: Phoenix, AZ
Top

Postby myoung » Sun Jan 30, 2011 9:18 pm

Today, I began framing the interior structures.

The first order of business was to lower the galley counter by 3 inches. I had originally planned for standard kitchen counter height to accommodate an under-counter fridge. But later, I decided that the freezer compartment wasn't necessary and chose a shorter but deeper model, the Dometic RM4223, which is only about 21 inches high. This will leave plenty of room for a substantial drawer over the fridge even with the lower counter height.

This photo shows the addition of another set of horizontal cleats on the front wall to provide a backing for the counter at the lower height.
Image

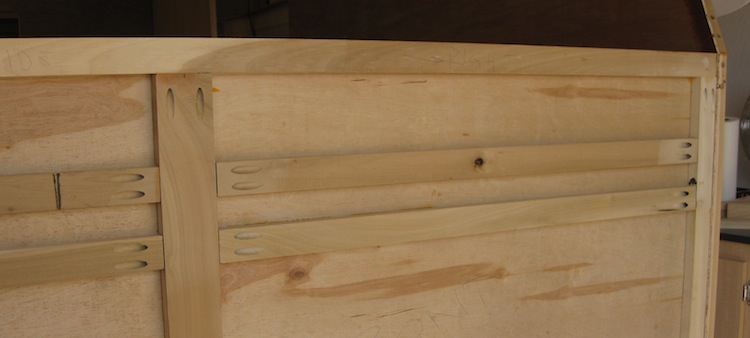
Because the galley is L-shaped, I also had to add another cleat along the street side. Notice the other set of cleats further back and about 4 inches lower. These cleats will provide backing for cabinetry along the side and the step-down between the galley counter and the cabinetry will be sufficient to install a DC and an AC outlet horizontally.
Image

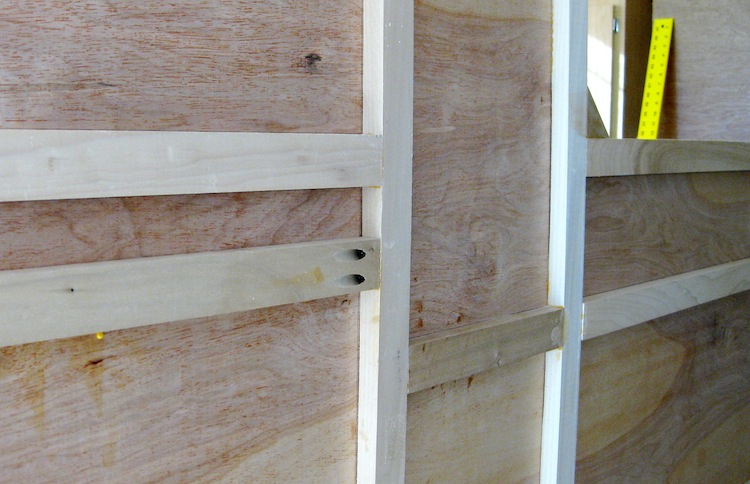
This photo is from the interior looking toward the street side. It shows the cleats along the floor and wall as well a a half-inch plywood end to the galley counter and cabinetry.
Image

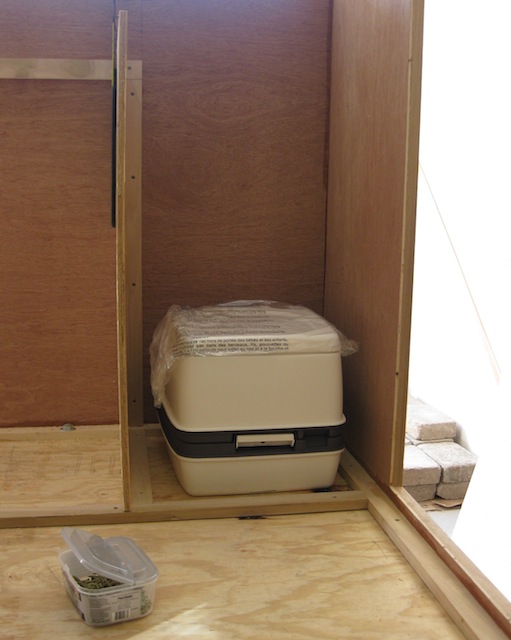
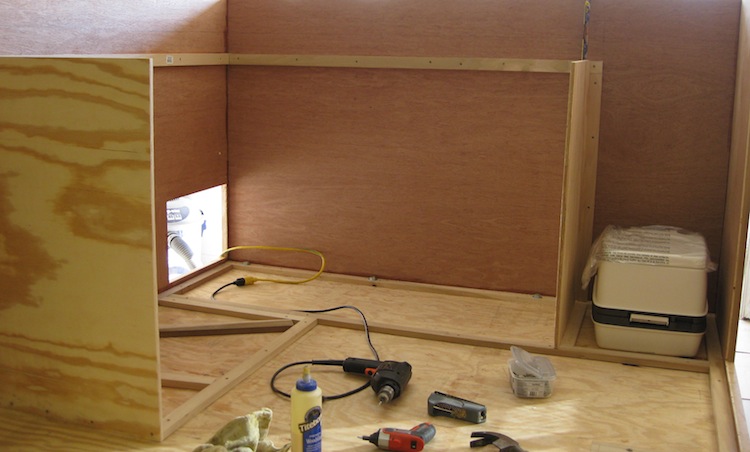
The Porta-Potti is in a narrow space inside the side door. Fortunately, I'm not particularly wide (yet) so this should be adequate. I haven't decided whether to raise it a bit or not. The argument against raising it is that there will be an electrical panel and other stuff on the front wall above the head. I've got to make sure there is enough room for all the stuff and the open seat cover.
Image

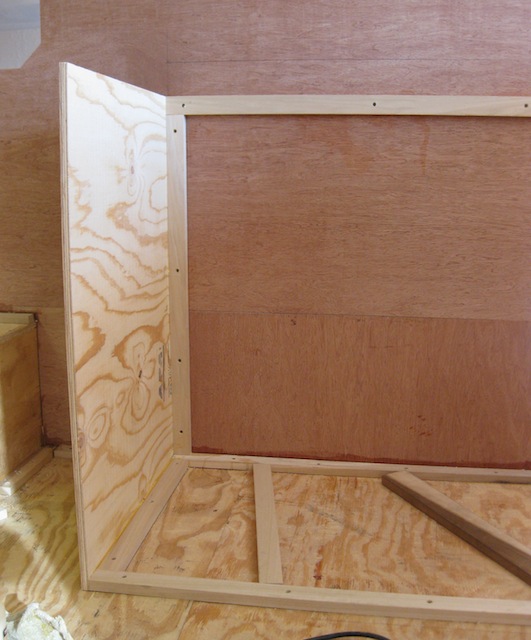
This is just another view looking forward toward the galley.
Image
Mike Young
build thread: viewtopic.php?t=40459
User avatar
myoung
500 Club
 
Posts: 644
Images: 250
Joined: Sat Aug 07, 2010 11:21 am
Location: Nipomo, CA
Top

Postby S. Heisley » Sun Jan 30, 2011 10:16 pm

You're making good progress, Mike. :thumbsup: That potty area will probably be fine for both you two thin people. (Of course, not at the same time! HaHa!) I suspect it'll only be used for emergencies and middle of the night trips anyway.
User avatar
S. Heisley
Super Lifetime Member
 
Posts: 8866
Images: 495
Joined: Mon Sep 17, 2007 10:02 am
Location: No. California
Top

Postby myoung » Sun Jan 30, 2011 11:13 pm

Sharon,

Years ago an architect friend of mine told me of a client who kept insisting that the home that was being designed for him should seat six. My friend kept hearing the phrase "seat six," "seat six" but couldn't understand what was the problem because certainly the dining room was large enough to seat 12 or more.

Eventually, the Texan client explained to the Yankee that to "seat six" meant that there should be six bathrooms.

My trailer will only "seat one."
Mike Young
build thread: viewtopic.php?t=40459
User avatar
myoung
500 Club
 
Posts: 644
Images: 250
Joined: Sat Aug 07, 2010 11:21 am
Location: Nipomo, CA
Top

Postby aggie79 » Mon Jan 31, 2011 9:26 am

:thumbsup: :applause: :thumbsup:

Mike,

Your build pace is amazing as is your execution of details and design! Thank you for posting pictures of your (blindingly) quick progress.

Tom
Tom (& Linda)
For build info on our former Silver Beatle teardrop:
Build Thread

93503
User avatar
aggie79
Super Duper Lifetime Member
 
Posts: 5405
Images: 686
Joined: Tue Aug 07, 2007 5:42 pm
Location: Watauga, Texas
Top

Postby S. Heisley » Mon Jan 31, 2011 11:35 pm

myoung wrote:Sharon,

Years ago an architect friend of mine told me of a client who kept insisting that the home that was being designed for him should seat six. My friend kept hearing the phrase "seat six," "seat six" but couldn't understand what was the problem because certainly the dining room was large enough to seat 12 or more.

Eventually, the Texan client explained to the Yankee that to "seat six" meant that there should be six bathrooms.

My trailer will only "seat one."


:rofl: Good one!

My sister once rented an old school house up in Maine that had been turned into a home. It still had attached to it a girls' two seater and a boys' two seater. Yep! Outhouses! (There was a modified closet with indoor plumbing in it too. I guess that was a real "water closet"! HaHa!)
User avatar
S. Heisley
Super Lifetime Member
 
Posts: 8866
Images: 495
Joined: Mon Sep 17, 2007 10:02 am
Location: No. California
Top

Postby myoung » Tue Feb 01, 2011 7:41 pm

More interior framing today, mostly in the galley.

Here are the fronts of the galley showing two door openings under the sink, space for the fridge to the left, a tall pantry drawer space the the left of that (not designed yet but this seems like a good use of the space), and a full width and very deep drawer over the fridge and pantry.
Image

Beneath the sink is a 2.5 gallon, on-demand electric water heater by Bosch. The two-burner stove is tentatively set on the diagonal. We'll see if that works out once I put the counter-top plywood in place.
Image

This is looking toward the fridge and you can see the 12-gallon fresh water tank on the chair. I put that on a platform over the cargo bay whose opening you can also see in this photo.
Image

I also put up the wall that forms the end of the rear settee and the hanging closet. Some framing along the floor and wall is the start of the framing of the cabinetry and settees. I should make some progress on this area tomorrow.
Image
Mike Young
build thread: viewtopic.php?t=40459
User avatar
myoung
500 Club
 
Posts: 644
Images: 250
Joined: Sat Aug 07, 2010 11:21 am
Location: Nipomo, CA
Top

Postby fromeo » Tue Feb 01, 2011 8:12 pm

Nice work, Mike!

I'm assuming the small openings in the lower sections of the wall are for outside access to storage. If so, great call, you will really like having that available.

- Frank
fromeo
Teardrop Master
 
Posts: 157
Joined: Tue Feb 27, 2007 2:01 pm
Location: Sicklerville, NJ
Top

Postby myoung » Tue Feb 01, 2011 8:27 pm

fromeo wrote:Nice work, Mike!

I'm assuming the small openings in the lower sections of the wall are for outside access to storage. If so, great call, you will really like having that available.

- Frank


Yes, I have cargo spaces on the street side front and the opposite corner on the sidewalk side rear. There is also a possibility of adding one at the bottom of the hanging locker, or I may just have a deep bin there for boots or bedding.
Mike Young
build thread: viewtopic.php?t=40459
User avatar
myoung
500 Club
 
Posts: 644
Images: 250
Joined: Sat Aug 07, 2010 11:21 am
Location: Nipomo, CA
Top

Postby woytovich » Tue Feb 01, 2011 9:58 pm

Curious to see how you are going to weather seal your pop-top both during use and during travel...

Mark
Mark - Metro New York
Toyota Land Cruisers: '66, '78 and '86
'03 Yukon XL, 2500/8.1 liter/8 lug + 18' 10k Car Trailer
M416 1/4 ton Military trailer - SOLD
5x8 Cargo/Camper - for sale soon
User avatar
woytovich
Teardrop Master
 
Posts: 152
Images: 4
Joined: Sat Jan 15, 2011 5:07 pm
Top

Postby myoung » Tue Feb 01, 2011 10:38 pm

woytovich wrote:Curious to see how you are going to weather seal your pop-top both during use and during travel...

Mark


A rubber gasket all around the edge along with the lapped top and roof should do the trick. I'll latch the top down when traveling, although the linear actuator should be sufficient to hold the top down in place. We'll see.
Mike Young
build thread: viewtopic.php?t=40459
User avatar
myoung
500 Club
 
Posts: 644
Images: 250
Joined: Sat Aug 07, 2010 11:21 am
Location: Nipomo, CA
Top

PreviousNext

Return to Build Journals

Who is online

Users browsing this forum: No registered users and 15 guests