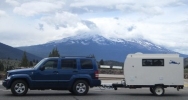
MyAway build - Updates for space usage & organization

...ask your questions in the appropriate forums BUT document your build here...preferably in a single thread...dates for updates, are appreciated....

Postby Shadow Catcher » Sun Feb 07, 2010 10:07 pm

I would not be hesitant about running electrical lines near gas as long as the electrical lines are protected and terminate in explosion proof enclosures (watertight). An industrial electrical supply place can help you with this. I worked in refineries doing inspections for a number of years and where things can go bang if there is a spark, they tend to be very careful.
You should also have a gas/carbon monoxide detector and fire alarm, these are standard RV models easily available.
User avatar
Shadow Catcher
Donating Member
 
Posts: 6008
Images: 234
Joined: Sat Apr 11, 2009 8:26 pm
Location: Metamora, OH

Postby S. Heisley » Mon Feb 08, 2010 12:11 am

Shadow Catcher wrote:
I would not be hesitant about running electrical lines near gas as long as the electrical lines are protected and terminate in explosion proof enclosures (watertight). An industrial electrical supply place can help you with this. I worked in refineries doing inspections for a number of years and where things can go bang if there is a spark, they tend to be very careful. You should also have a gas/carbon monoxide detector and fire alarm, these are standard RV models easily available.


Thanks, Shadow Catcher. There's an industrial electrical supply company not too far from here. I'll look into the RV carbon monoxide detector and fire alarm, too. I think I'm going to take my story and pictures to a local plumber that I know and see what he thinks, too. I'm finding that, with possible gas issues, you can't ask too many people.
User avatar
S. Heisley
Super Lifetime Member
 
Posts: 8866
Images: 495
Joined: Mon Sep 17, 2007 10:02 am
Location: No. California

Postby Shadow Catcher » Mon Feb 08, 2010 7:45 am

RVIA standards call for detectors and for a conventional tear with galley in the rear they may not be as important, BUT.
Checking for leaks in a gas line is very simple using something like leak-tec http://www.amgas.com/ltpage.htm (you want the sensitivity) or in a pinch a thinned out detergent. This needs to be checked out to begin with after assembly and after some use. I have a gauge on our propane tank and it is there for one purpose and that is to tell me if I have a leak, if the pressure bleeds down (even over days) after I close the valve on the tank there is a leak.
User avatar
Shadow Catcher
Donating Member
 
Posts: 6008
Images: 234
Joined: Sat Apr 11, 2009 8:26 pm
Location: Metamora, OH
Top

Postby S. Heisley » Tue Mar 02, 2010 2:58 am

During February, I added partitions to isolate the gas from the electric within the galley cabinet. Below is a picture, looking down at the inside of the cabinet, to show the partitioning. (I still need to do a bit more caulking and weather stripping to these.)To save weight, I used 1/8â€
User avatar
S. Heisley
Super Lifetime Member
 
Posts: 8866
Images: 495
Joined: Mon Sep 17, 2007 10:02 am
Location: No. California
Top

Postby Shadow Catcher » Tue Mar 02, 2010 6:24 am

I think it is kind of like a new car thing, that first dent grows exponentially in your mind. :x
User avatar
Shadow Catcher
Donating Member
 
Posts: 6008
Images: 234
Joined: Sat Apr 11, 2009 8:26 pm
Location: Metamora, OH
Top

Postby S. Heisley » Tue Mar 02, 2010 11:00 am

Thanks, Shadow Catcher, for your kind words and support. It means a lot. :)
User avatar
S. Heisley
Super Lifetime Member
 
Posts: 8866
Images: 495
Joined: Mon Sep 17, 2007 10:02 am
Location: No. California
Top

Postby Steve_Cox » Tue Mar 02, 2010 11:23 am

Sharon,
:thumbsup:
Steve
User avatar
Steve_Cox
4000 Club
4000 Club
 
Posts: 4903
Images: 196
Joined: Sun Apr 03, 2005 8:46 am
Location: Albuquerque New Mexico
Top

Postby Cliffmeister2000 » Tue Mar 02, 2010 11:25 am

S. Heisley wrote:
However, while I knew pine wood is soft, I had no idea that it would dent so easily! I’m already having trouble with denting on the cabin door trim and the cabinet front! Remembering that CPES is supposed to make wood 40% stronger, I am going to take 3 pieces of trim boards and perform an experiment! One of the trim pieces will be coated with two coats of Urethane, like those in the picture. The second will be coated with two coats of CPES, and the third will be coated with two coats of CPES followed by two coats of the Urethane. Once the three pieces have dried and have set for at least 24 hours, I am going to drop a can, press a metal ruler, etc. on each as equally as I can so I can study the differences. What I am hoping is that the third one, with the CPES and Urethane, will perform much better than the other two. If it does, I’ll be removing the doors and drawer, sanding the finish off the trim and recoating them in both CPES and Urethane. I’ll report back in my build thread with my findings, probably in a week or two.


Sharon, I coated the outside of my Weekender with 3 coats of CPES. It truly does make it harder! I had to cut one piece after coating, and used a hacksaw instead of a wood saw. :thumbsup:
God Bless

Cliff

♥God. ♥People.
1 John 4:9-11

My Teardrop build pictures
User avatar
Cliffmeister2000
Titanium Donating Member
 
Posts: 3622
Images: 157
Joined: Thu Jul 26, 2007 10:18 pm
Location: Phoenix, AZ
Top

Postby S. Heisley » Tue Mar 02, 2010 9:59 pm

...Thanks, Steve.

Cliffmeister wrote:
Sharon, I coated the outside of my Weekender with 3 coats of CPES. It truly does make it harder! I had to cut one piece after coating, and used a hacksaw instead of a wood saw.


I had the same thing happen with my deck plywood. I'm hoping that the wood boards, not glued and layered like plywood is, work the same. The sticks are cut into 12" pieces and 2 coats of CPES is on two of 'em now. Tomorrow, I'll coat the plain one and one of the CPES'd ones with Urethane and wait for them to cure.
User avatar
S. Heisley
Super Lifetime Member
 
Posts: 8866
Images: 495
Joined: Mon Sep 17, 2007 10:02 am
Location: No. California
Top

Postby Wolfgang92025 » Tue Mar 02, 2010 10:58 pm

Trailer is looking good Sharon.... :thumbsup:

Wolfgang
Wolfgang

Image
User avatar
Wolfgang92025
Lifetime member
 
Posts: 1098
Images: 660
Joined: Fri Apr 18, 2008 10:16 pm
Location: Salt Lake City area, Utah
Top

Postby S. Heisley » Wed Mar 03, 2010 10:12 am

Thanks, Wolfgang. I'm looking forward to seeing yours at IRG!
User avatar
S. Heisley
Super Lifetime Member
 
Posts: 8866
Images: 495
Joined: Mon Sep 17, 2007 10:02 am
Location: No. California
Top

Postby riverfront » Wed Mar 03, 2010 10:38 am

Amazing simply amazing!!!
Bruce
User avatar
riverfront
Teardrop Master
 
Posts: 268
Images: 2
Joined: Wed Mar 15, 2006 4:06 pm
Location: Illinois-Sterling
Top

Postby S. Heisley » Wed Mar 03, 2010 7:10 pm

Gosh, Thanks, Bruce. :)
User avatar
S. Heisley
Super Lifetime Member
 
Posts: 8866
Images: 495
Joined: Mon Sep 17, 2007 10:02 am
Location: No. California
Top

Postby Shadow Catcher » Wed Mar 03, 2010 7:58 pm

Looking Mavolus. One day I would love to see it. How about next year at the international gathering 8)
User avatar
Shadow Catcher
Donating Member
 
Posts: 6008
Images: 234
Joined: Sat Apr 11, 2009 8:26 pm
Location: Metamora, OH
Top

Postby Ward » Wed Mar 03, 2010 11:03 pm

Congratulations on the build, and I am particularleryly :lol: thats a hard word to say particularly impressed with the quality of the build without the use of many power tools :thumbsup:

I plan to use an old camper stove/oven combo from coleman (recycled) but I like your stove where did you get it?

Please keep us updated I'm in LOVE.

Regards
07' Harley Street Bob
04 f350 4x4 powerstroke
10' GMC Acadia 8 passenger SLT (TV)

***NO REGRETS******
User avatar
Ward
Teardrop Advisor
 
Posts: 73
Images: 29
Joined: Fri Feb 19, 2010 1:52 am
Location: Southeast Texas
Top

PreviousNext

Return to Build Journals

Who is online

Users browsing this forum: No registered users and 15 guests