The "Club Car" build. Updated 10-11-11 FINISHED!

...ask your questions in the appropriate forums BUT document your build here...preferably in a single thread...dates for updates, are appreciated....

Postby stomperxj » Tue Aug 24, 2010 10:55 pm

Instead of editing your original post, reply to the thread and it will bump it back to the top. Its better to do it that way anyway cuz it lets people reply in between your posts. Nice work btw... Great lookin trailer
User avatar
stomperxj
The 300 Club
 
Posts: 395
Images: 1
Joined: Tue Jul 29, 2008 12:25 am
Location: Kuna ID

Postby aggie79 » Wed Aug 25, 2010 8:08 am

Woodbutcher,

I can't help you with the computer stuff, but I have to say that is one fine teardrop build you have going! The folding seat/bed is over the top.

Thanks for showing details on your construction methods. It helps me to learn how do different aspects of woodworking. (BTW, I think it was discussed before but I think a woodworking techniques journal on this board would be very helpful.)

Tom
Tom (& Linda)
For build info on our former Silver Beatle teardrop:
Build Thread

93503
User avatar
aggie79
Super Duper Lifetime Member
 
Posts: 5405
Images: 686
Joined: Tue Aug 07, 2007 5:42 pm
Location: Watauga, Texas

Postby Woodbutcher » Fri Aug 27, 2010 7:56 pm

OK, Stomperxj, I'll do it your way, that makes sense. Then all I have to do is edit to update today's date. Thanks!

Tom, Thanks for letting me know someone is following how I do things. I'm sure there are many other ways to accomplish the same things, these are just the ways I've found that work for me. Hopefully it will help others.


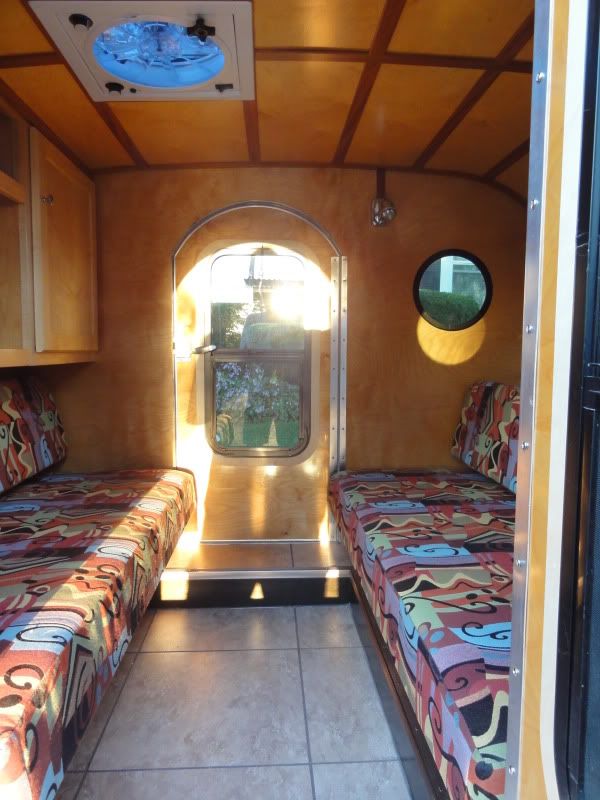
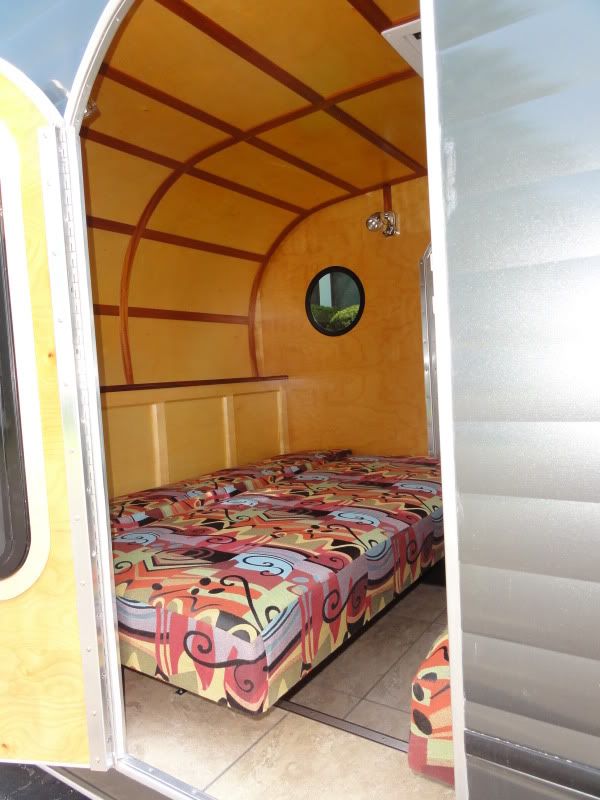
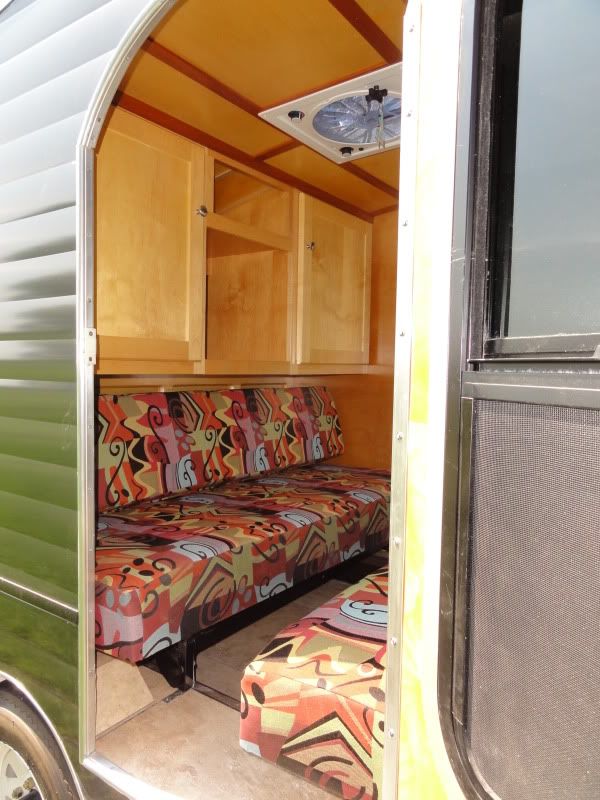
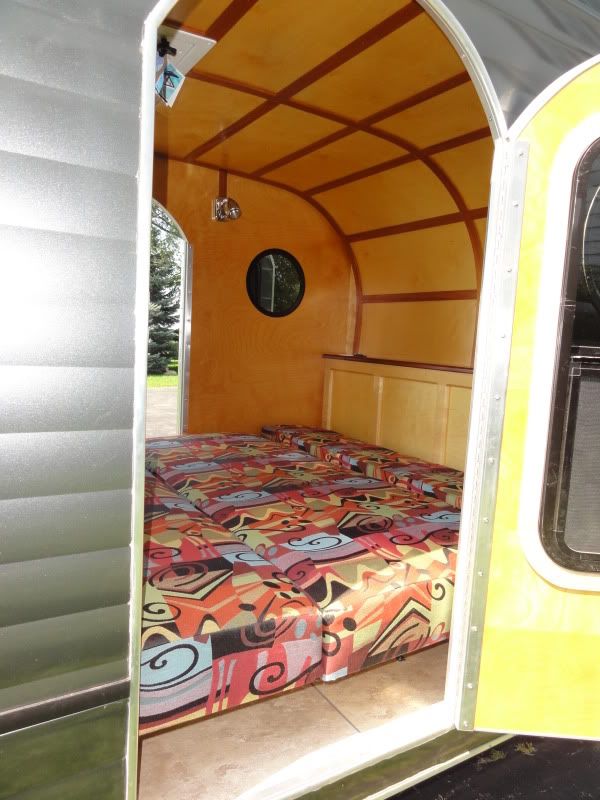
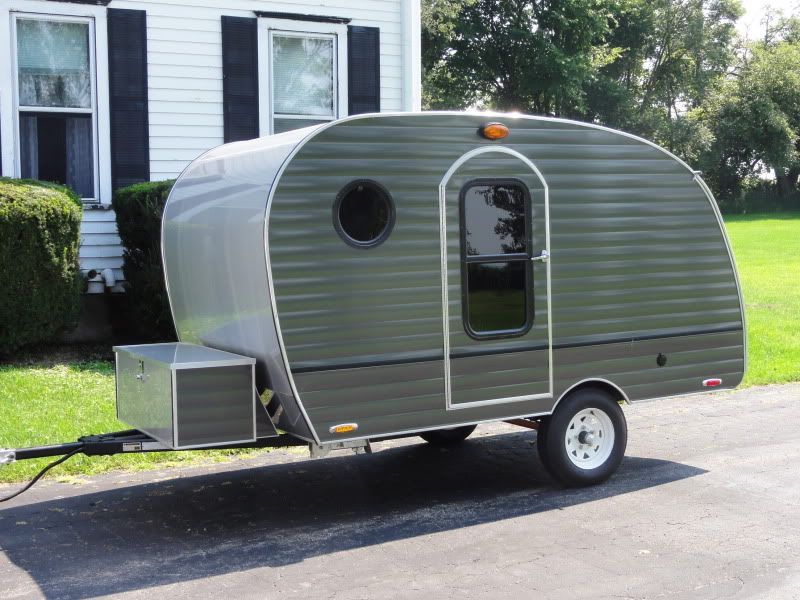
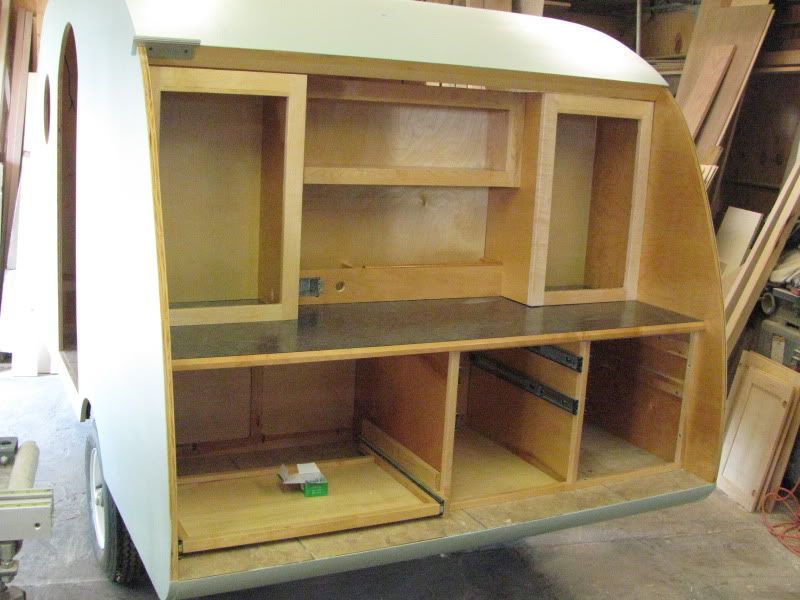
Alright here are a few things I just finished .

The dreaded Galley hatch! First off I am using a hinge I get from So-Cal Teardrops. It is 20 bucks a foot, which I do not like. It's expensive. But I used it on my first build and it works well and I love it. I work completely alone. So not having anyone around to ask, "hey can you hold this" doesn't happen. This hinge allows me to put the galley on and off as I need to. So for finishing and fitting everything it's a big plus.

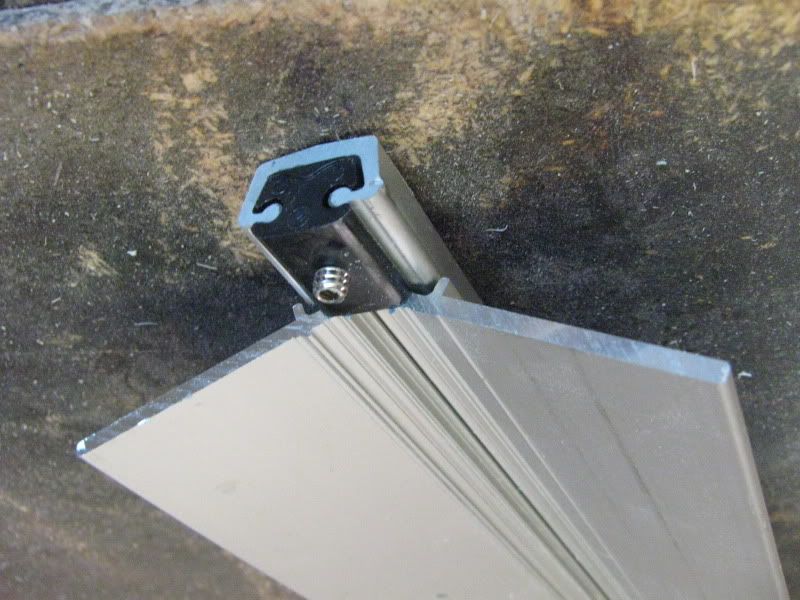
Here is what it looks like.

Image

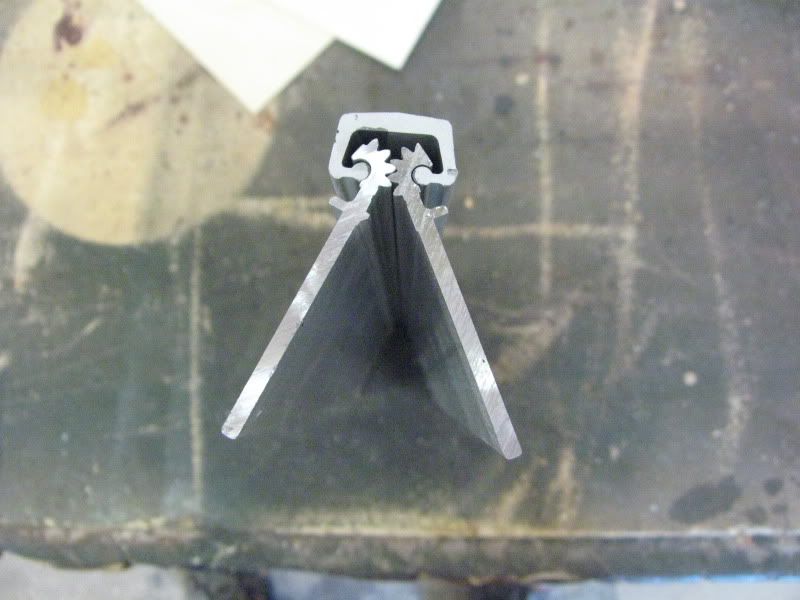
The hinge is a ratchet style. You slide off the cover and the hinge separates. Very easy to take the galley off and on. Here are the stops that keep everything in place.

Image

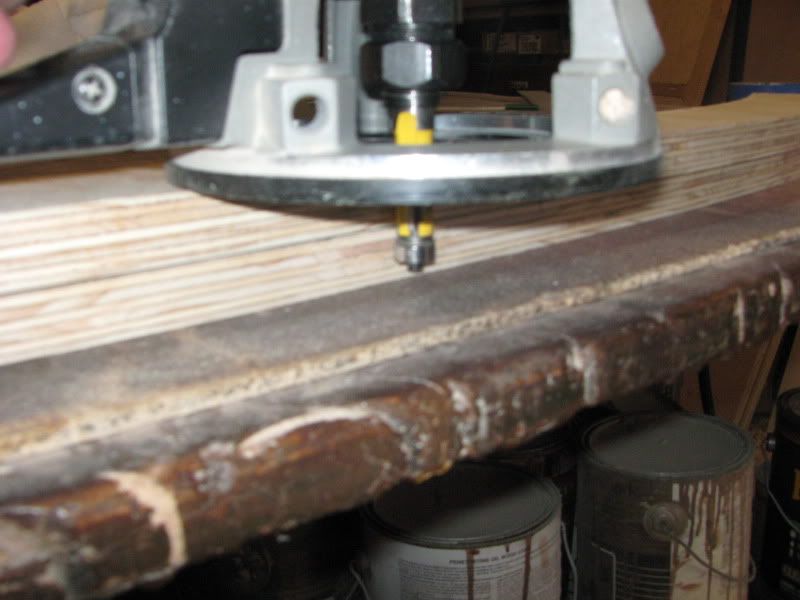
The first thing I did was make 1 rib that matches my side profile. I allowed for the thickness of the metal and gasket material. After I make one perfect pattern, I needed 6 more. I traced the perfect one onto my 3/4" plywood.

Image

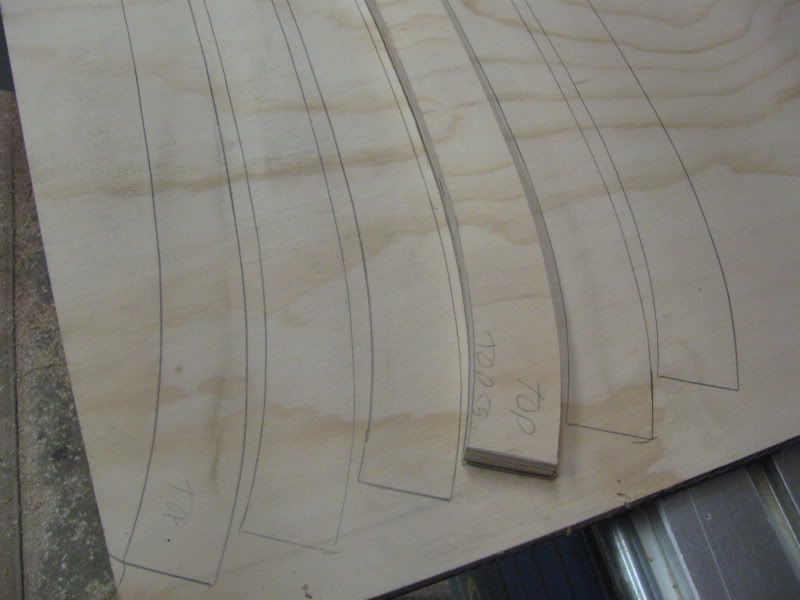
Then I band sawed between my drawn out ribs. You could use a sabre/jig saw if you have one. Really doesn't matter the cuts are not accurate.

Now I have my 6 other ribs, all over sized.
Image

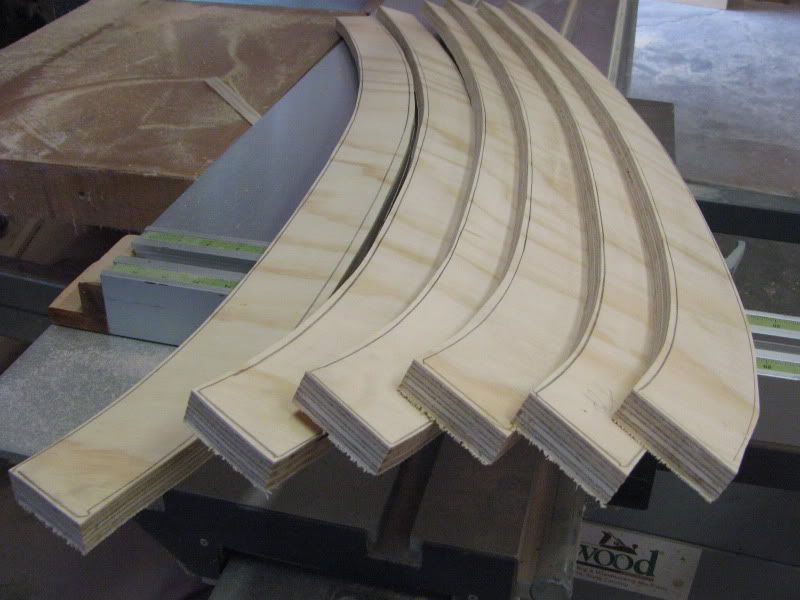
Now I take my first perfect pattern and screw it to my over sized rib. Then I use my router with a 1/2" straight bit with a bearing on the bottom. Flip the screwed together pieces over with the pattern piece on the bottom. Run the bit around following the pattern to duplicate another perfect rib. I use a router mat. Really helps hold the work in place and helps save fingers! Really cheap and great for sanding on as well.

Image

Image

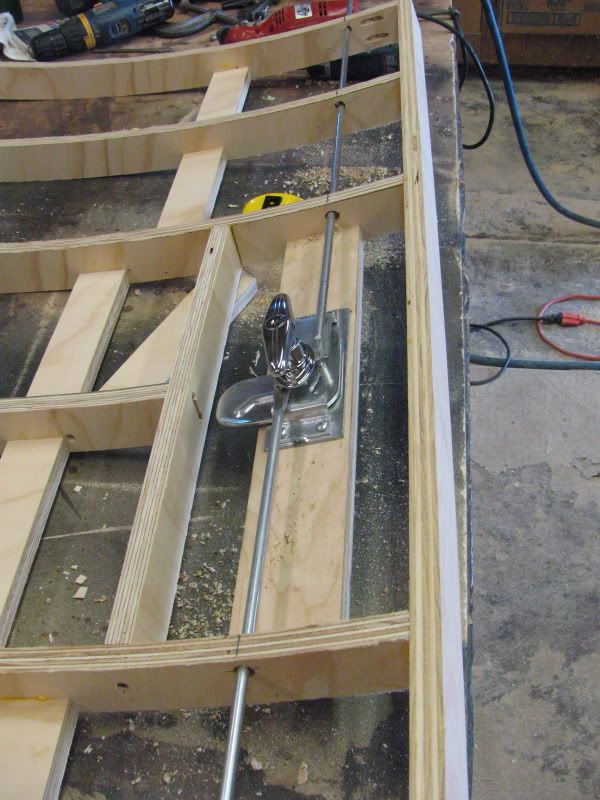
After I get my 6 other ribs made. I wanted to make a mock up of the hatch. Since my hinge comes apart I just screwed 2 ribs to a short cross piece to make a mini hatch. What I wanted to do was fit the lift struts.

Image

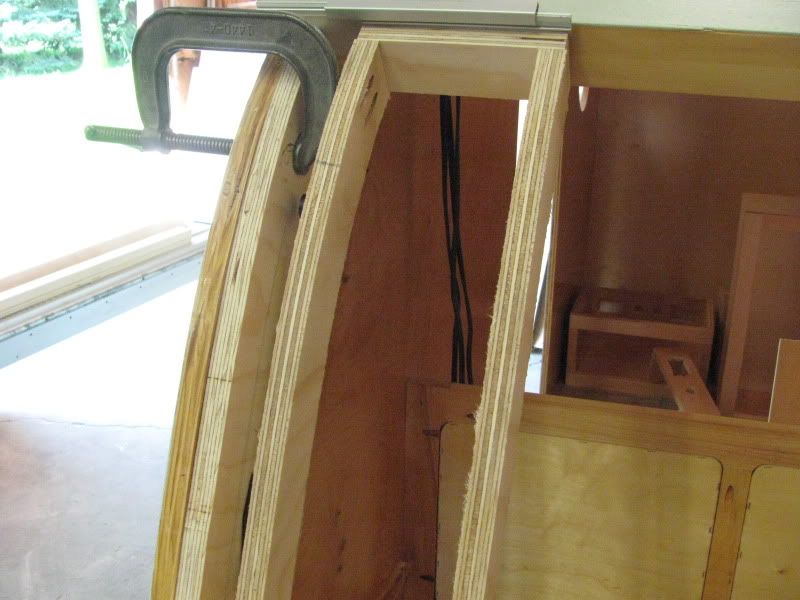
Then I made a pattern piece out of 3/4" plywood that matches the tears profile of the side. Two C-clamps hold it in place. Now I am able to measure and screw the strut in place without worrying about messing up the hatch and the galley side. There was a thread on here from Grant I believe that showed where to place everything. I am down about 4.5" from the top of the hatch, and about 17.5" to the bottom. Your results may very depending on the length of your struts. But It really does not matter since you can make a million holes if you want. It will never show. Then lift the hatch and check for head room.

Image

Image

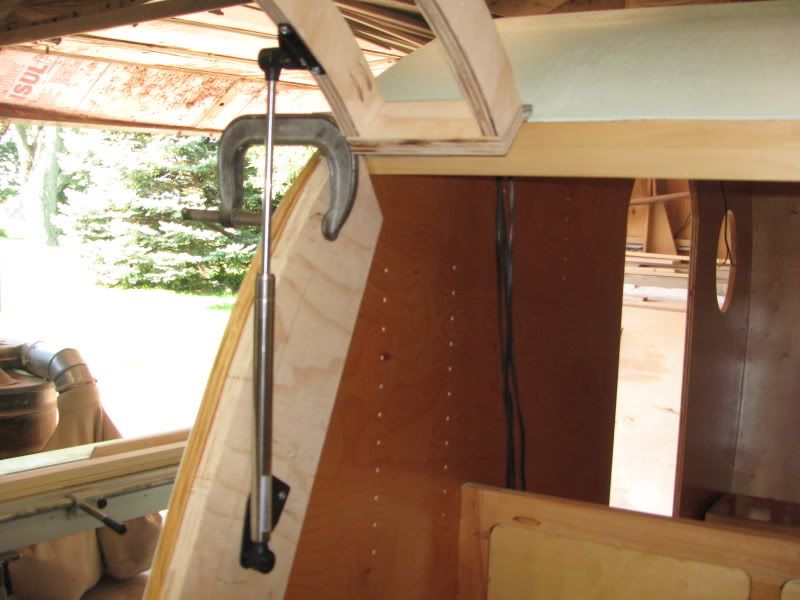
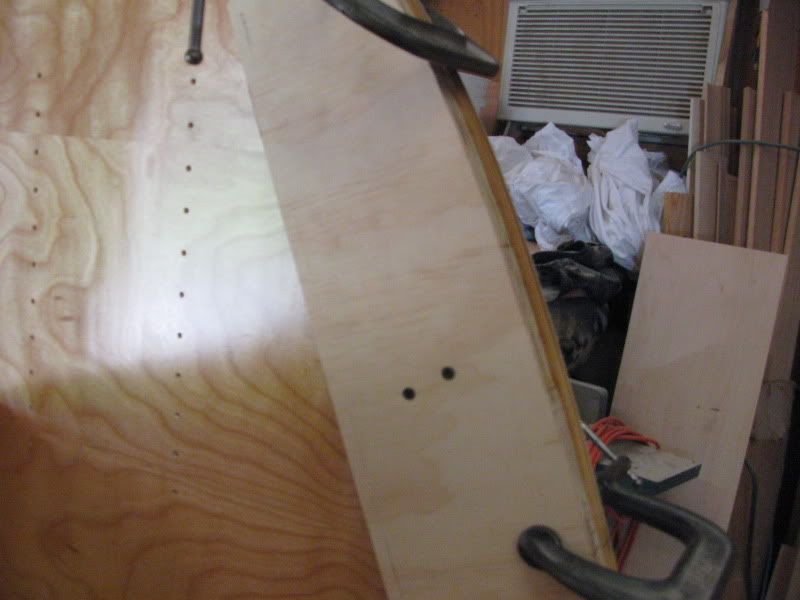
Now that I have my placement right, I run some 1" screws into the bottom strut bracket. This makes a hole in the galley side to mark where the bracket goes "for real".

Image

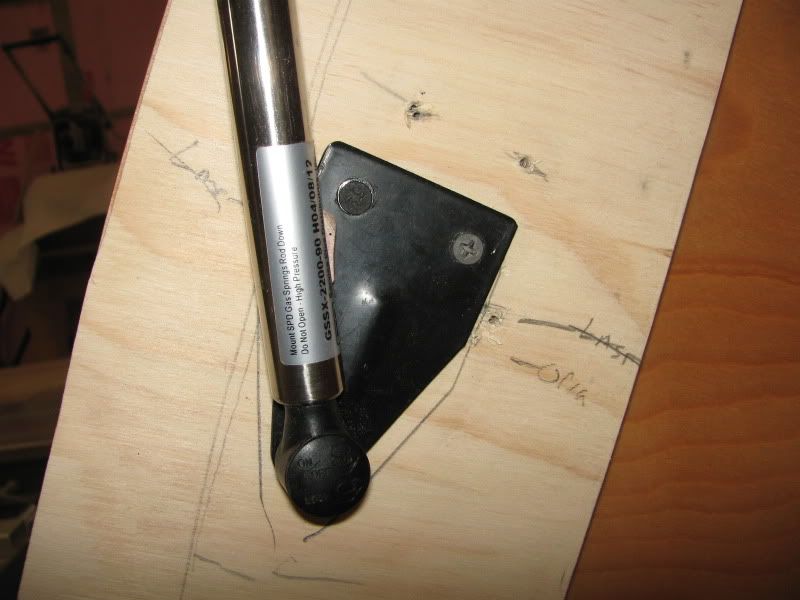
After this is done, take everything apart. Take the pattern for the strut bracket and flip it over and clamp it to the other side of the galley. Screw some 1" screws into the holes left from side A and now side B is a mirror image. When the hatch is done the struts are already marked for install.

Image

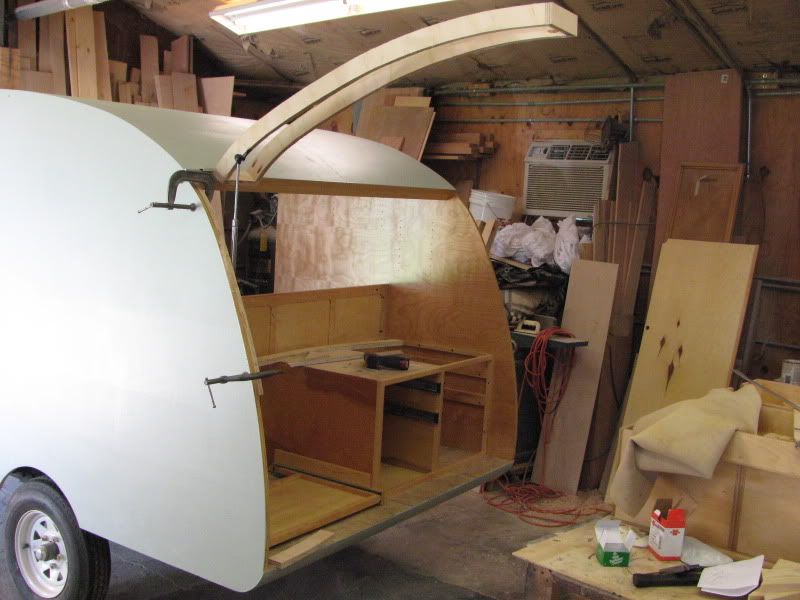
Next I assembled my hatch. Used pocket screws (KREG, great tool !) to put it together. Next I installed all the blocking for the hatch lock and the tail lights and License plate light/bracket.

Image

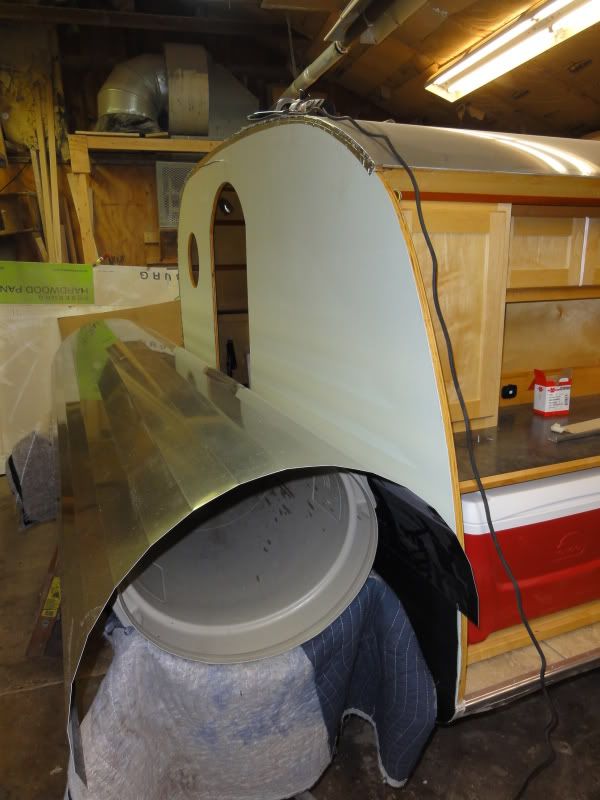
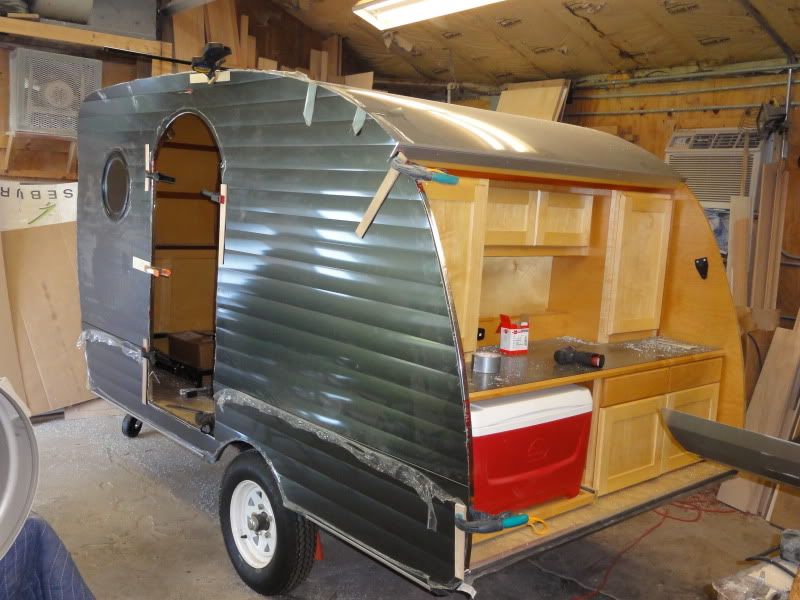
Here is the finished hatch just sitting in the opening.

Image

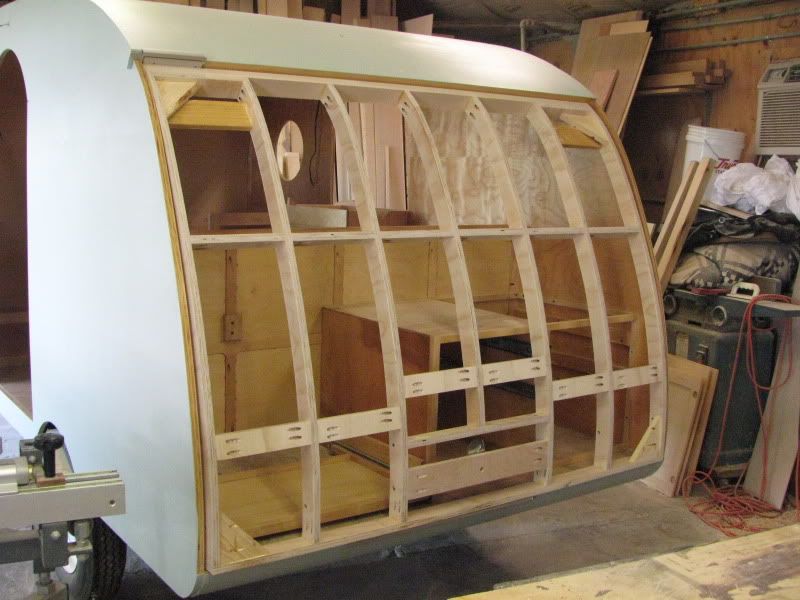
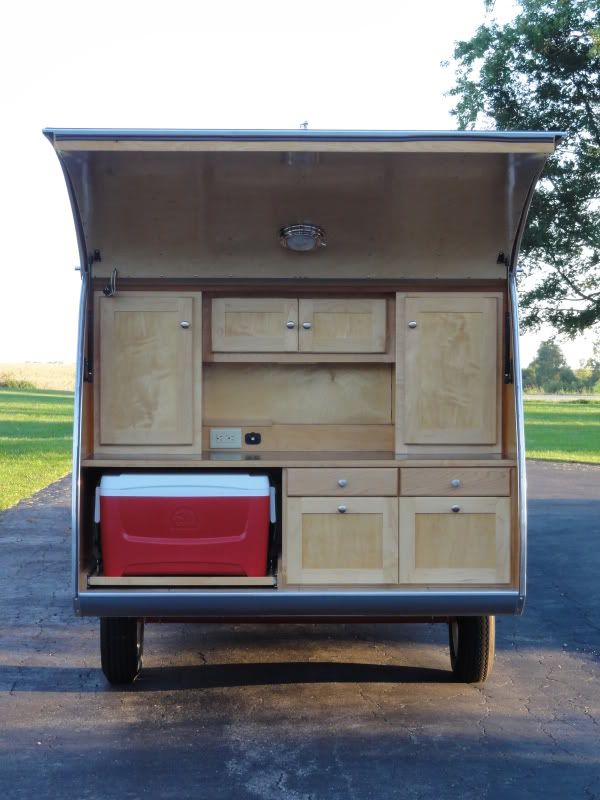
I then started putting a few of the cabinets in place. I have moved these all around the shop for weeks. Nice to get them out of my way and where they belong.

Image

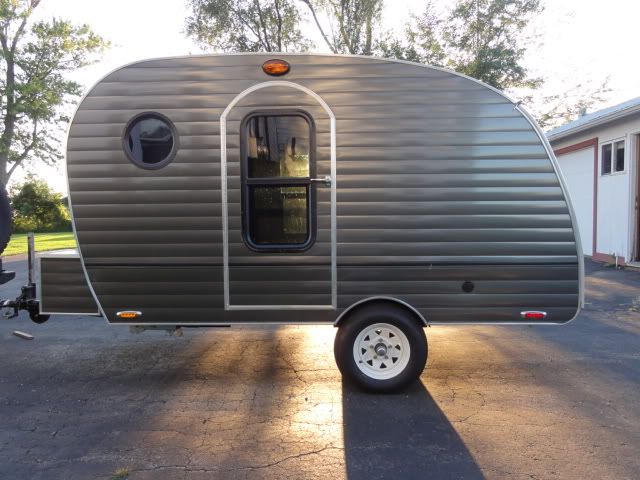
Well that is where I am so far.
User avatar
Woodbutcher
Platinum Donating Member
 
Posts: 4187
Images: 45
Joined: Fri Mar 10, 2006 10:01 pm
Location: Chicago Suburbs
Top

Postby azmotoman » Tue Sep 07, 2010 11:18 am

Futon frames with a basement? WOW! That's a great idea. :thumbsup:
Money isn't everything, but it keeps the kids in touch!
*************
Dinero isn' ¡t todo, pero él mantiene el interés de los niños!
User avatar
azmotoman
Silver Donating Member
 
Posts: 165
Images: 10
Joined: Fri Jul 02, 2010 10:07 am
Location: AZ ('bama transplant)
Top

Postby Woodbutcher » Tue Oct 11, 2011 7:59 pm

OK, I am back....The project got put in the barn for winter and I had real paying work so I did not get back to this till a few months ago. Nor did I take as many build pictures as I went along.


The aluminum I used is painted and has a pleat bent in it for interest. But that pleat makes the sheet roll up and is a pain to work with. Since I work alone I had to improvise how to install it with no extra hands. So it's, 2 saw horses with garbage cans in them. Holds the roll so I can crawl under and get the sheet in the seam. Stand it up and hold it in place with duct tape. Fight with the router to trim the extra and punch out the door metal. I had to reuse the drops for the doors, so I could not make any mistakes.

Image

Image

Well that leads me to the finished project. I told you I did not keep up with build pictures as I went along......So through the magic of the internet here it is....

Image

Image

The inside has 2 frames out of the back of a Leisure Van that create seating. They face each other and flip down to make a queen size bed.

Image

This is the headboard end. There is storage behind the headboard panel.
Image


Here is the foot board end with a place for a TV and heater.

Image

Here is a picture with the seats folded down into a bed.
Image


I managed to make the tongue box out of the scraps...
Image

The galley has lots more storage then my first build.
Image

Took it for a test drive behind my work Van. Could not even tell it was back there.
Image

Image

It's been out in the rain and to the high pressure car wash and passed the test. So I will take it on it's maiden trip to the Illinois Fall Gathering at Panther Creek State park. Wish me luck and thanks for looking!
User avatar
Woodbutcher
Platinum Donating Member
 
Posts: 4187
Images: 45
Joined: Fri Mar 10, 2006 10:01 pm
Location: Chicago Suburbs
Top

Postby Wolffarmer » Tue Oct 11, 2011 8:09 pm

WOW!!!!!!!!!!!!

WOWZER!!!!!!!!!

That is one nice trailer. How do you expect to get any camping done? You are going to be to busy showing it off.

You should be down right proud of youself

:thumbsup: :applause: :thumbsup: :applause: :thumbsup: :thumbsup:

Randy
"these guys must be afraid of the dark"
User avatar
Wolffarmer
Donating Member
 
Posts: 4612
Images: 309
Joined: Wed May 02, 2007 1:32 pm
Location: Idaho Rupert
Top

Postby canned o minimum » Tue Oct 11, 2011 9:07 pm

GEEZ LOUISE !!! Randy is right.. you'll NEVER git any campin done...even "I" want a "tour" !!

When yer ALONE, ya git creative with settin thangs up to work on em ! Love the trash can/ saw horse thingy !!

Mighty fine trailer my friend.. mighty FINE ! Love the drop floor and seat/bed idea !

You must be PROUD !!
canned o minimum
1000 Club
1000 Club
 
Posts: 1266
Joined: Sun Mar 21, 2010 11:54 pm
Location: Riverside,Ca.
Top

Postby bdosborn » Tue Oct 11, 2011 9:15 pm

Very nice! I've scrolled through your pictures about a dozen times now, makes me want to build another one ... :thumbsup:

Bruce
2009 6.5'X11' TTT - Boxcar
All it takes is a speck of faith and a few kilowatts of sweat and grace.
Image
Boxcar Build
aVANger Build
User avatar
bdosborn
Donating Member
 
Posts: 5512
Images: 778
Joined: Wed May 05, 2004 11:10 pm
Location: CO, Littleton
Top

Postby Oldragbaggers » Tue Oct 11, 2011 9:16 pm

Unique, beautiful and very well thought out. I love it. Fine craftsmanship to boot!!
:applause: :applause: :applause: :applause:

Becky
Life is sooooo good.........
Sail...camp....bike...repeat
Becky

Build Journal http://www.tnttt.com/viewtopic.php?f=50&t=45917
Visit our blog at http://www.oldragbaggers.com
Image Image
User avatar
Oldragbaggers
Gold Donating Member
 
Posts: 1842
Images: 331
Joined: Mon Aug 01, 2011 9:22 pm
Location: Essex, MD
Top

Postby CliffinGA » Tue Oct 11, 2011 9:36 pm

:applause: :applause: :applause: :thumbsup: beautiful job!!!! Enjoy the maiden voyage!

Cliff :thumbsup:
In God we trust, shoot the rest and he will sort out!

My Build:

viewtopic.php?f=50&t=42628
User avatar
CliffinGA
1000 Club
1000 Club
 
Posts: 1499
Images: 207
Joined: Sat Nov 14, 2009 1:29 pm
Location: Jefferson, GA
Top

Postby Woodbutcher » Tue Oct 11, 2011 9:44 pm

Thanks to all for the kind words. It was mostly fun to build. The first time working with metal and all the trim. I could do without some of the problems. There is a certain amount of satisfaction that comes with completing a project. The next one will be a real light weight one. There are lots of extra parts left over from the last two builds that will get used up. I've already done some planing.
User avatar
Woodbutcher
Platinum Donating Member
 
Posts: 4187
Images: 45
Joined: Fri Mar 10, 2006 10:01 pm
Location: Chicago Suburbs
Top

Postby Billy K » Tue Oct 11, 2011 10:03 pm

Some "butchers" are artists !!

That is a sweet trailer.
Congrats on the "finish" and...
ENJOY, you have earned all the gawking and staring !!!
"...influence is no government." - George Washington
Billy K
Teardrop Master
 
Posts: 276
Joined: Sun Dec 06, 2009 8:03 pm
Location: Kokomo,IN
Top

Postby kevingb » Tue Oct 11, 2011 10:39 pm

Wow! Nice... Really like the pleated aluminum.

:applause:
User avatar
kevingb
Donating Member
 
Posts: 73
Images: 97
Joined: Tue Mar 10, 2009 7:10 pm
Location: Granbury, Texas
Top

Postby Maureenm » Tue Oct 11, 2011 11:59 pm

Spectacular! :applause:
User avatar
Maureenm
Donating Member
 
Posts: 571
Images: 13
Joined: Mon Jul 11, 2011 8:30 pm
Location: Portland,oregon
Top

Postby absolutsnwbrdr » Wed Oct 12, 2011 8:04 am

Looks great!! :thumbsup:

That pleated siding looks awesome, and I love the color!
Zach
Coming Soon...
Image Image
User avatar
absolutsnwbrdr
Donating Member
 
Posts: 2657
Images: 412
Joined: Mon Jan 25, 2010 6:10 pm
Location: Hanover, PA
Top

PreviousNext

Return to Build Journals

Who is online

Users browsing this forum: No registered users and 14 guests