Hikerjohnd's Great Escape - Update 1-16-11

...ask your questions in the appropriate forums BUT document your build here...preferably in a single thread...dates for updates, are appreciated....

Postby Hikerjohnd » Tue Oct 26, 2010 4:30 pm

Well, it looked like rain when I woke up this morning so I tried to find something to do that I could cover quickly. Turned out to be a record high temperature and not a cloud in the sky! Wish I had tackled the flooring, but there is still time.

I bought this walnut for another project and never got around to using it. Anyway, I figure it will make add a nice touch to the trailer!

I was going to wait until the weekend of the 20th when my help was here to do this, but given how long it took (and how much sawdust was generated) I think I'm glad I did it now. Still have to get the floor in before help arrives though - maybe tomorrow.

Image

Image
---------------
--John

So be it.
User avatar
Hikerjohnd
Teardrop Advisor
 
Posts: 65
Images: 88
Joined: Wed Sep 15, 2010 9:57 pm
Location: Savannah, GA

Postby Hikerjohnd » Wed Oct 27, 2010 5:43 pm

Big day for me today! I finally got to work on the floor!

I started by cutting out the floor pocket holes.

Image

Then I attached the pockets.

Image

Next, I added bottoms to the pockets.

Image

Now it's ready to waterproof!

Image

Poof! It's Waterproof! That stuff (Henry 107) was like painting with runny pudding.

Image

While the bottom dried, I turned my attention to sanding and getting the pocket covers all nice and pretty.

Image

Image

With luck, I will be able to attach the floor to the frame tomorrow. Add a few bolts to make sure everything is solid and then I can start laying out the sides!

Maybe by this weekend I will get started laying all that out.
---------------
--John

So be it.
User avatar
Hikerjohnd
Teardrop Advisor
 
Posts: 65
Images: 88
Joined: Wed Sep 15, 2010 9:57 pm
Location: Savannah, GA

Postby Miriam C. » Wed Oct 27, 2010 6:16 pm

:thumbsup: Heck of an idea! Love it! :applause:
“Forgiveness means giving up all hope for a better past.â€
User avatar
Miriam C.
our Aunti M
 
Posts: 19675
Images: 148
Joined: Wed Feb 15, 2006 3:14 pm
Location: Southwest MO
Top

Postby absolutsnwbrdr » Thu Oct 28, 2010 1:52 pm

Nice storage bins! Wish I had thought of that! I guess its not too late, but it would have been a heck of a lot easier doing it in the beginning like you have.
Zach
Coming Soon...
Image Image
User avatar
absolutsnwbrdr
Donating Member
 
Posts: 2657
Images: 412
Joined: Mon Jan 25, 2010 6:10 pm
Location: Hanover, PA
Top

Postby Hikerjohnd » Thu Oct 28, 2010 3:19 pm

No pics today. But I got the floor bolted to the frame and the waterproofing wrapped all the way around the sides of the floor. I started priming the wood but then the rains came. Will take pics once I finish priming.
---------------
--John

So be it.
User avatar
Hikerjohnd
Teardrop Advisor
 
Posts: 65
Images: 88
Joined: Wed Sep 15, 2010 9:57 pm
Location: Savannah, GA
Top

Postby Hikerjohnd » Fri Oct 29, 2010 3:33 pm

Got the floor ready and primed today! Am probably going to put one more coat of primer on just to be sure there are no missed spots. Also have to go back and prime all the crevices of the pocket holes.

Image

Image

Next step - WALLS!!

I'm so ready to start on the walls!
---------------
--John

So be it.
User avatar
Hikerjohnd
Teardrop Advisor
 
Posts: 65
Images: 88
Joined: Wed Sep 15, 2010 9:57 pm
Location: Savannah, GA
Top

Postby Hikerjohnd » Tue Nov 23, 2010 9:03 am

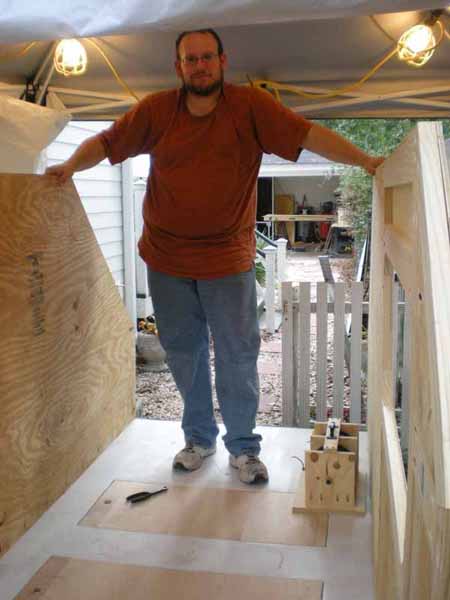
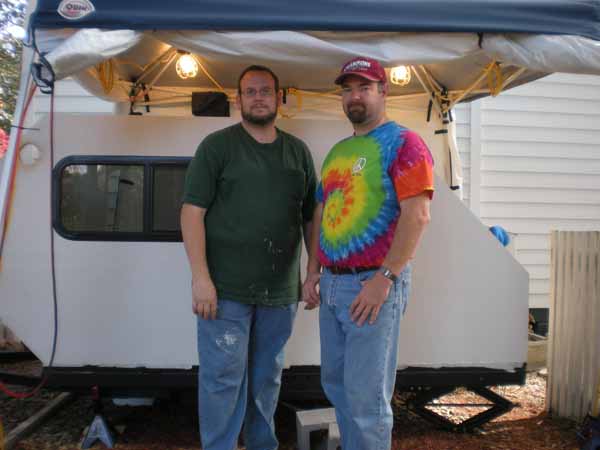
Well, I didn't get much done before the arrival of my brother and best friend Bob. But once he got here we made PROGRESS!

I cannot express how grateful I am to have someone who will show up and work tirelessly to make my dreams come true.

Our weekend was simple, Saturday, up at 5:30 AM, breakfast at local diner at 6:00, home by 7:00, setup shop and making noise by 7:30. We worked until 10:00 PM Saturday night (noise ordinance kicks in then). Sunday morning was the same. We stopped work at noon Sunday so he could pack and head home.

And here is what we accomplished:
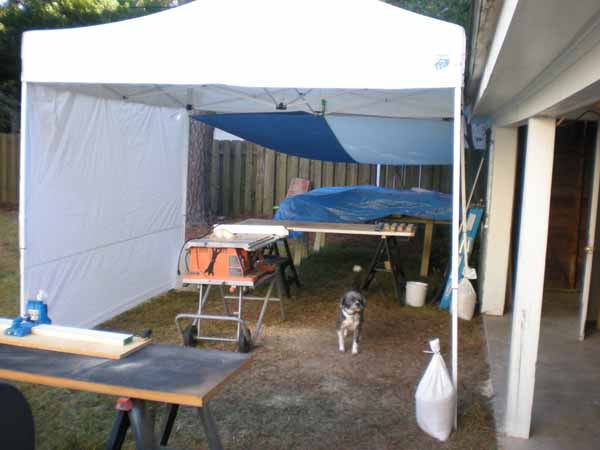
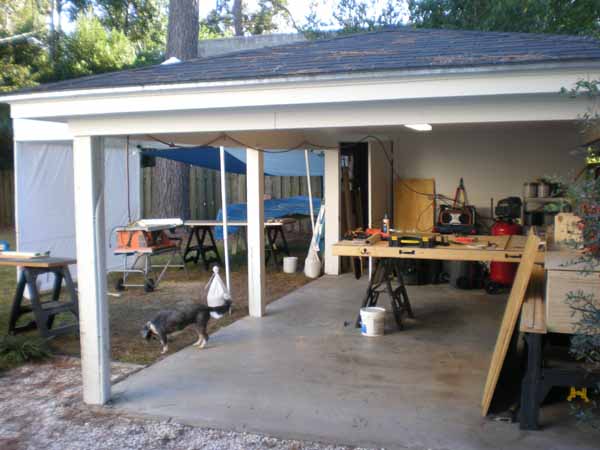
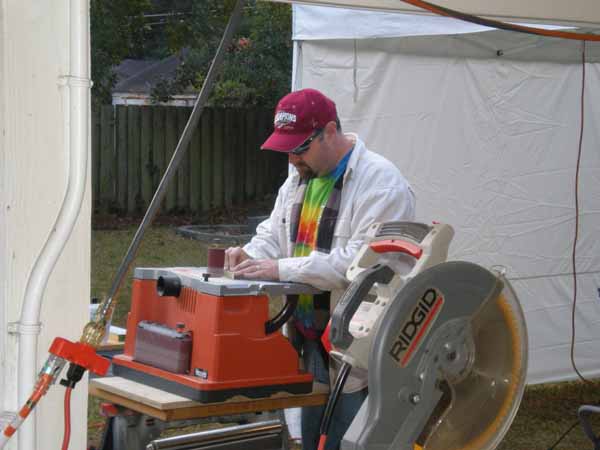
A place to work

Image
Image

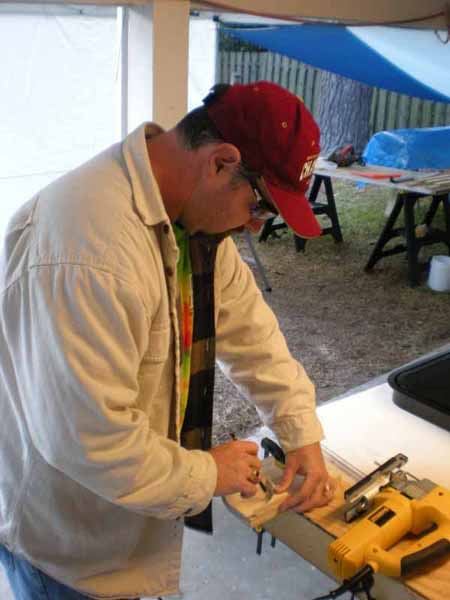
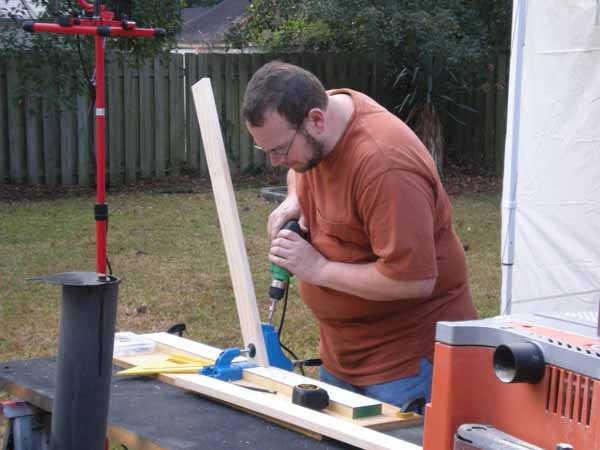
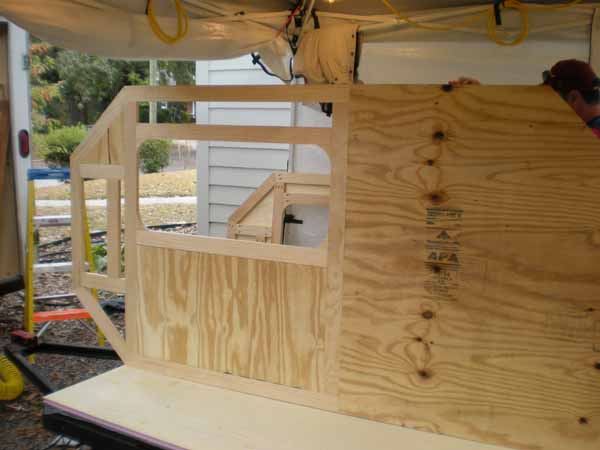
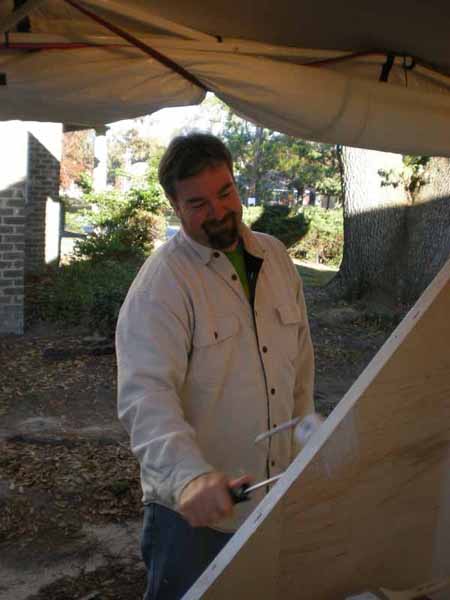
Bob laid out, cut, and sanded all the curves for the door and windows.

Image
Image

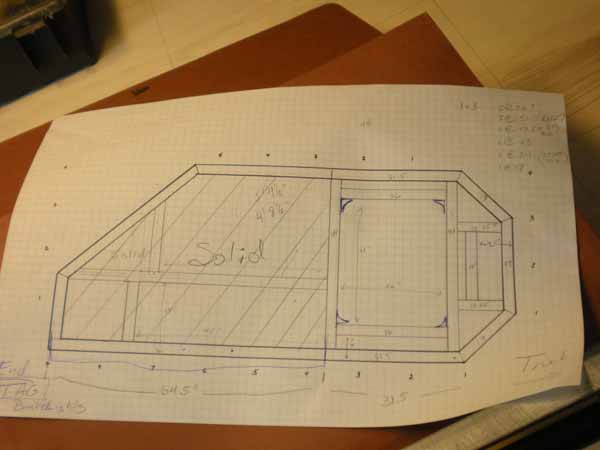
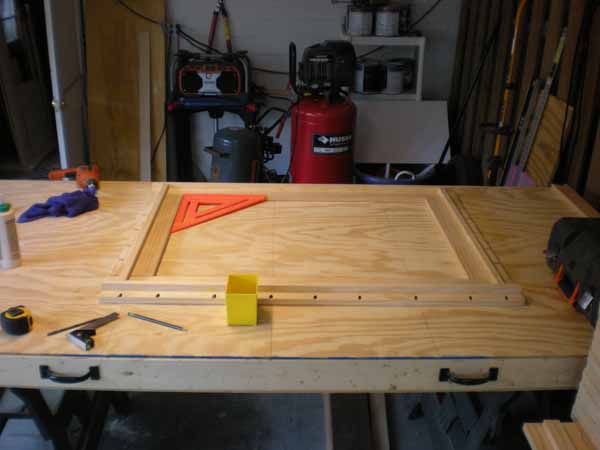
We had a rough plan to follow - Bob expressed a bit of apprehension at my desire to wing it, so I put pen to paper.

Image

Bob deemed the pocket hole jig 'awesome'. I agree and I'm glad he brought his drill so we had a dedicated drill for the station. Changing bits, even with the quick connect, gets old after a while.

Image

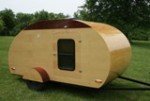
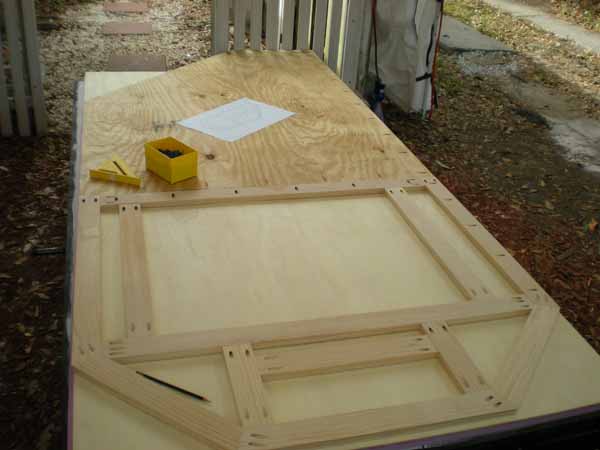
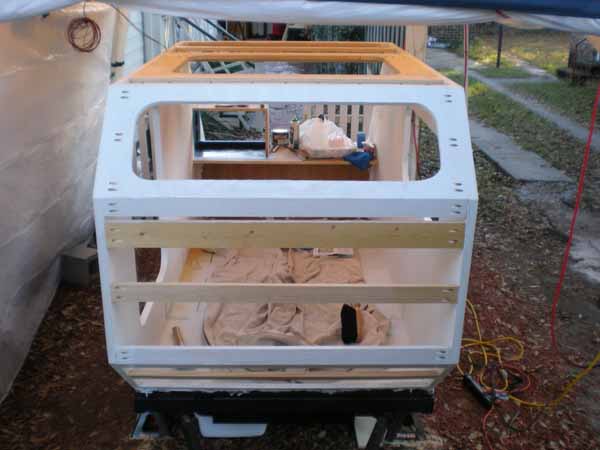
Walls assembled. I decided to make the back half of each wall solid so I could put a screw in anywhere. Since I am winging it on the inside cabinet construction, it seemed the easiest way to be sure I would have something solid to screw into. And, since my windows are all sized for 1 1/4" walls, I used 1/4" ply as the skin over 3/4" ply & 1x3's. The walls are held in place with adhesive and pocket screws. I was surprised they stood on their own once installed.

Image
Image
Image

Next, we turned our attention to the roof slats and front window support. We got a few in place to support the walls then primed the walls. Bob is an awesome painter!

Image
Image
Image

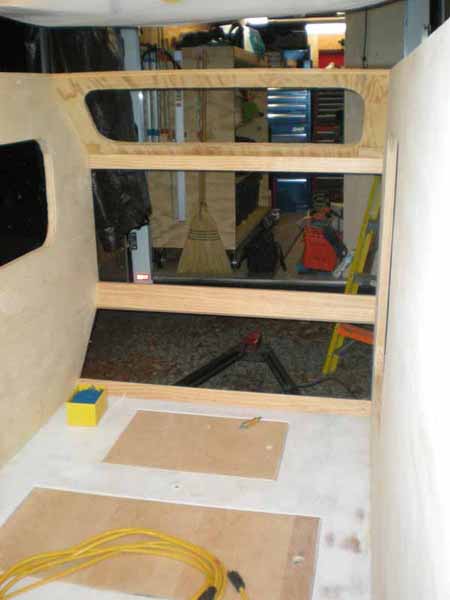
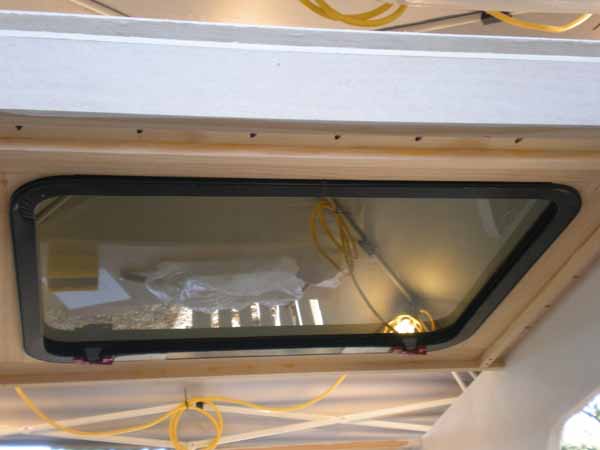
While Bob was priming the walls, I began working on the supports for the moon roof. I am very concerned the roof will sag under the weight of such a large window, so I constructed a reinforced slat to handle the weight. I was pleased to see the roof didn't sag a bit with the window in place!

Image
Image

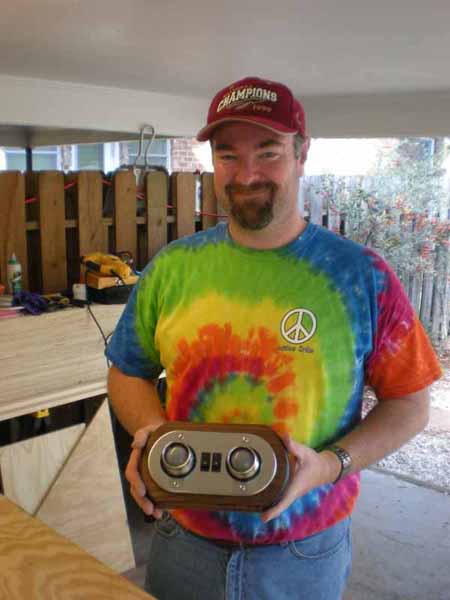
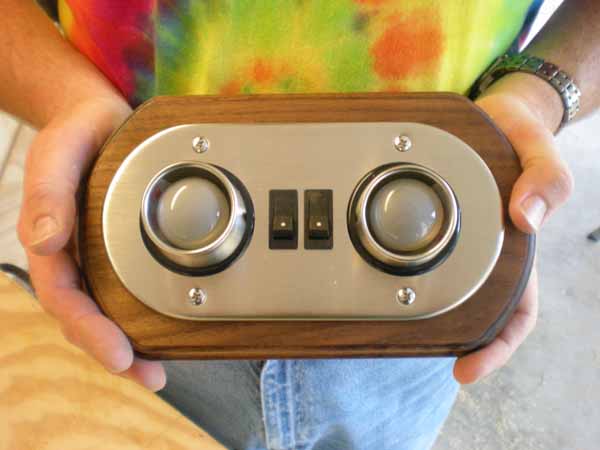
Bob worked so hard this weekend, I wanted him to have the chance to work on something that will be finished. We cut a piece of walnut and he cut out a backing for the 12v cabin light. I am very impressed with the walnut and he did an awesome job making it look so good! And for the record, this was his first time using a router!

Image
Image

Alas, all things must end. Bob had a long drive ahead of him and we got him packed and ready to go. If I could talk him into one more weekend between now and Christmas, I bet this trailer will be finished by New Years!

Image

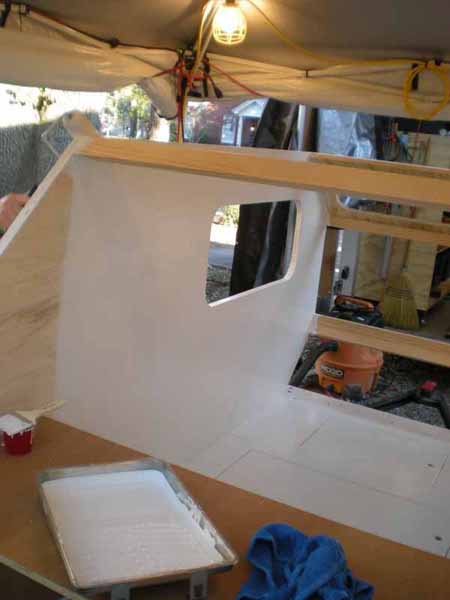
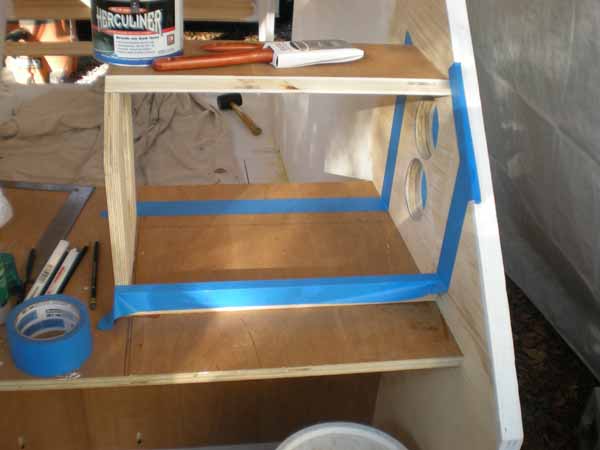
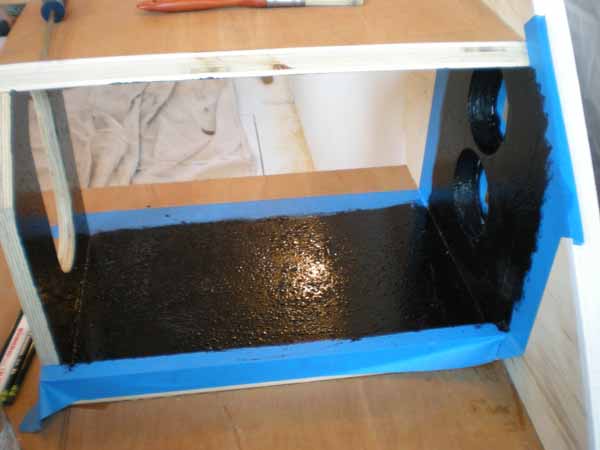
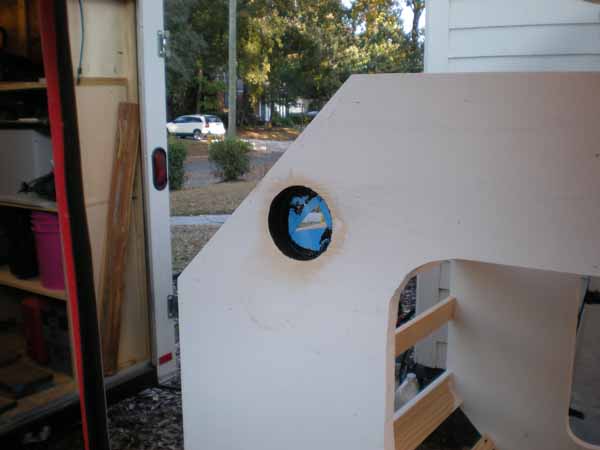
After Bob was gone, I decided to clean up and call it a weekend. But as I cleaned, I kept saying to myself "I'll just finish up this one little thing..." That one little thing led to another, and another and before i knew it, I had the AC spot in place and had put the first coat of truck bed liner on the space where the unit will sit. I decided to use the truck bed liner to protect all the penetrations (cabin vent fan hole pictured). It seems like a good choice to block any potential water seepage. I will, of course, be using liberal amounts of silicone when i put my vents in place.

Image
Image
Image

Not a bad bit of work for one weekend. I'm going to try to get the galley wall in place before Thanksgiving!

Happy Turkey Day Everyone!

Image
---------------
--John

So be it.
User avatar
Hikerjohnd
Teardrop Advisor
 
Posts: 65
Images: 88
Joined: Wed Sep 15, 2010 9:57 pm
Location: Savannah, GA
Top

Postby S. Heisley » Tue Nov 23, 2010 10:30 am

Good job, John! How fortunate you are to have a bro/bf to help you, too! You could maybe tell him that you want him to come back and help you for another weekend as your Christmas present. Yes, it looks like you could have it camp-able by New Years.
User avatar
S. Heisley
Super Lifetime Member
 
Posts: 8775
Images: 495
Joined: Mon Sep 17, 2007 10:02 am
Location: No. California
Top

Postby absolutsnwbrdr » Tue Nov 23, 2010 11:25 am

Great progress!! I'm gonna have to look into one of those pocket hole jigs! Those cabin lights are pretty sweet too!
Zach
Coming Soon...
Image Image
User avatar
absolutsnwbrdr
Donating Member
 
Posts: 2657
Images: 412
Joined: Mon Jan 25, 2010 6:10 pm
Location: Hanover, PA
Top

Postby aggie79 » Tue Nov 23, 2010 3:35 pm

Wow John! :shock:

Y'all got more done in a weekend than I did in a year. :thumbsup: Congrats on the fine teardrop and pace of construction. You're kind of shooting a hole in the "Teardrop Time" theory.

Tom
Tom (& Linda)
For build info on our former Silver Beatle teardrop:
Build Thread

93503
User avatar
aggie79
Super Duper Lifetime Member
 
Posts: 5405
Images: 686
Joined: Tue Aug 07, 2007 5:42 pm
Location: Watauga, Texas
Top

Postby Hikerjohnd » Tue Nov 23, 2010 9:34 pm

What's teardrop time?? :)


If I don't get this finished by St Patrick's Day, my landlord is going to kill me. The house I live in goes on the market then, and it has to be in show condition everyday. I think they would frown on a half built camper sitting in the yard!

Oh well, It will get done when it gets done.

I did a little on the front end today. Got the outside of the front skinned and then insulated. Will skin the inside tomorrow if weather nice. And yes, I think it's funny that the Pink Panther will be watching me from the front wall. It wasn't intentional but funny it ended up that way!

Image
Image

My uncle is stopping by tomorrow on his way to Florida for Thanksgiving. He is a master at all things electrical and I am hoping he will wire up my breaker box for me. I can wire up outlets, but am scared about the box itself!
---------------
--John

So be it.
User avatar
Hikerjohnd
Teardrop Advisor
 
Posts: 65
Images: 88
Joined: Wed Sep 15, 2010 9:57 pm
Location: Savannah, GA
Top

Postby Hikerjohnd » Wed Nov 24, 2010 9:03 pm

Did a little more today. Got the front end skinned and started the ceiling. Battened down everything for turkey day. Supposed to rain here Friday so I am planning a weekend off from work.

Hope everyone has a great holiday weekend!

Image
Image
---------------
--John

So be it.
User avatar
Hikerjohnd
Teardrop Advisor
 
Posts: 65
Images: 88
Joined: Wed Sep 15, 2010 9:57 pm
Location: Savannah, GA
Top

Postby Hikerjohnd » Sat Dec 04, 2010 6:25 pm

I feel like I'm moving so slowly now that I am working alone again. Things that should take an hour or so seem to take up the whole weekend! But I shall continue on and hopefully finish before too terribly long.

A short day today, but I got some important things knocked out. I am waiting on a piece of formica from HD and it better be here Tuesday - it's already a week over due! I feel like I can't continue on the galley until I get the formica installed.

I still managed to get some stuff done - and I hate painting...

First I put the wheel hubs and wheels on (many thanks to my brother-in-law Don - without his help I would not have had the confidence to tackle this phase of the project).

Image

Then I put on the front wheel I picked up at Northern Tool on Black Friday

Image

Then I painted the galley and inside the cabin until I ran out of paint in the pan (I am not ready to paint the whole inside the cabin but didn't want to spend time cleaning the paint pan, so I used up what I poured out)

Image
Image

Then I installed the breaker box and got started running some wires. Will finish installing the exhaust fan tomorrow then work on some other wiring projects.

Image
Image

Will install some shelves and do some more painting tomorrow if all goes well!

Just for record, this is taller than I thought it was going to be - but I really like it! The more I look at it, the better i think it is!
---------------
--John

So be it.
User avatar
Hikerjohnd
Teardrop Advisor
 
Posts: 65
Images: 88
Joined: Wed Sep 15, 2010 9:57 pm
Location: Savannah, GA
Top

Reading lights

Postby GeoDrop » Sat Dec 04, 2010 6:45 pm

John,

Your reading light looks very familiar. :-)

Image
Matthew (& Sandi)
The GeoDrop
User avatar
GeoDrop
Donating Member
 
Posts: 243
Images: 2
Joined: Mon Sep 07, 2009 9:45 pm
Location: Northeast Kansas
Top

Re: Reading lights

Postby Hikerjohnd » Sat Dec 04, 2010 9:47 pm

N523RV wrote:John,

Your reading light looks very familiar. :-)

Image


Sweet! Great minds really do think alike!

I don't need to send royalties or anything do I?
---------------
--John

So be it.
User avatar
Hikerjohnd
Teardrop Advisor
 
Posts: 65
Images: 88
Joined: Wed Sep 15, 2010 9:57 pm
Location: Savannah, GA
Top

PreviousNext

Return to Build Journals

Who is online

Users browsing this forum: No registered users and 14 guests