2+2 in Colorado (continued from other thread)

...ask your questions in the appropriate forums BUT document your build here...preferably in a single thread...dates for updates, are appreciated....

Re: Welding planned tomorrow

Postby GreatPumpkin » Sat Dec 04, 2010 2:54 am

rxsamar wrote:Well tomorrow, I hope to purchase a bit more steel and weld the frame. I'm a member of Club Workshop Denver. www.clubworkshop.com . For a nominal fee I get to use their commercial grade gear machinery. An awesome initiative. CNC router, TIG and MIG welders, plasma cutters, fully equipped wood and auto shops - and a good bunch of folks.

Cheers all

R


That's a pretty neat business idea. Gives you access to tools that some of us will never see/use except in our dreams!
Custom Benroy/Grunman/Hybrid...In Progress
2001 Dodge Ram 1500
2001 Honda XR650R

"In regione caecorum rex est luscus." GP
User avatar
GreatPumpkin
Teardrop Master
 
Posts: 124
Images: 5
Joined: Sun Oct 11, 2009 12:47 am
Location: Colville, WA

Finally work begins

Postby rxsamar » Sun Dec 05, 2010 11:18 pm

After a false start over the Thanksgiving long weekend I am finally underway. I was short some crucial steel and my supplier was closed for the holidays. No big deal, I needed to concentrate on eating excessive amounts of turkey anyway.

Image

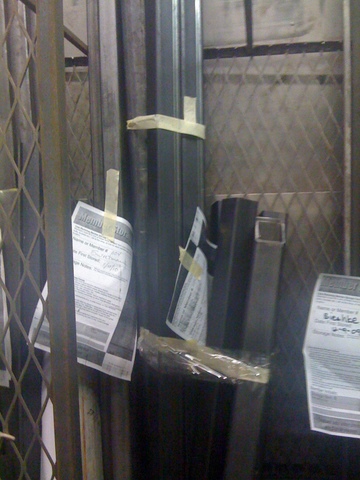
Yesterday I got to the steel supplier (Altitude Steel) to pick up another 14 feet of 2x2 square 11g tubing and 20 feet of 11g 2" angle iron. Boy do I miss the metric system! :lol:

Image

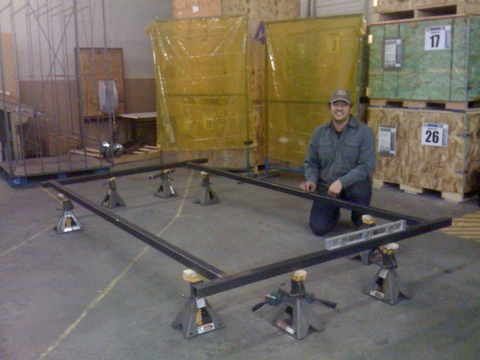
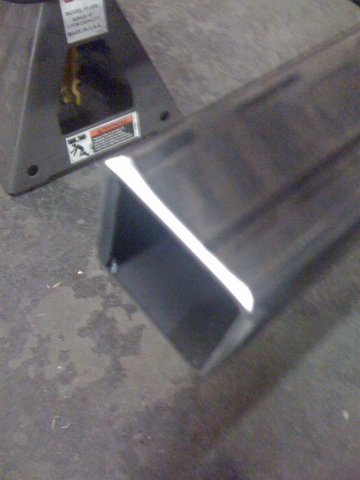
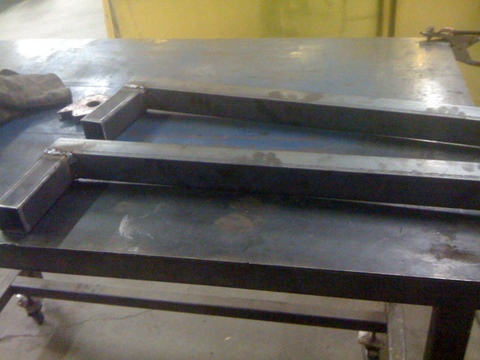
I spent most of the morning cutting steel in accordance with "the plan" (will scan it in for you folks-later). I then spend absolutely ages levelling and setting the frame ready for welding. Dramas included loosing half an inch - after setting up everything again I was spot on. One of the staff at the club workshop (and my welding instructor) advised me to bevel my steel where I could. Worked a treat.

Image

Image

Some how I lost half an inch again in the middle of the frame. I managed to correct this without too much trouble by tapping on of the cross struts into place gently with a hammer.

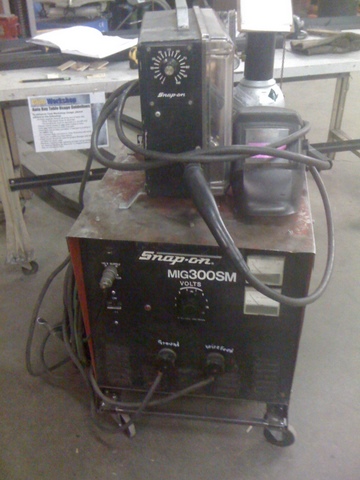
Although I've been welding a great deal in preparation for this build (on some offcuts and scrap pieces the same size as my chassis's materials) it still took most of the first day to get the power and wire feed sussed out. Still I'm pretty happy with the welds - there is only one I intend to redo - my first one to no surprise.

Later in the evening I got a bit tired - I should have stopped and gone home. I accidentally prefabbed part of the back end extensions identically when the two pieces should have been a mirror image of each other. I then installed one of them forgetting to check the lateral level for the first time of the day causing a slight rise. Yep time to pack up and go home. I slept very well that night!!

Image

Image

Image

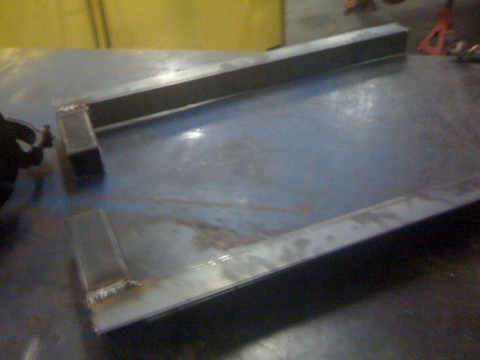
Today, I spent the morning fixing my mistakes from the night before. Grinding the welds took ages - the metal didn't not want to come apart. Makes me feel pretty confident about the quality of my welds. A few of the club's autoshop guys came by for a tour and inspection - a couple gave my welding a once over.

Image

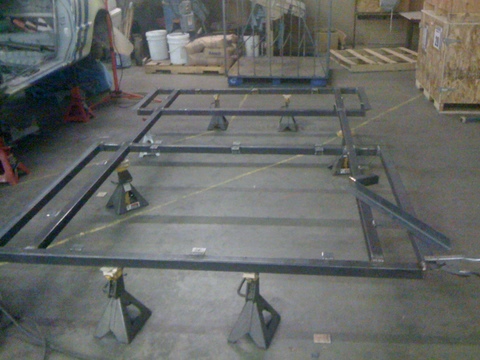
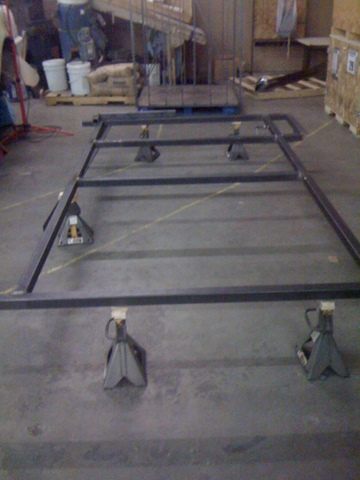
By the mid afternoon I finished the frame (minus the tongue). I installed some brazed ons for bolting the teardrop cabin in place as well.

No more welding until my axle arrives - I'll install that, the tongue and finish a couple of the underside welds that I haven't completed.

Cheers

Rohan
rxsamar
Donating Member
 
Posts: 26
Images: 26
Joined: Sun Nov 28, 2010 2:28 pm
Location: Denver, CO

Finally got all the parts to finish the trailer chassis

Postby rxsamar » Fri Feb 11, 2011 1:14 am

Well, I like others had some issues getting my axle. It seems 6 weeks is the norm. The axle arrived about 5 weeks ago however my supplier forgot to order the mounting brackets. Anyway they rang me a couple of weeks ago to let me know the brackets had arrived as well as the wheels and I picked everything up.

We've had some friends visiting from Australia for the past month so I haven't been able to work on the trailer lately. Before they arrived I did complete the trailer floor. I actually made two floors in the end. I wasn't happy with my first attempt and floors/foundations are important. It took me a while to work out the equipment quirks such as taking into account the width of the table saw blade. I also purchased 1/4 inch ply for both sides of the sandwich floor,...what was I thinking. Rookie mistakes. Much happier with the 2nd attempt. It's now tarred and varnished with the floor side made of 1/2 inch ply. It now awaits the completion of the trailer chassis.

It means the trailer is going to be 150$ more expensive than it had to be but in the long run I think it was worth it. One thing is for sure, I'll be taking greater care when I begin work on the walls. Hopefully lessons learned will served me well with the rest of the build. I'm really looking forward to getting back to work.
rxsamar
Donating Member
 
Posts: 26
Images: 26
Joined: Sun Nov 28, 2010 2:28 pm
Location: Denver, CO
Top

Varnish and Epoxy - How do I need?

Postby rxsamar » Wed Feb 23, 2011 11:22 pm

Hi all,

Finally finished the trailer and installed the axle. Hopefully I'll get to paint the trailer this week. The workshop is quiet most weeknights. I need to find the charger for my camera so I can post a photo or two.

I need some advice though. Does anyone have any idea about how much epoxy and varnish I'll need for a 5 foot 2+2 design. 1 Gallon epoxy, 2 gallons Varnish?

I'm looking to put an order in with Raka soon

Cheers

Rohan
rxsamar
Donating Member
 
Posts: 26
Images: 26
Joined: Sun Nov 28, 2010 2:28 pm
Location: Denver, CO
Top

Postby Wolfgang92025 » Thu Feb 24, 2011 8:02 pm

Rohan

I only used epoxy as a glue, not a sealer. I think it was 2 pints of west system. Used rot doctor for sealer. Maybe 2 to 2 1/2 gallons.
All told I guess I used about 3 gallons of spar varnish for both inside ans outside. Gloss outside, semi gloss inside. Used aluminum
for the roof.
Wolfgang

Image
User avatar
Wolfgang92025
Lifetime member
 
Posts: 1098
Images: 660
Joined: Fri Apr 18, 2008 10:16 pm
Location: Salt Lake City area, Utah
Top

2+2 in Denver - Latest update

Postby rxsamar » Sun Mar 06, 2011 12:51 am

Hi folks,

Just a very quick update. I've finally finished the trailer chassis and the project is now mobile. I painted it matte black using SEM "trim Black", an automotive paint I was recommended. It worked great and I'm very happy.

Image

I finished my floor in December while I was waiting for the axle to arrive. Varnished and sealed with roofing sealant.

Image

I cut out my template today after spending a bit of time learning to use a router, a biscuit joiner. I'm following Steve Frederick's teardrop builder's manual. I also drew out the wall framing - I'm not following the 2+2H design to the letter, It'll be slightly modified as I'm hoping to sleep across the width of the teardrop and I'm not doing portholes.

It feels great to finally be back into the woodshop after spending far too much time on the trailer chassis. I am however a bit daunted by the size of the job - I might have bitten off more than I can chew in choosing to build a 2+2. I'll just have to keep chewing like crazy!

My goal tomorrow - another coat of paint on the chassis in the morning before the wife arrives to see how I'm going. It's been 3 months since she last visited the workshop. I also hope to have the frames built on my template ready for trimming during the week after the glue has set in the biscuit joins. If you have no idea what I'm talking about check out Voyageur and Lil' Diner build threads.

Cheers

R
rxsamar
Donating Member
 
Posts: 26
Images: 26
Joined: Sun Nov 28, 2010 2:28 pm
Location: Denver, CO
Top

Re: 2+2 in Denver - Latest update

Postby Wolfgang92025 » Mon Mar 07, 2011 11:10 pm

rxsamar wrote:Hi folks,

I might have bitten off more than I can chew in choosing to build a 2+2. I'll just have to keep chewing like crazy!


R


Rohan

Remember, one step at a time. It might not be done in the time frame you imagined, but once it is built, you will not be sorry.

So just keep moving along .......
Wolfgang

Image
User avatar
Wolfgang92025
Lifetime member
 
Posts: 1098
Images: 660
Joined: Fri Apr 18, 2008 10:16 pm
Location: Salt Lake City area, Utah
Top

Finally,..a trailer

Postby rxsamar » Mon Mar 07, 2011 11:49 pm

Thanks for the encouragement Wolfgang. I think I look at photos of your trailer once a week to remind me what I'm working toward.

I had a productive weekend - finished painting the chasis, cut my wall template, drafted my wall framing layout to it and bolted the floor to the trailer. I also bought lumber and praticed using a biscuit joiner on some scrap. I even had the wife out for inspection

Piccies as follows!

The long waited trailer - now for walls and a roof
Image

The wall template
Image
rxsamar
Donating Member
 
Posts: 26
Images: 26
Joined: Sun Nov 28, 2010 2:28 pm
Location: Denver, CO
Top

Postby Breezy13 » Thu Jul 07, 2011 8:00 am

Nice to see another Coloradian building. I"m up in Estes Park. Hope to see some updates!!

Breezy
User avatar
Breezy13
Teardrop Builder
 
Posts: 47
Images: 11
Joined: Mon May 23, 2011 9:20 am
Location: Estes Park, CO
Top

Postby Cliffmeister2000 » Thu Jul 07, 2011 8:18 am

I just found and read your build journal to date. It looks like you are doing great! I am very jealous of your Club Workshop! :thumbsup:
God Bless

Cliff

♥God. ♥People.
1 John 4:9-11

My Teardrop build pictures
User avatar
Cliffmeister2000
Titanium Donating Member
 
Posts: 3622
Images: 157
Joined: Thu Jul 26, 2007 10:18 pm
Location: Phoenix, AZ
Top

Finally making some progress

Postby rxsamar » Fri Jul 08, 2011 12:51 am

Hi all,

Sorry it's been a while but I had a bit of a disaster. I finally got around to making a template for my walls (which I now realise I should have done first.) When I went to see what it looked like on my floor the template seemed a little long.javascript:emoticon(':?') I then realised I'd misread the floor plans and made it a foot too short.javascript:emoticon(':cry:') There was no good option but to just suck it up and again build another floor. Thanks again Wolfgang for posting those photos of your 2+2 floor set up and words of encouragement.

After the floor I tackled another job that had been causing me a bit of consternation - making up the oversize wall panels with fibreglass, epoxy and plywood. The resin and glass from Raka worked a treat even for a rookie like me. I'm pretty happy with the results that came out. Unfortunately I neglected to take any photos (sorry).

It took a full weekend and a couple of nights after work to build and shape the wall frames, a few more weeks of opportunistic work to get the walls and frame built and shaped. About I 6 weeks ago I finally slew my 'white whale',..I finally got the walls up. I had my parents come out from Australia for about a month so I haven't got much further.

Here are some long awaited photos. My camera is pretty crappy but you get an idea of my progress.

Image
Image
Image
Image
Image
Image
Image
Image

I had orignally planned to have a double bed in the rear with cabinets and storage up front. Things have changed now as my wife is pregnant - we decided that instead we'd have a couch up front. javascript:emoticon(':thinking:') Somewhere comfortable to sit with the baby for feeding, and a comfy bed for him or her when they get older. I know a few of you folks have built this layout - grateful for some reference material.

I'm not sure I am going to get this trailer completed or at least campable this summer for the Rockies. It looks like we will still be in the tent for this summer's camping trips. But hey at least I'm still on the horse making progress. Might just have to go south sometime warm this winter instead.
rxsamar
Donating Member
 
Posts: 26
Images: 26
Joined: Sun Nov 28, 2010 2:28 pm
Location: Denver, CO
Top

Postby Breezy13 » Fri Jul 29, 2011 6:16 am

Any updates, would love to see a final product!!
User avatar
Breezy13
Teardrop Builder
 
Posts: 47
Images: 11
Joined: Mon May 23, 2011 9:20 am
Location: Estes Park, CO
Top

Charlie and Eli

Postby rxsamar » Mon Jan 23, 2012 11:50 pm

Hi all,

Sorry it's been such a long time between posts. Things have been pretty busy lately and not just with the teardrop. The big news is that I am the proud new father of a baby boy named Eli born here in Denver in October. Needless to say I no longer have the luxury of being able to get to the workshop as often. But not to worry - I'm finally on the home straight although with our last summer in Colorado around the corner I've realised that campable is my main goal. But hey I've noticed teardrops are like boats, they are improved upon over time. This time next year I'll be packing up to return to Oz - better get a move on.

Eli and his favourite toy
Image

My wife has christened the teardrop as Charlie - the other child. I have continued working on it through the year albeit at a slower pace. I now realise the the extra 2-3 feet in length and width have increased the workload many times over - things would have been easier e.g. like sheathing the aluminium on the roof had I gone for a traditional sized teardrop.

I've had a few mishaps that have caused major headaches. But it all adds to the experience and now in the (hopefully) final run to campability it feels like it's coming together. To get this campable to the standard that will keep wifey happy all I need to do (unless I've forgotten something) is:javascript:emoticon(':thinking:')

Fenders
Finish trimTrim
Trailer light wiring
Install roof fan
Finish back hatch locking mechanism
Sealing and testing
Galley bench

Offcourse to keep my family happy the for long more ambitious trips of the type we intend before we return home I need to finish the following:
12 volt system wiring
Finish galley
Hook up water tank

Side view from front
Image
Side view - had a devil of a time bending the aluminium trim around door
Image

Galley Hatch - man is this heavy!! - Since this photo was taken I installed the back hatch latch/lock - only the rods that came with it are about 2 feet too short
Image

Ready for my galley
Image

So travel plans - we're thinking of doing the epic traverse to Alaska mid July to mid August this year over 4-6 weeks depending on what I can swing with my employer - after all we won't get this opportunity again in our lifetimes - living in North America with a SUV, a Teardrop, a Toddler and a 3500 mile road north to Alaska. This Memorial day we WILL be camping - a year later and a rather naive me thought when I began this project - but better later than not at all.
rxsamar
Donating Member
 
Posts: 26
Images: 26
Joined: Sun Nov 28, 2010 2:28 pm
Location: Denver, CO
Top

Postby jdarkoregon » Tue Jan 24, 2012 12:27 am

Darn nice build you have created. I really hope your trip to Alaska happens

Keep up the good work and thanks for sharing images

John
Innovation is essential
The world can be better
ImageImage
User avatar
jdarkoregon
Donating Member
 
Posts: 1237
Images: 47
Joined: Mon Aug 22, 2005 7:07 pm
Location: Oregon, Sublimity
Top

Campable - 3600 mile maiden voyage completed

Postby rxsamar » Tue Sep 04, 2012 8:45 pm

Hi folks,

I know it's been a while. The good news is after a lot of hard work, a few challenges and some frustrations I got our 2+2 campable. Me, wife, kid and dog have just returned from a 3600 mile maiden voyage through Wyoming, Montana and Canada. Unfortunately we were unable to get enough vacation leave from work to make a comfortable go of a trip to Alaska so we went approximately halfway as far as Jasper, Alberta, Canada hopping from National Park to National Park over two weeks. Jasper is the roughly in the vicinity of the approximate halfway point between Denver and Fairbanks depending on which route you take - atleast according to Google maps.

Travelling with an infant changes things - we were always late leaving campsites and after a couple of draining driving days early one we realized that 300-400 miles a day made for a enjoyable trip and feeding schedules limited our mileage. Rezana my wife went from being somewhat skeptical this thing would ever come off - to taking over all decor and furnishing decisions - to insisting we come home a couple of days later than first planned. We hosted tours to at least 2-3 interested campers every day and met so many great people we would never have got to know if the teardrop hadn't peaked their curiosity. We also met a couple of teardroppers along the way a campinn (couple from Washington state) and a lovely couple in a very well built simple teardrop from Tennessee. Both doing some serious mileage traversing this continent. When we last hear from the couple travelling in the Campinn they were in Alabama and were considering their return to Washington via Yellowstone. I might just get that Alaskan adventure next spring - although I finish up working in the US in May next year which might be a little early in the season!! (We hear mosquitos are the state bird of Alaska in spring!)

Despite this being our first trip and despite the mad rush to completion (we had to delay our departure a few days while I madly ran around Denver getting paperwork sorted for registration and hooked up power, gas, curtains etc, we had few issues.

I'm intending to do a few fishing trips before winter snows arrive, although I have been thinking about heating options - anyone had some experience with ducted 12volt electric heating

http://dcthermal.com/catalog/12-volt-ducted-heaters

Photos to come very soon.
rxsamar
Donating Member
 
Posts: 26
Images: 26
Joined: Sun Nov 28, 2010 2:28 pm
Location: Denver, CO
Top

PreviousNext

Return to Build Journals

Who is online

Users browsing this forum: No registered users and 12 guests